Author: Rachel Sousa

  • Concrete Beam Sizing for Residential Projects

    Concrete Beam Sizing for Residential Projects

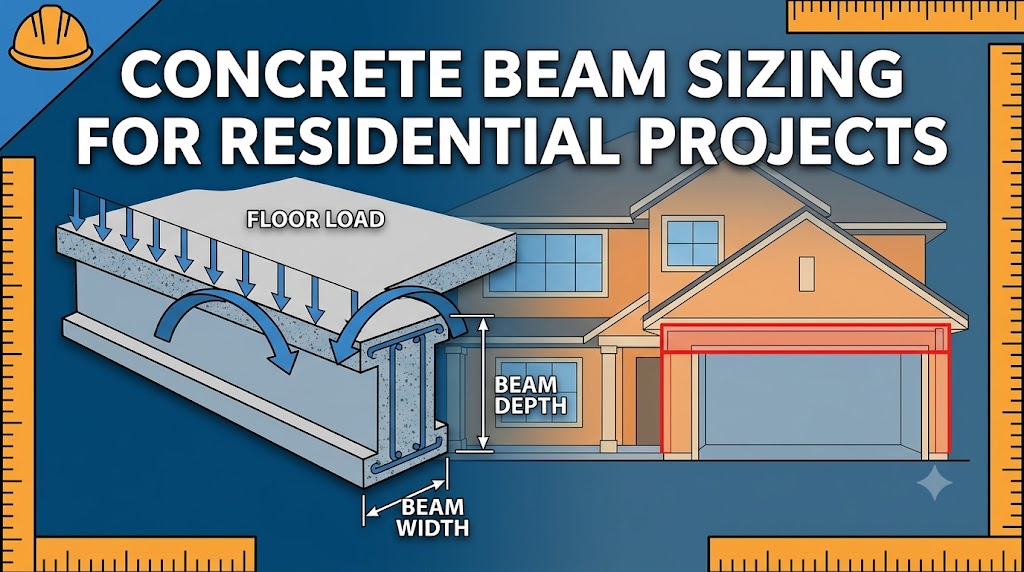
    A residential concrete beam must carry its load without deflecting more than L/360 of its span under live load — that single criterion drives every sizing decision. Get the depth wrong by even 50 mm / 2 in and you risk cracking, excessive deflection, or costly remediation after the slab is poured.

    How to Size a Concrete Beam: The Core Formula

    The starting point for residential beam design is a simple rule of thumb: beam depth ≈ span / 10 to span / 12 for typical loading. A 4 m / 13 ft span beam carrying a one-way slab and normal residential live load (1.5–2.0 kPa / 30–40 psf) typically needs a depth of 350–400 mm / 14–16 in. This thumb rule gives you a starting point; a structural check is still required.

    The full design check uses the bending moment formula:

    M = (w × L²) / 8   where M is the design moment (kN·m or ft·lbf), w is the total uniform load per metre or foot of beam, and L is the clear span.

    Worked example: a beam spanning 5 m / 16.4 ft with a total factored load of 18 kN/m / 1,233 lb/ft:

    M = (18 × 5²) / 8 = 56.25 kN·m / 41,500 ft·lbf

    From that moment, you back-calculate the required steel area and then check that the chosen section works in shear. Use the concrete beam calculator to run these numbers quickly — it handles both simply supported and continuous beam cases with metric and imperial inputs.

    Beam Sizing by Span and Load: Residential Reference Table

    The table below covers the most common residential scenarios. Beam width is assumed at 250 mm / 10 in throughout; depth varies with span and load.

    SpanTotal Load (w)Design Moment (M)Min. Beam DepthMain Steel (est.)
    3.0 m / 9.8 ft12 kN/m / 822 lb/ft13.5 kN·m / 9,960 ft·lbf280 mm / 11 in2 × 16 mm / 2 × #5
    4.0 m / 13.1 ft15 kN/m / 1,028 lb/ft30.0 kN·m / 22,130 ft·lbf350 mm / 14 in3 × 16 mm / 3 × #5
    5.0 m / 16.4 ft18 kN/m / 1,233 lb/ft56.3 kN·m / 41,500 ft·lbf420 mm / 16.5 in3 × 20 mm / 3 × #6
    6.0 m / 19.7 ft20 kN/m / 1,370 lb/ft90.0 kN·m / 66,350 ft·lbf500 mm / 19.7 in4 × 20 mm / 4 × #6
    7.5 m / 24.6 ft22 kN/m / 1,507 lb/ft154.7 kN·m / 114,100 ft·lbf600 mm / 23.6 in4 × 25 mm / 4 × #8

    These figures assume f’c = 25 MPa / 3,600 psi concrete, simply supported conditions, and 40 mm / 1.6 in clear cover, with reinforcement taken as US Grade 60 rebar (413 MPa yield) — the metric-region equivalent is Grade 500 (B500) rebar, which is a genuinely stronger bar, not just a unit conversion of Grade 60, so don’t substitute one for the other without re-checking the steel area. Continuous beams with moment redistribution at supports can use shallower sections — typically 15–20% less depth.

    What Affects Beam Depth in Practice

    Concrete compressive strength is the first lever. Stepping from 25 MPa / 3,600 psi to 32 MPa / 4,600 psi concrete reduces the required tension steel area by roughly 10–12% for the same moment, allowing either a slightly shallower beam or more margin. Verify your mix using the concrete compressive strength converter if you’re working between PSI and MPa.

    Cover requirements eat into effective depth. In interior dry conditions, 25–30 mm / 1–1.2 in cover is typical. Exposed or coastal environments push that to 40–50 mm / 1.6–2 in, which reduces the lever arm and increases the required gross section if you’re already at the minimum depth.

    Support conditions matter more than most DIYers expect. A beam that is “pinned” at both ends (simply supported) develops maximum moment at midspan. A beam that is “fixed” or “continuous” over supports redistributes moment — the span moment drops, but you must account for hogging moment at the supports and provide top steel there. Underdesigning top steel in a continuous beam is one of the most common residential structural failures.

    Torsion is rarely an issue for straight, centrally loaded residential beams but becomes critical in L-shaped floor plans, cantilever decks, and spandrel beams at slab edges. If your beam carries eccentric load or supports a slab on one side only, the torsional check must be run separately.

    Common Mistakes in Residential Beam Design

    Sizing from span tables without checking the actual load. Generic span tables assume standard residential live loads of 1.5–2.0 kPa / 30–40 psf. A beam under a kitchen with heavy stone benchtops, a piano, or a loaded bookcase wall can see 3.0–4.0 kPa / 60–80 psf. Using the wrong input produces a section that passes on paper and fails under real conditions.

    Ignoring deflection under long-term loads. Concrete beams creep. A beam sized only to meet the L/360 short-term deflection limit will often exceed L/480 (the plaster cracking limit) under sustained load after 12–18 months. Apply a long-term deflection multiplier of 1.5–2.0 to the calculated elastic deflection unless your specification explicitly uses a reduced creep factor.

    No stirrups near the support. Shear demand peaks within a distance equal to the beam depth from each support. Spacing stirrups at 300 mm / 12 in throughout — common on DIY projects — leaves the shear-critical zone under-reinforced. Within the first beam-depth length from each face, halve the stirrup spacing.

    Underspecifying the concrete mix. A 20 MPa / 2,900 psi mix is cheaper but requires a significantly larger section to carry the same moment as 25 MPa. The additional formwork, labour, and rebar usually cost more than the concrete upgrade. For residential beams, 25–32 MPa / 3,600–4,600 psi is the economic optimum.

    Related Calculators You Might Need

    Once you have confirmed beam sizing, reinforcement quantity is the natural next calculation. The rebar / reinforcing steel calculator converts bar count and length to total weight and approximate cost, which you need for budgeting and ordering. If your beam is part of a larger floor system, the concrete slab thickness selector will help you coordinate slab depth with beam depth to keep the soffit flush. For continuous or ring beams where torsion is a concern, the rebar spacing calculator handles stirrup layout at variable centres, and the concrete load capacity calculator lets you cross-check that the final section meets the required factored load.

    Frequently Asked Questions

    How deep does a concrete beam need to be for a 4 m span?

    For a typical residential floor load of 15 kN/m / 1,028 lb/ft, a 4 m / 13.1 ft simply supported beam needs a minimum depth of approximately 350 mm / 14 in with a 250 mm / 10 in width and 25 MPa concrete. If the beam is continuous (built into supporting walls), that can reduce to around 300 mm / 12 in. These are starting values — a formal check against the actual design moment is required before construction.

    What concrete strength is best for residential beams?

    25 MPa / 3,600 psi is the practical minimum for structural concrete beams in residential construction. 32 MPa / 4,600 psi is worth the modest premium on longer spans (5 m / 16 ft and above) because it reduces the required steel area and allows a shallower section without sacrificing load capacity. Anything below 20 MPa / 2,900 psi should not be used for load-bearing beams.

    Do I need stirrups in a small residential beam?

    Yes. Any beam carrying floor or roof loads needs shear reinforcement. For beams up to 400 mm / 16 in deep under light residential loads, 10 mm / #3 stirrups at 200 mm / 8 in centres within the shear-critical zone (one beam depth from each support) and 300 mm / 12 in elsewhere is a reasonable baseline. Stirrup requirement does not disappear simply because the beam is short or carries a modest load.

    What’s the difference between a drop beam and a hidden beam?

    A drop beam hangs below the slab soffit — it’s visible from below and makes efficient use of extra depth. A hidden (or flush) beam is contained within the slab depth and gains its moment capacity entirely from the slab thickness. Hidden beams need significantly more steel and are only practical for shorter spans under lighter loads, typically under 3 m / 10 ft with normal residential loading.

    Can I use ready-mix bags for a structural beam?

    For short beams and lintels under 1.5 m / 5 ft, site-mixed concrete using premix bags is acceptable if the water:cement ratio is carefully controlled. Anything longer or carrying significant structural load should be ready-mix from a batch plant, where the 25–32 MPa mix can be certified. Use the ready-mix vs bagged concrete cost calculator to compare costs once you know your beam volume.
  • How Much Weight Can a Concrete Slab Hold?

    How Much Weight Can a Concrete Slab Hold?

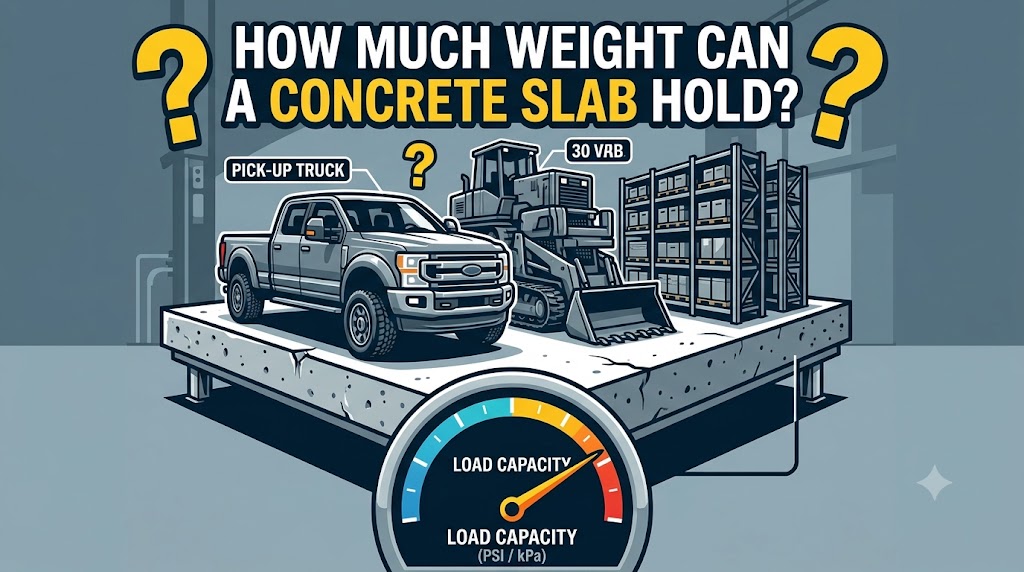
    A standard 100 mm / 4 in residential concrete slab at 25 MPa / 3,600 psi can carry a uniform distributed load of approximately 5.0 kPa / 104 psf before deflection or cracking becomes a concern. The actual capacity depends on slab thickness, concrete strength, reinforcement, span between supports, and whether the load is distributed or concentrated on a small point.

    These figures are for planning and comparison purposes. For any slab carrying vehicles, racking, or machinery loads, have the final design checked by a structural engineer — the calculations below are simplified and don’t substitute for a site-specific design.

    How Concrete Slab Load Capacity Is Calculated

    Load capacity is not a single number — it changes with how the load is applied and the geometry of the slab. The two conditions you must check separately are flexural (bending) capacity and punching shear capacity. Distributed loads (stored goods, vehicles, equipment spread across the surface) govern flexure. Concentrated loads — a forklift wheel, a machine foot, or a storage rack leg — govern punching shear.

    For a simply supported one-way slab, maximum moment at midspan: M = (w × L²) / 8, where w is load per unit width and L is span. The required slab thickness then comes from the section modulus and the design moment capacity of the reinforced section. Use the concrete load capacity calculator to run this check for your specific slab geometry, concrete grade, and reinforcement.

    Punching shear around a concentrated load is checked on a critical perimeter located at d/2 from the face of the loaded area, where d is the effective depth of the slab. For a 125 mm / 5 in slab with 20 mm / 0.8 in cover, d ≈ 97 mm / 3.8 in. The punching shear capacity per unit length of that perimeter is approximately:

    Vp = 0.34 × √f’c × d   (MPa, mm units)

    For 25 MPa concrete, this gives roughly 165 kN/m / 11,300 lb/ft of perimeter. On a 300 × 300 mm / 12 × 12 in base plate, the critical perimeter sits d/2 outside each face, giving an effective perimeter of 4 × (300 + 97) mm ≈ 1.59 m / 5.2 ft. Multiplying capacity by perimeter length gives a punch-through load of roughly 260 kN / 58,900 lb for that 125 mm slab with no reinforcement. That is well within range for a heavily loaded rack leg or wheel load — which is why rack legs and heavy machinery typically require a thicker slab, a spreader plate, or both.

    Concrete Slab Load Capacity by Thickness and Use

    The table below gives typical uniform distributed load capacities for unreinforced and lightly reinforced slabs on grade, at 25 MPa / 3,600 psi concrete. “On grade” means the slab sits continuously on prepared subgrade, which provides elastic support and significantly increases capacity over a suspended slab.

    Slab ThicknessReinforcementTypical UseSafe UDL (on grade)
    75 mm / 3 inNonePaths, thin overlays2.0–2.5 kPa / 42–52 psf
    100 mm / 4 inF72 mesh / #3 @ 300 mmResidential floor, patio4.5–5.5 kPa / 94–115 psf
    125 mm / 5 inF82 mesh / #4 @ 300 mmGarage, light workshop6.5–8.0 kPa / 136–167 psf
    150 mm / 6 inF92 mesh / #4 @ 250 mmCommercial floor, forklift (1–2 t)10–13 kPa / 209–271 psf
    175 mm / 7 in#4 @ 200 mm each wayForklift (3–4 t), warehouse15–18 kPa / 313–376 psf
    200 mm / 8 in#5 @ 200 mm each wayHeavy industrial, racking >8 t20–25 kPa / 418–522 psf

    These values are indicative. Actual capacity depends on subgrade CBR, concrete curing quality, and the concentration of loads at rack leg positions.

    What Actually Limits a Slab’s Weight Capacity

    Concrete strength sets the ceiling. Stepping from 25 MPa / 3,600 psi to 32 MPa / 4,600 psi increases punching shear capacity proportionally with √f’c — roughly a 13% gain. For residential slabs this rarely matters; for commercial warehouse floors with racking loads above 10 t / 22,000 lb, it is often worth specifying 32 or even 40 MPa.

    Subgrade quality matters as much as slab thickness on ground-bearing slabs. A California Bearing Ratio (CBR) of 2% (weak clay) gives significantly less support than a CBR of 10% (compacted gravel). On poor subgrade, a 150 mm / 6 in slab can behave structurally closer to a 100 mm / 4 in slab on good subgrade. Always compact and test before pouring — remediation after the fact means breaking out concrete.

    Point loads from racking are the most common cause of commercial slab failure. A 6 m / 20 ft high storage rack loaded to 5 t / 11,000 lb per bay concentrates approximately 25 kN / 5,600 lb on each 100 × 100 mm / 4 × 4 in foot plate. A 150 mm / 6 in unreinforced slab cannot handle that without a spreader plate. The standard solution is a 300 × 300 mm / 12 × 12 in base plate with a slab thickened to 175–200 mm / 7–8 in at rack positions — the anchor bolt / embed plate calculator helps size the plate and embedment for a given leg load.

    Reinforcement position affects which failure mode governs. Mesh in the top of a suspended slab resists the hogging moment over supports. Mesh in the bottom resists midspan sagging. A slab reinforced only at the bottom on grade will develop top cracks at concentrated load positions; a slab reinforced only at the top will crack at midspan under uniform load. For ground slabs with racking or vehicles, top and bottom reinforcement is the most reliable approach on spans above 5 m / 16 ft between joints.

    Common Mistakes That Reduce Slab Load Capacity

    Pouring concrete on uncompacted fill. Settlement under the slab creates voids. Once a section of slab loses subgrade support, it behaves as a suspended element and its capacity drops sharply compared to the supported design. Compact every 150 mm / 6 in lift of fill and test with a nuclear densometer or dynamic cone penetrometer before forming up.

    Using a residential-grade slab for light commercial loads without checking rack leg pressure. A 100 mm / 4 in slab is fine for domestic vehicles and stored boxes. One pallet racking system loaded to 2 t / 4,400 lb per level with three levels transfers 60 kN / 13,500 lb per leg. That is well above the punching shear capacity of a standard residential slab with no spreader plate.

    Mixing up distributed load and point load capacity. A slab that comfortably carries 5 kPa / 104 psf as a uniform distributed load may fail at a much smaller concentrated load on a small-diameter foot — because punching shear is a different failure mode with its own limit state. Always check both.

    Inadequate curing reducing actual compressive strength. Concrete left to dry in hot or windy conditions without curing membrane or wet curing can lose 20–30% of its 28-day design strength. A 25 MPa / 3,600 psi mix that achieves only 18 MPa / 2,600 psi reduces both flexural and punching shear capacity significantly. Cure for a minimum of 7 days under conditions above 10°C / 50°F — the concrete curing time estimator adjusts that window for your local temperature.

    Related Calculators You Might Need

    For the full set of structural and reinforcement tools, start at the structural calculators hub. For most slab capacity questions, the concrete slab thickness selector is the right tool to start — it matches your load and span to the minimum required thickness. If you then need to work out how much concrete the slab will take, the concrete slab calculator handles volume and bag count. For slabs with mesh reinforcement, the wire mesh / welded wire fabric calculator converts area to sheets and total weight, and the concrete slab deflection calculator lets you check that mid-span deflection under your design load stays within the L/360 serviceability limit.

    Frequently Asked Questions

    How much weight can a 4 inch concrete slab hold?

    A 100 mm / 4 in residential concrete slab on compacted subgrade at 25 MPa / 3,600 psi typically carries 4.5–5.5 kPa / 94–115 psf as a safe uniform distributed load. That equates to roughly 460–560 kg/m² / 94–115 lb/ft². A concentrated load — such as a car wheel at 7–8 kN / 1,575–1,800 lb on a small footprint — is a different calculation and governs punching shear, not flexure. Most residential 4 in slabs are designed for passenger vehicles but not forklifts or racking.

    Can a concrete slab hold a car?

    Yes. A standard 100 mm / 4 in reinforced garage slab is designed for passenger vehicles weighing up to approximately 3,500 kg / 7,700 lb. The load from each tire — roughly 6–8 kN / 1,350–1,800 lb — is well within the punching shear capacity of a properly cured and compacted-subgrade slab. Heavy vehicles (vans, SUVs, light trucks) are also fine. Problems arise when large concentrated loads like scissor lifts, concrete trucks, or forklifts are driven onto residential slabs.

    What PSI concrete is needed for heavy loads?

    For commercial warehouse floors carrying 10+ t / 22,000+ lb racking, 32 MPa / 4,600 psi is the practical minimum. For extremely heavy industrial loads above 40 kPa / 835 psf, designers typically specify 40 MPa / 5,800 psi with steel fibre reinforcement in addition to mesh or bar. You can convert between PSI and MPa using the concrete PSI to MPa converter if you’re working across unit systems.

    Does reinforcement significantly increase load capacity?

    For ground-bearing slabs, reinforcement increases capacity meaningfully over unreinforced concrete for distributed loads, and significantly more for concentrated loads near joints or slab edges where bending is highest. For suspended slabs, reinforcement is not optional — unreinforced suspended concrete slabs are unsafe for any significant live load. The type of reinforcement matters: top and bottom steel combined outperforms mesh in the bottom only, especially under point loading.

    How do I increase my existing slab’s load capacity?

    For an existing slab, the realistic options are: overlay with a 50–75 mm / 2–3 in bonded concrete topping (increases effective depth and adds capacity); install spreader plates under concentrated loads (distributes point load over a larger perimeter); improve drainage to reduce subgrade saturation (saturated clay loses significant bearing capacity); or break out and replace the affected bay with a properly designed slab. Post-installed anchor reinforcement is only effective if the slab is being extended or a structural connection is needed. For any of these, get sign-off from a structural engineer before loading the slab.

  • Concrete Expansion Joints: Spacing Rules for Every Slab Type

    Concrete Expansion Joints: Spacing Rules for Every Slab Type

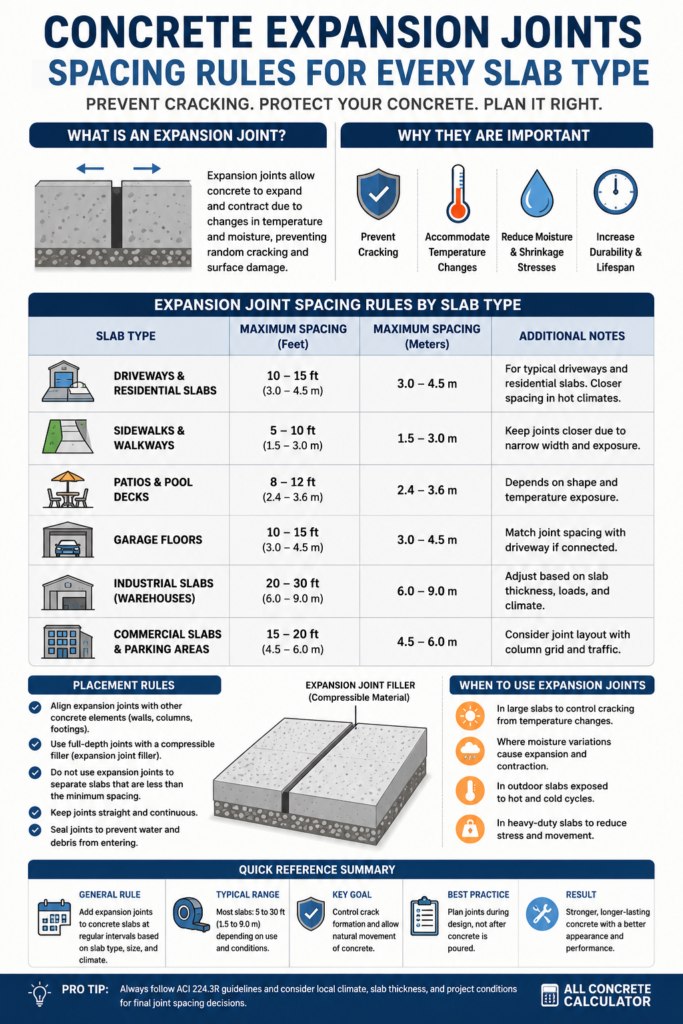
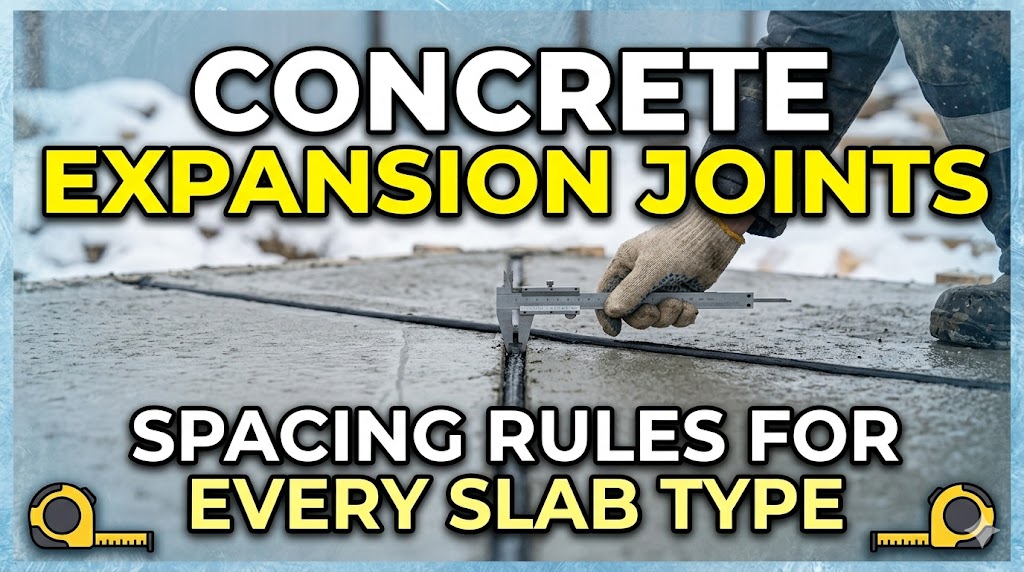
    The standard rule for contraction joint spacing is 2–3 times the slab thickness in feet — a 4-inch / 100 mm slab gets joints every 8–12 feet / 2.4–3.6 m. Expansion joints are a separate matter: they are placed only at fixed structures (columns, walls, drains) and changes in slab direction, not on a regular grid. Confusing the two types — contraction vs expansion — is the most common error in residential and light commercial flatwork.

    INFOGRAPHICS ON Concrete Expansion Joints

    Contraction joints vs expansion joints: different functions, different rules

    A contraction joint (also called a control joint) is a deliberate plane of weakness sawn or formed into the slab to control where shrinkage cracking occurs. The concrete will crack — joints simply determine where. A true expansion joint is a full-depth gap filled with compressible material that allows the slab to expand thermally without transferring load to adjacent structures.

    Use the Concrete Expansion Joint Spacing Calculator to get spacing recommendations based on slab thickness, aggregate type, climate zone, and slab use. The calculator applies ACI 224R and ACI 330R recommendations and flags where structural isolation joints are required.

    Joint typePurposeDepthFiller required?
    Contraction / controlDirects shrinkage crackingT/4 to T/3 (sawn or tooled)No — crack closes on itself
    Expansion / isolationAbsorbs thermal movement; isolates slab from structureFull depthYes — compressible backer rod + sealant
    Construction jointPour termination pointFull depthOptional — depends on continuity requirement

    Contraction joint spacing by slab type and thickness

    ACI 224R-01 (Control of Cracking in Concrete Structures) gives the primary guidance. Beyond the thickness-based spacing rule above, the L/W ratio — a panel’s length relative to its width — should not exceed 1.5:1 for a given panel. Elongated or non-square panels (L:W ratio greater than 1.5:1) crack diagonally in the corners regardless of joint spacing, so panel shape and joint spacing both need to be checked — satisfying one doesn’t guarantee the other.

    Slab typeTypical thicknessMax joint spacing (imperial)Max joint spacing (metric)Standard reference
    Residential driveway4 in / 100 mm10–12 ft3.0–3.6 mACI 302.1R
    Residential patio / walkway3.5–4 in / 90–100 mm8–10 ft2.4–3.0 mACI 302.1R
    Garage floor (residential)4–5 in / 100–125 mm10–15 ft3.0–4.6 mACI 302.1R
    Light industrial floor5–6 in / 125–150 mm15–20 ft4.6–6.1 mACI 302.1R-15 Cl. 9.3
    Warehouse / heavy industrial6–8 in / 150–200 mm20–25 ft (or joint-free design)6.1–7.6 mTR34 / ACI 360R
    Exterior pavement / highway8–12 in / 200–300 mm15 ft (JPCP) — 20 ft (JRCP)4.6–6.1 mAASHTO / FHWA
    Pool deck4 in / 100 mm8 ft maximum2.4 m maximumACI 302.1R + moisture cycling

    Pool deck spacing is tighter than the thickness formula alone suggests because of wet/dry thermal cycling from pool water contact — the slab expands when wet and warm, contracts when dry. ACI 302.1R recommends 8-ft / 2.4-m maximum panels for pool decks regardless of thickness. For heavily reinforced slabs designed as structurally reinforced (not plain concrete), the ACI 318 minimum reinforcement ratio may allow larger panels — consult the Rebar Spacing Calculator to verify steel coverage.

    Where expansion joints are actually required

    True expansion joints — full-depth, compressible filler — are required at specific locations, not on a spacing grid. The engineering logic: when concrete is restrained from expanding (by a column, foundation wall, or adjacent slab) it will buckle or spall. An isolation joint between the slab and the fixed structure allows independent movement.

    LocationJoint typeWidth and material
    Column bases and footingsIsolation (diamond or round pattern around column)3/4 in / 19 mm — closed-cell foam backer rod + polyurethane sealant
    Slab abutting foundation wallIsolation joint full perimeter1/2–3/4 in / 12–19 mm — premolded bituminous filler
    Slab meeting existing slabExpansion joint if different pour dates/ages1/2 in / 12 mm min — compressible foam + sealant
    Driveway at garage apron / building edgeIsolation joint1/2 in / 12 mm — closed-cell backer + sealant
    Change in slab thickness or directionConstruction or expansion jointFull depth — depends on load transfer requirement
    Sidewalk at light poles / treesIsolation joint around structure1/2 in / 12 mm — foam filler

    For highway and arterial paving, FHWA HRT-14-083 (Pavement Design for Rural Roads) and AASHTO MEPDG govern expansion joint placement at bridges, rigid/flexible transitions, and intersections. State DOT specifications vary significantly — always check state standard specifications, as generic ACI guidance does not govern roadway work.

    Climate adjustments to spacing

    Temperature range drives expansion movement. Concrete’s coefficient of thermal expansion is approximately 5.5 × 10^-6/°F (9.9 × 10^-6/°C). A 100-ft / 30.5-m slab exposed to a 100°F / 56°C seasonal temperature range (common in US continental climates — Phoenix to Minneapolis annual delta) will expand and contract by approximately 0.66 inches / 17 mm over its full length. This is why FHWA limits JPCP slabs to 15-ft / 4.6-m lengths in high-temperature-range climates and allows up to 20 ft / 6.1 m in moderate climates.

    In maritime climates (UK, Pacific Northwest, coastal Australia) where the annual temperature range is 40–60°F / 22–33°C, control joint spacing can be stretched 10–15% beyond inland equivalents without higher cracking risk, assuming standard OPC mixes and adequate subgrade preparation.

    Common mistakes with concrete joint placement

    1. Cutting control joints too late. The window is 4–12 hours after finishing — in hot or windy conditions, closer to 2–4 hours. Random cracking initiates at bleed water channels and aggregate interfaces as the slab dries; if joints are not cut before cracking starts, the joint is useless as a control measure. A wet saw cut is required in all cases — a scoring tool applied after the slab stiffens does not create an effective plane of weakness. Sawcut depth must be T/3 for wet saws in most conditions (T/4 is acceptable with early-entry saws in the first 1–4 hours).

    2. Omitting isolation joints at column bases. Without an isolation joint, differential settlement between the column footing (deep, stable) and the slab (shallow, susceptible to subgrade movement) will crack the slab radiating outward from the column. Diamond or circular isolation patterns 6–12 inches / 150–300 mm larger than the column base are standard. Use premolded foam or pre-cut expansion joint filler placed before the pour, not caulk applied afterward.

    3. Using the wrong filler material. Premolded asphalt filler (AASHTO M213) compresses when the slab expands but does not recover its full thickness on contraction — it is a permanent compression absorber. Backer rod + polyurethane sealant is the correct detail for joints that must remain watertight through cycling. Foam backer rod controls sealant depth (target 2:1 width-to-depth ratio for polyurethane) and prevents three-sided adhesion, which causes sealant failure.

    4. Spacing joints for aesthetics rather than engineering. Square panel grids at 10-ft / 3.0-m centres look clean on a plan. Actual joint spacing is determined by slab thickness and aggregate size — not by what looks even. An L-shaped or irregular slab may require non-uniform joint spacing and re-entrant corner joints (45-degree saw cuts into corners) to prevent the diagonal cracking that consistently forms at concave corners without a relief cut.

    Related calculators you might need

    Accurate joint spacing starts with knowing the exact slab dimensions. The Concrete Slab Calculator gives volume in cubic yards or cubic metres and flags recommended panel dimensions for the slab size entered. For driveways specifically, the Concrete Driveway Calculator includes a joint spacing output based on driveway width. Reinforced slabs that use steel to enable wider joint spacing should be sized with the Rebar / Reinforcing Steel Calculator to confirm coverage and lap length. For pool decks where isolation joint placement around pool coping and equipment pads is critical, the Concrete Pool Deck Calculator handles irregular perimeter shapes.

    Frequently asked questions

    How far apart should concrete expansion joints be?

    Expansion joints (full-depth isolation) are placed at fixed structures — columns, walls, drains — not on a regular grid. What most people call expansion joints are actually contraction joints, which go every 8–12 ft / 2.4–3.6 m for a 4-inch / 100 mm slab per ACI 302.1R. Thicker slabs allow wider spacing: a 6-inch / 150 mm slab can go to 15–20 ft / 4.6–6.1 m. Use the Concrete Expansion Joint Spacing Calculator for your specific slab type.

    Do I need expansion joints in a residential driveway?

    You need isolation joints where the driveway meets the garage slab, any structure, and adjacent sidewalk. The joints running across the driveway width every 8–12 feet are contraction joints, not expansion joints. If your driveway is longer than 60–80 feet / 18–24 m, full-depth expansion joints (1/2 inch / 12 mm premolded filler) at mid-length are good practice in continental climates with large seasonal temperature swings.

    What material should I use to fill expansion joints?

    For horizontal flatwork with drainage concerns: closed-cell polyethylene backer rod sized 1/8 inch / 3 mm larger than the joint width, then a pourable or self-leveling polyurethane sealant tooled to a 2:1 width-to-depth ratio. For vertical isolation joints at walls: premolded asphalt-impregnated fibreboard (AASHTO M213) works as a pour filler, then seal the top 1 inch / 25 mm with sealant. Avoid rigid fillers (wood, concrete) — they defeat the joint’s purpose.

    How deep do concrete saw cuts need to be for control joints?

    T/3 depth (one-third of slab thickness) is the standard for conventional wet saws cutting 4–12 hours after finishing. For a 4-inch / 100 mm slab: 1.33 inches / 34 mm minimum. Early-entry dry saws (within 1–4 hours) can be effective at T/4 because the concrete is still plastic enough that the reduced plane of weakness is sufficient to direct cracking. Shallow cuts — less than T/4 — regularly fail to control cracking.

    Can I skip expansion joints if I use fiber reinforcement?

    No. Synthetic or steel fiber reinforcement reduces crack width and improves post-crack load transfer, but it does not eliminate drying shrinkage or thermal movement. Fiber-reinforced slabs still require control joints at standard spacing. Joint spacing can sometimes be modestly extended with heavy fiber dosing (4–8 lb/yd³ / 2.4–4.7 kg/m³ of steel fiber) combined with structural design confirmation, but this is an engineered solution, not a DIY shortcut.

  • How Long Does Concrete Take to Cure? Full Timeline by Climate

    How Long Does Concrete Take to Cure? Full Timeline by Climate

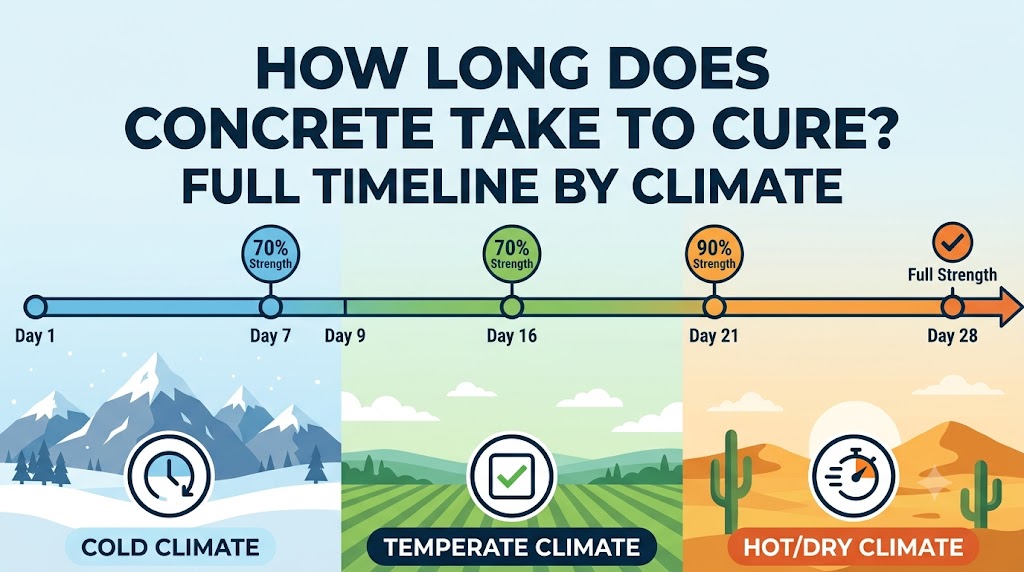
    Concrete reaches design strength (typically 3,000–4,000 psi / 20–28 MPa) at 28 days under standard conditions — but you can walk on it after 24–48 hours and drive on it after 7 days. Those milestones assume moderate temperatures (60–80°F / 15–27°C) and adequate moisture. Change either variable and the entire timeline shifts.

    Concrete curing timeline: what happens at each stage

    Curing is not drying. It is a hydration reaction between water and cement particles (calcium silicate hydrate formation) that generates strength over time. Cutting off moisture too early stops the reaction; the concrete never reaches its rated strength, regardless of how long you wait after the fact.

    Use the Concrete Curing Time Estimator to get a temperature-adjusted timeline for your specific pour conditions. The standard milestones below apply to Type I/II Portland cement mixed at a 0.45–0.50 water-cement ratio and cured at 70°F / 21°C:

    TimeApprox. StrengthFoot trafficVehicle trafficNotes
    24–48 hours~1,000 psi / 7 MPaYes (carefully)NoAvoid impact; no point loads
    3 days~1,800 psi / 12 MPaYesNoLight equipment possible
    7 days~2,500 psi / 17 MPaYesPassenger cars OK~65% of 28-day strength
    14 days~3,000 psi / 21 MPaYesYes~85–90% of 28-day strength
    28 daysFull design strengthYesYes, incl. trucksACI standard benchmark
    90 days+>28-day strengthYesYesStrength continues rising slowly for years

    These percentages follow the typical strength-gain curve for standard OPC mixes used across concrete technology references. Supplementary cementitious materials (SCM) alter the curve: fly ash slows early-age gain; GGBS (slag) can push final strength higher but takes longer to get there.

    How temperature affects concrete curing time

    Temperature is the single biggest variable outside mix design. The Arrhenius relationship governs cement hydration — roughly, every 18°F / 10°C drop in temperature halves the reaction rate. Every 18°F / 10°C rise roughly doubles it (up to a threshold where flash setting becomes a risk).

    Curing tempDays to 3,000 psiDays to 28-day equiv.Risk
    95°F / 35°C~3–4 days~18–20 daysPlastic shrinkage, rapid moisture loss
    70°F / 21°C~7 days28 daysBaseline — no special measures needed
    50°F / 10°C~14 days~50 daysSlow gain; keep forms longer
    40°F / 4°C~21 days~70+ daysMinimum viable curing temp (ACI 306)
    Below 32°F / 0°CCuring stopsIndefiniteWater freezes; permanent damage if early

    At below 50°F / 10°C, ACI 306R (Cold Weather Concreting) requires that concrete be maintained at a minimum of 50°F / 10°C for at least the first 7 days of curing. At above 90°F / 32°C, ACI 305R (Hot Weather Concreting) protocols apply — shading, chilled mix water, retarders, and accelerated curing compound application all become necessary tools.

    Humidity and wind: the overlooked curing killers

    High ambient temperature alone is manageable. High temperature + low humidity + wind is where plastic shrinkage cracking becomes near-certain without intervention. ACI 305R estimates evaporation rate using the Menzel formula, which works from the vapor pressure difference between the concrete surface and the surrounding air — driven by concrete surface temperature, air temperature, relative humidity, and wind speed — rather than a simple plug-in equation, which is why it’s normally read off a nomograph or calculated with dedicated software rather than by hand. What matters in practice is the output: when the estimated evaporation rate exceeds 0.2 lb/ft²/hr (1.0 kg/m²/hr), precautionary measures are mandatory. Below that threshold, standard wet curing works. The Concrete Curing Time Estimator factors this in automatically rather than requiring a manual nomograph read.

    High-altitude curing

    Above 5,000 ft / 1,500 m, lower atmospheric pressure accelerates surface moisture evaporation independent of temperature. Evaporation rates at altitude can run 20–30% higher than sea-level equivalents at the same air temperature. Budget for additional curing compound or extend wet curing duration by at least 2 days.

    Common mistakes that compromise concrete curing

    1. Stripping forms too early in cold weather. Contractors routinely pull forms after 24 hours regardless of temperature. At 45°F / 7°C, concrete may still be below 500 psi / 3.5 MPa at 24 hours — far too weak to handle form removal stresses. ACI 347 form stripping guidelines specify minimum in-place strength, not minimum time. Use a maturity meter or at minimum a pocket penetrometer to verify before stripping.

    2. Applying a curing compound over bleed water. Bleed water is still rising from the mix for 1–4 hours after placement. Applying a membrane-forming curing compound before bleed water has evaporated traps it beneath the surface, causing delamination and dusting. Wait until the surface sheen disappears and the imprint of your thumb barely registers — then apply the compound.

    3. Using a garden hose to wet-cure flatwork. Intermittent wetting creates wet-dry cycles that cause differential shrinkage. Plastic shrinkage cracks can develop in the top 1/4 inch / 6 mm of the slab between watering cycles. Correct approach: saturate the surface once, apply wet burlap, cover with polyethylene sheet, and keep it sealed for the full curing period — minimum 7 days for residential, 14 days for structural.

    4. Sawcutting control joints too late. The standard window is 4–12 hours after finishing (sooner in hot, dry, windy conditions). Waiting until the next morning on a hot-weather pour means random cracking has already initiated. Joints must be cut to a depth of T/4 to T/3 (where T = slab thickness) to be effective — a 4-inch / 100 mm slab needs a 1-inch / 25 mm deep cut minimum.

    Related calculators you might need

    Before the pour, confirm your volume is right using the Concrete Slab Calculator, which handles rectangular and irregular flatwork in both imperial and metric. If you’re mixing on-site, the Water-Cement Ratio Calculator helps you dial in the w/c ratio that directly determines how your curing timeline plays out — a w/c above 0.60 extends the curing window and reduces final strength. For hot pours where admixtures are involved, the Concrete Admixture Dosage Calculator handles retarder and accelerator dosing. If you’re planning to seal the surface after cure, the Concrete Sealer Coverage Calculator prevents over- or under-ordering.

    Frequently asked questions

    How long before I can drive on new concrete?

    Passenger cars: 7 days minimum at standard temperatures. Heavy trucks and equipment: 28 days. Driving on concrete before 7 days risks surface crushing and permanent rutting, particularly if the mix was placed in hot weather with a higher w/c ratio. In cold weather (below 50°F / 10°C during curing), add at least 3–5 days to both thresholds.

    Does concrete cure faster in hot weather?

    It gains strength faster early on, but total curing quality is often worse. High temperatures accelerate hydration but also drive off moisture faster than the reaction can use it. The result is higher early strength but lower 28-day strength — a 10°F / 5.5°C increase in curing temperature can reduce 28-day compressive strength by 3–5%. Wet curing and curing compounds become non-negotiable above 85°F / 29°C.

    What happens if concrete freezes during curing?

    If concrete freezes before it reaches 500 psi / 3.5 MPa compressive strength (typically within the first 24 hours at standard mix designs), the ice expansion physically disrupts the hydrating cement matrix. That damage is permanent — the concrete will never reach design strength, regardless of subsequent warming and continued curing. ACI 306R requires protection to maintain a minimum 50°F / 10°C for the first 7 days.

    How do I know when concrete has fully cured?

    The Concrete Curing Time Estimator gives a calculated timeline based on your pour temperature. For structural verification, a Schmidt rebound hammer gives a non-destructive surface hardness reading. For precise in-place strength, break field-cured cylinder cores at 7, 14, and 28 days. For residential DIY work, the 28-day mark is the practical standard.

    Can I speed up concrete curing?

    Yes — within limits. Steam curing at 140–175°F / 60–80°C (used precast) achieves 28-day strength in 18–24 hours. On-site, external heating blankets can compress the timeline by 30–40% in cold weather. Chemical accelerators (calcium chloride, up to 2% by cement weight for non-reinforced work; non-chloride accelerators for rebar applications) can push 3-day strength to near 7-day levels. None of these eliminate the 28-day requirement for structural load applications.

    Is 28 days really when concrete stops curing?

    No. ACI uses 28 days as the standard test benchmark because strength gain is roughly 90–95% complete by then. Concrete continues hydrating — and gaining strength — for years, provided moisture is present. 90-day strength often exceeds 28-day strength by 10–20% in mixes with fly ash or slag. The 28-day number is an engineering benchmark, not a biological endpoint.

  • Pouring Concrete in Cold Weather: US, Canada, UK & EU Guide

    Pouring Concrete in Cold Weather: US, Canada, UK & EU Guide

    Cold weather concreting begins at 40°F / 4°C air temperature — not 32°F / 0°C. At 40°F, ground temperatures and subgrade conditions are already impacting the mix, and the 3-day forecast matters as much as conditions at placement. ACI 306R, CSA A23.1 (Canada), and BS 8500 (UK) all treat 5°C / 41°F as the threshold below which elevated protection measures apply.

    Cold weather concrete temperature requirements by standard

    The minimum concrete temperature at point of placement — not batch plant — varies by slab thickness. Thinner sections lose heat faster and require higher initial temperatures. Use the Concrete Curing Time Estimator to model temperature-adjusted strength gain curves for your specific conditions before committing to a pour date.

    Section thicknessMin concrete temp (moderate cold)Min concrete temp (extreme cold)Standard referenceMinimum protection period
    <12 in / 300 mm55°F / 13°C65°F / 18°CACI 306R Table 5.17 days
    12–36 in / 300–900 mm50°F / 10°C60°F / 16°CACI 306R Table 5.17 days
    >36 in / 900 mm (mass)45°F / 7°C55°F / 13°CACI 306R Table 5.17 days
    Any (UK, BS 8500)50°F / 10°C50°F / 10°CBS 8500 / CIRA C6607 days min
    Any (Canada, CSA)50°F / 10°C50°F / 10°CCSA A23.1 Cl. 7.57 days, longer for SCM mixes

    “Moderate cold” in ACI terms means air temperatures between 25°F and 40°F / -4°C and 4°C; “extreme cold” means below 25°F / -4°C. These are air temperatures, not wind-chill values — wind-chill affects exposed humans but does not directly affect concrete temperature below the surface. Wind speed does accelerate surface moisture evaporation and heat loss from exposed fresh concrete.

    Regional conditions: US, Canada, UK, and EU

    United States and Canada

    The Midwest and Prairie provinces present the most challenging winter concreting environment in North America — Chicago averages 18°F / -8°C in January; Winnipeg averages 0°F / -18°C. ACI 306R is the primary standard; the International Building Code (IBC) references it directly. Canadian practice follows CSA A23.1, which is closely aligned with ACI 306R but adds requirements for freeze-thaw durability: air entrainment is mandatory in all exposed concrete in freeze-thaw exposure zones F1 and F2. ASTM C260-compliant air-entraining admixtures at 4–8% air content by volume are the standard requirement.

    The Frost Depth / Footing Depth Calculator provides state- and province-level frost line depths based on ASCE 7 and NBC climate data — essential for any footing or foundation work in winter conditions. Frost depths range from 6 inches / 150 mm in coastal Georgia to 72 inches / 1,830 mm in northern Minnesota and Manitoba.

    United Kingdom

    The UK’s maritime climate means sustained deep freezes are rare in southern England but common in Scotland and the north — January averages range from 39°F / 4°C in London to 34°F / 1°C in Aberdeen. BS 8500-1:2015 and the Concrete Society Technical Report 34 govern cold-weather practice. CIRIA C660 (Early-age Thermal Crack Control) is the standard reference for managing thermal gradients in mass pours. The key UK-specific risk is repeated freeze-thaw cycling rather than sustained extreme cold — temperatures hovering near 32°F / 0°C for weeks with daily cycling are more damaging to early-age concrete than a single sharp frost.

    EU (Germany, Scandinavia, Poland, Alpine regions)

    EN 13670 (Execution of Concrete Structures), used alongside the Eurocode 2 (EN 1992) structural design framework, governs cold-weather concrete across the EU including Scandinavia — Norway and Sweden both moved their structural concrete design basis onto Eurocode 2 over a decade ago, so older national codes like NS 3473 and BBK are legacy references rather than current practice. Germany’s DIN 1045 and the ÖVBB guidelines in Austria specify that no concrete shall be placed when the temperature at point of delivery is below 5°C / 41°F without specific protective measures detailed in a Method Statement. Scandinavian practice routinely specifies heating of enclosures and formwork in winter, with insulated timber form systems achieving R-values of 3–5 to maintain concrete temperature above 10°C for 7 days.

    Heating, insulation, and protection methods by temperature range

    Air temp at pourRequired measuresForm stripping (guideline)Notes
    40–50°F / 4–10°CWarm batch water; insulated blankets on exposed surfaces48–72 hoursStandard cold-weather precautions
    28–40°F / -2–4°CWarm batch water + heated subgrade; insulated enclosure if thin slab72–96 hoursAir entrainment required for exposed flatwork
    18–28°F / -8 to -2°CHeated enclosure; heated mix water; pre-heat aggregates5–7 days minimumDo not use CaCl2 with rebar at these temps
    Below 18°F / -8°CHeated enclosure mandatory; consider delaying10+ daysCore temp monitoring required; ACI 306R Appendix B

    Heating batch water is the most cost-effective temperature control — water has high specific heat (1.0 BTU/lb/°F vs 0.22 for aggregate) but accounts for only 6–8% of mix mass. Heating aggregate is more effective by mass but logistically complex. Never heat water above 180°F / 82°C before adding cement — superheated water in contact with cement causes flash set.

    Common mistakes in cold weather concreting

    1. Failing to heat the subgrade. Frozen subgrade acts as a heat sink — it will draw heat out of fresh concrete faster than any insulating blanket can compensate from above. ACI 306R requires that all ice, snow, and frost be removed from the subgrade, and that subgrade temperature at the surface be above 32°F / 0°C at time of placement. Use propane ground thaw heaters for a minimum of 24 hours prior to pour on frozen ground.

    2. Misjudging “warm enough” on sunny winter days. A bright, calm winter day at 45°F / 7°C feels adequate. But after sunset, temperatures can drop to 20°F / -7°C within hours. Concrete placed at 2 PM may be exposed to freezing temperatures before it reaches 500 psi / 3.5 MPa — the ACI threshold below which freeze damage is permanent. Always plan for the overnight low, not the afternoon high.

    3. Using calcium chloride accelerator with steel reinforcement. Calcium chloride (CaCl2) is an effective accelerator in plain concrete but causes accelerated corrosion in steel-reinforced structures. Above 1% by cement weight, it is prohibited in reinforced concrete by ACI 318 in all conditions. Use non-chloride accelerators (ASTM C494 Type C or E) in reinforced work — the Concrete Admixture Dosage Calculator gives correct dosage ranges for non-chloride alternatives.

    4. Stripping forms before minimum in-place strength is verified. The schedule pressure to reuse formwork is real, but concrete at 35°F / 2°C may take 3–4 times longer to reach stripping strength than at 70°F / 21°C. A Schmidt rebound hammer or a pocket penetrometer provides a non-destructive field check. For critical structural elements, break field-cured cylinders stored adjacent to the pour at ambient conditions — they give the most accurate in-place strength estimate.

    Related calculators you might need

    Cold-weather pours often require more volume than estimated due to protective waste (overpour into heated enclosures, spillage from handling). The Concrete Waste Factor Calculator quantifies realistic overage and helps avoid costly short loads. For footings below the frost line, the Concrete Footing Calculator paired with the Frost Depth / Footing Depth Calculator gives the full volume and depth picture. If you’re heating the enclosure and running diesel or propane heaters for several days, factor that into the Full Concrete Project Estimator — heating costs on a 5-day winter pour can exceed $500–$2,000 depending on enclosure size.

    Frequently asked questions

    What is the minimum temperature to pour concrete?

    The minimum safe air temperature at time of placement is 40°F / 4°C, with concrete mix temperature maintained at 50–65°F / 10–18°C depending on section thickness. Below 40°F / 4°C air temperature, active heating is required. Below 27°F / -3°C, concrete placed without full enclosure heating and ground thaw will almost certainly suffer irreversible freeze damage if protection fails.

    Can I pour concrete when it’s going to freeze tonight?

    Only if you can guarantee concrete reaches 500 psi / 3.5 MPa before freezing occurs — typically requiring 24+ hours at 50°F / 10°C or higher. If tonight’s low is at or below 32°F / 0°C and you cannot guarantee that temperature maintenance, do not pour. The $200–$400 saved by pouring today versus waiting is not worth the cost of a slab that must be demolished and replaced.

    How do you keep concrete warm in winter?

    Three tools, used in combination based on severity: insulated curing blankets (R-2 to R-4) on all exposed surfaces immediately after screeding; heated enclosures (plywood or poly sheet tenting with propane or electric heat) for temperatures below 25°F / -4°C; and concrete heating blankets (electric resistance heating pads) for critical structural pours. Monitor concrete temperature at depth with embedded thermocouples or thermal probes, not surface IR guns.

    Does cold weather affect concrete strength permanently?

    Yes, if freezing occurs before 500 psi / 3.5 MPa in-place strength is achieved. The ice formation physically disrupts the calcium silicate hydrate matrix being formed by hydration. Once disrupted, subsequent warming and curing cannot restore the concrete to design strength. If freezing occurs after 500 psi is confirmed, the concrete may recover most of its strength with continued curing, though the surface will show some scaling.

    Is air entrainment required for cold weather concrete?

    Air entrainment is required for all exposed concrete subject to freeze-thaw cycles regardless of whether it was placed in cold weather. ACI 318 Table 26.4.2.1 specifies 4.5–7.5% total air content for 1-inch / 25 mm maximum aggregate size in severe exposure (F2). This applies to driveways, patios, sidewalks, and pool decks in freeze-thaw zones — not to interior slabs or foundations below frost line. Check the Concrete Air Entrainment Calculator for exposure class and target air content.

  • Pouring Concrete in Hot Weather: Guide for Gulf, AU & India

    Pouring Concrete in Hot Weather: Guide for Gulf, AU & India

    Above 90°F / 32°C, every stage of concreting accelerates — hydration, evaporation, stiffening. ACI 305R defines hot weather concreting as any combination of high air temperature, low humidity, high wind speed, and solar radiation that produces a concrete evaporation rate above 0.2 lb/ft²/hr (1.0 kg/m²/hr). In the Gulf states, Western Australia, and central India from April to September, that threshold is routinely exceeded by 10 AM.

    Hot weather concreting thresholds and mix temperature limits

    ACI 305R and AS 1379 (Australia) both specify a maximum fresh concrete temperature at point of delivery of 95°F / 35°C. IS 7861 (India) governs hot weather concreting practice in a similar way, though Indian industry guidance more commonly cites a practical placement ceiling closer to 104°F / 40°C rather than the exact 35°C figure used in the US and Australian standards. The practical target across all these standards is 85°F / 29°C or below at discharge — every additional 10°F above 85°F reduces workability by roughly 10–15 mm of slump and cuts setting time. Use the Concrete Admixture Dosage Calculator to estimate retarder doses that compensate for temperature-accelerated set.

    Concrete temp at dischargeSet time reduction vs 70°FMax slump retention (min)Key risk
    70°F / 21°C (baseline)90None
    85°F / 29°C~25% faster60Plastic shrinkage cracking begins
    90°F / 32°C~40% faster45Cold joint risk if placement delayed
    95°F / 35°C~60% faster30Flash set, cold joints, structural failure risk
    >100°F / 38°CUncontrolled<20Do not pour without chilled batch water + ice

    Region-specific conditions: Gulf, Australia, and India

    Gulf States (UAE, Saudi Arabia, Qatar, Kuwait)

    The Gulf presents peak concrete placement temperatures of 104–113°F / 40–45°C from June to August, combined with relative humidity ranging from 10% (inland Saudi Arabia) to 85% (coastal UAE). The combination of extreme heat and variable humidity creates radically different evaporation rates day to day. Gulf specification bodies — Dubai Municipality’s ready-mix concrete standards, the Qatar Construction Specifications (QCS), and Saudi Aramco Engineering Standard SAES-Q-001 — all require concrete placement temperatures not exceeding 95°F / 35°C and typically mandate pre-cooling of aggregates and batch water.

    Practical measures mandated or strongly recommended in Gulf concrete practice: batch water chilled to 35–40°F / 2–4°C; ice substitution of up to 75% of mix water by mass; aggregate stockpile shading; chilled steel formwork; transit mixer drum insulation; and placement scheduled before 8 AM or after 6 PM. Night pours are common for major placements from June through September.

    Australia (Northern Territory, Queensland, Western Australia)

    Australian Standard AS 1379-2007 and the associated AS 3600 structural concrete code align with ACI 305R on the 35°C maximum delivery temperature. Darwin averages daily maximums of 91–95°F / 33–35°C year-round; Karratha and Port Hedland in WA regularly exceed 104°F / 40°C from November to March. The additional complication in northern Australia is the wet season: relative humidity exceeds 80% from December to March, which reduces evaporation rate but adds bleed water problems and inhibits surface finishing.

    Concrete specifications for major infrastructure projects in the Pilbara and Darwin regions routinely include ice batch water requirements, maximum w/c ratios of 0.40 for durability in cyclone-zone construction, and a minimum 7-day ponding cure rather than curing compound, given the dust and wind conditions.

    How to reduce concrete temperature on-site

    The rule of thumb: every 10°F / 5.5°C reduction in concrete temperature gains approximately 1 extra hour of workable life. Temperature reductions come from the mix components in proportion to their heat capacity and mass. Aggregates make up ~70% of mix mass, so cooling them has the most impact — shading aggregate stockpiles can achieve 5–10°F / 3–6°C reduction alone. Chilled mix water (35°F / 2°C) delivers another 5–8°F / 3–4°C. Replacing part of the mixing water with flake ice provides the most aggressive cooling — ice absorbs 144 BTU/lb (334 kJ/kg) as it melts, compared to only 1 BTU/lb/°F for liquid water.

    Calculate the adjusted mix: the Water-Cement Ratio Calculator accounts for total water contribution including ice. The combined weight of ice + liquid water must equal the total design water content; do not add ice as extra water.

    Common mistakes in hot weather concreting

    1. Adding water at the site to restore slump. Slump lost due to temperature cannot be recovered by adding water without compromising design strength. A w/c increase from 0.45 to 0.52 reduces 28-day compressive strength by approximately 15–20%. Use a mid-range or high-range water reducer (superplasticizer) dosed at the plant to maintain workability without increasing w/c. The Concrete Admixture Dosage Calculator provides correct dosage ranges by admixture type.

    2. Placing concrete on dry, sun-baked subgrade. Hot, dry subgrade absorbs water from the fresh concrete mix at an accelerated rate — effectively reducing the w/c at the base of the slab, which increases bleed water in the upper zone and creates a stratified strength profile. Dampen the subgrade to field capacity (surface is moist, no standing water) immediately before placement, and keep it shaded until placement begins.

    3. Finishing before bleed water evaporates. High ambient temperatures and wind cause the surface to appear ready to finish before bleed water has fully risen. Finishing at this stage traps bleed water and weak laitance near the surface, producing a dusting failure layer within the top 3–5 mm. Wait for bleed water to clear entirely. If the surface stiffens too fast, use an evaporation retarder — not misting — to slow surface drying.

    4. Using Type III (high-early) cement in hot conditions. Type III cement generates significantly more heat of hydration than Type I/II. In hot weather, this amplifies the already-elevated concrete temperature and accelerates set unpredictably. For hot-weather pours, specify Type I/II or Type II (moderate heat) with an SCM replacement (30–40% fly ash or 25–35% slag) to reduce heat of hydration without sacrificing long-term strength.

    Related calculators you might need

    Before ordering concrete for a hot-weather pour, confirm volume requirements precisely with the Concrete Slab Calculator — overage wastes money, but running short and forming cold joints in 40°C heat is a structural problem. The Concrete Curing Time Estimator adjusts the curing timeline for your specific ambient temperature, so you know exactly when traffic loads are safe. For projects where sealing after cure is planned, the Concrete Sealer Coverage Calculator prevents under-application — critical in UV-intense environments like the Gulf and northern Australia where penetrating sealers degrade faster.

    Frequently asked questions

    What temperature is too hot to pour concrete?

    There is no absolute cut-off, but above 95°F / 35°C at the point of discharge, structural risk rises sharply enough that most standards — ACI 305R, AS 1379, IS 7861 — require enhanced controls or cessation of placement. Practically, above 100°F / 38°C ambient air temperature without chilled batching, ice substitution, and night-pour scheduling, meeting specification requirements becomes extremely difficult.

    How do I keep concrete cool in hot weather?

    Cool the ingredients, not the poured concrete. Shade aggregate stockpiles, use chilled batch water (35–40°F / 2–4°C), substitute up to 75% of mix water with flake ice, and schedule placement in early morning or post-sunset hours. White-painted or insulated transit mixer drums reduce temperature gain in transit. Spraying cold water on forms and the subgrade immediately before pour also helps.

    Can I pour concrete in direct sunlight in summer?

    Yes, but it requires active temperature management. Direct solar radiation can increase concrete surface temperature by 10–20°F / 5–11°C above ambient within minutes of placement. Shade the freshly placed surface immediately using shade cloth at 1 ft / 300 mm above the slab — not in contact with it. Apply an evaporation retarder before finishing. Begin wet curing or apply a curing compound within 20–30 minutes of finishing completion.

    What admixtures help in hot weather?

    Set retarders (ASTM C494 Type B or D) are the primary tool — they extend the initial set time by 1–4 hours depending on dosage and ambient conditions. Mid-range water reducers (Type A or F) maintain slump without adding water. For extreme heat, a combination retarder-water reducer (Type D or G) is often specified. In Gulf and Australian practice, carboxylic acid-based superplasticizers are preferred for their temperature stability up to 45°C.

    How long does concrete take to cure in 40°C / 104°F heat?

    Early strength gain is accelerated — concrete may reach 1,500 psi / 10 MPa within 48 hours. However, 28-day strength is reduced by 5–10% versus baseline curing conditions. The Concrete Curing Time Estimator provides a temperature-adjusted curve. Full curing requires continuous moisture retention — at 40°C without curing compound or wet curing, surface moisture loss can halt hydration within 4–6 hours of placement.

  • Concrete Crack Repair: Causes, Types & How to Fix Them

    Concrete Crack Repair: Causes, Types & How to Fix Them

    The repair method for a concrete crack is determined by what caused it, not just how wide it is. A 1/8 inch (3 mm) crack from alkali-silica reaction needs a different fix than an identical-width crack from shrinkage — one is stable, the other is active and will re-open any rigid filler within months.

    Before buying materials, use the Concrete Crack Repair Calculator to estimate filler volume by crack length, width, and depth. Underestimating means a second trip; overestimating means wasted product that has a limited shelf life once opened.

    How to diagnose your crack type before repairing it

    Crack width alone does not tell you what you are dealing with. These four tests take under 10 minutes and determine both cause and correct repair approach.

    Chalk line test (active vs dormant): Draw a chalk line across the crack perpendicular to its length. Check again in 2 weeks. If the line has shifted or the crack has widened, it is an active crack under ongoing movement — rigid fillers will fail. If it is unchanged, the crack is dormant and can be filled with any compatible product.

    Depth check: Push a thin wire into the crack. Hairline cracks less than 1/4 inch (6 mm) deep are surface-level. Cracks penetrating to the full depth of the slab (typically 4 inches / 100 mm for residential slabs) affect structural integrity.

    Staining pattern: Rust-coloured staining along a crack indicates corroding rebar — the steel has expanded and split the concrete. This is not a surface repair issue. The rebar must be exposed, treated for corrosion, and the concrete restored with a structural epoxy mortar or full section replacement.

    Pattern recognition: Map cracks (fine random network, also called crazing or craze cracking) are surface-only and caused by rapid surface drying during curing. They look alarming but are cosmetic. A single long diagonal crack at a slab corner typically indicates differential settlement. Parallel cracks running the length of a driveway panel suggest poor or missing expansion joints.

    Crack types, causes, and correct repair methods

    Crack TypeWidthCauseRepair Method
    Hairline / map cracking< 1/16 in / < 1.5 mmRapid surface drying, over-trowellingConcrete sealer or thin overlay
    Shrinkage crack1/16–1/4 in / 1.5–6 mmNormal drying shrinkage, poor joint placementPolyurethane sealant (flexible)
    Settlement crack> 1/8 in / > 3 mm, steppedSoil movement, poor compactionMudjacking or foam lifting + epoxy fill
    Structural crackVariable, often > 1/4 in / 6 mmOverload, rebar corrosion, freeze-thawEpoxy injection or section replacement
    Expansion joint failureGap at joint faceJoint filler degradedBacker rod + polyurethane or polysulfide sealant

    Hairline and map cracking

    These are the most common and least urgent cracks. No structural action is needed. If sealing for aesthetics, apply a penetrating silane/siloxane sealer that does not film-form over the cracks — acrylic film-forming sealers can highlight crazing by creating a sheen that shows the crack network. For a cleaner finish, a thin polymer-modified overlay at 1/4 inch (6 mm) bonds well to sound concrete and hides the pattern entirely — the Concrete Resurfacing Calculator works out material quantity for an overlay at that depth.

    Shrinkage and working cracks

    These need a flexible filler, not a rigid one. Concrete slabs move — thermally, seasonally, and under load. A rigid epoxy filler in a moving crack will debond at the edges within one freeze-thaw cycle in northern climates (Canada, northern US, UK Scotland, Scandinavia). Self-levelling polyurethane sealant (e.g. NP1, Sikaflex 1a) bonds to concrete, remains flexible from -40°F to 200°F (-40°C to 93°C), and accepts foot and vehicle traffic once cured (24–48 hours).

    Prep is non-negotiable: rout the crack to a minimum 1/4 inch (6 mm) wide × 1/4 inch (6 mm) deep U-shaped profile using an angle grinder with a crack chasing blade or a dedicated crack router. Blow out dust and debris. Install backer rod (closed-cell polyethylene foam) to control fill depth — the sealant should fill to 1/4 inch (6 mm) below the surface, not flush. Flush fill causes three-sided adhesion, which prevents proper joint movement and leads to cohesive failure in the sealant.

    Step-by-step repair for the most common crack scenarios

    Dormant hairline crack (< 1/8 in / 3 mm), no movement: Clean with a wire brush and compressed air. Apply a low-viscosity epoxy crack filler (water-thin consistency) that wicks into the crack by capillary action. Spread kiln-dried sand over wet epoxy to match the surrounding surface texture. Cure time: 12–24 hours before foot traffic, 72 hours before vehicle traffic.

    Active shrinkage crack (any width, confirmed movement): Rout to U-profile. Clean. Install backer rod sized 25% wider than the crack (it compresses to fit and holds position). Apply polyurethane sealant by gun, tooling to a concave finish. Do not paint over within 48 hours — most polyurethane sealants need full cure before coating.

    Settlement crack with vertical displacement (stepped crack): Routing and filling the crack alone does not address the cause — one side of the slab has moved and will continue to move unless the substrate is stabilised. Options: polyurethane foam injection (slabjacking) for slabs with void beneath; mudjacking with a cementitious slurry for larger areas. After levelling, seal the filled crack with a flexible sealant to accommodate residual movement.

    Common mistakes that make the repair fail

    Filling without routing. Pouring filler into a raw crack leaves a V-shaped void. The filler bonds only at the surface, with no mechanical key and minimal contact area. It falls out under traffic within weeks. Every crack wider than 1/16 inch (1.5 mm) must be routed or chiselled to a uniform U-profile before filling.

    Using rigid epoxy on an active crack. Epoxy has zero flexibility after cure — typical elongation at break is 2–5% versus 150–300% for polyurethane. Applying epoxy to a crack that still moves (seasonal slab movement in climates with a 40°F / 22°C temperature range is typically 1/16–1/8 inch / 1.5–3 mm across a 10 ft / 3 m slab) guarantees re-cracking at the fill edges within one year.

    Skipping backer rod. Without backer rod, sealant fills the full depth of the crack. This creates a thick bead that is too rigid to flex without tearing, and it wastes expensive sealant. Backer rod controls the depth of sealant to the standard 2:1 width-to-depth ratio — depth roughly half the joint width, down to a 1/4 inch (6 mm) practical minimum on narrow cracks — which gives the sealant room to stretch without tearing.

    Repairing in cold weather without precautions. Epoxy and polyurethane both have minimum application temperatures: most require 40–45°F (4–7°C) minimum substrate temperature. Applying below this threshold results in poor cure, soft filler, and adhesion failure. In cold conditions, warm the crack with a heat gun immediately before application and tent the area for at least 6 hours during cure.

    Related calculators you might need

    If the crack resulted from an improperly placed or missing joint, the Concrete Expansion Joint Spacing Calculator will give you the correct joint spacing for your slab dimensions and thickness going forward. For a full cost picture — including whether repair vs replacement makes more financial sense — use the Concrete Demolition and Removal Cost Estimator alongside the Concrete Cost Calculator. If you are dealing with settlement and are assessing whether to pour a replacement slab, the Concrete Slab Calculator gives you volume and bag count for any slab dimensions.

    Frequently asked questions

    How do you fix cracks in concrete? The method depends on crack type and activity. Dormant hairline cracks under 1/8 inch (3 mm) are filled with low-viscosity epoxy. Active or wide cracks need routing to a uniform U-profile, backer rod installation, and flexible polyurethane sealant. Structural cracks with vertical displacement require substrate stabilisation before any surface fill.

    Can concrete cracks be permanently fixed? Dormant cracks in stable substrates can be permanently filled — epoxy injections used in structural repair have bond strengths exceeding the tensile strength of the surrounding concrete. Active cracks cannot be “permanently” filled with a rigid product; flexible sealants that accommodate movement are the correct long-term solution and will need replacement every 5–10 years.

    What is the best product for filling concrete cracks? For dormant hairline cracks: low-viscosity epoxy. For active or wide cracks: self-levelling polyurethane sealant (NP1, Sikaflex, or equivalent). For structural cracks requiring load transfer: two-component epoxy injection system. There is no single best product — the crack type dictates the chemistry required.

    How wide does a concrete crack have to be before it is structural? There is no single threshold, but cracks wider than 1/4 inch (6 mm), cracks with vertical displacement (one side higher than the other), and cracks associated with rebar staining all warrant engineering assessment before repair. Width alone is a poor indicator — a narrow crack caused by rebar corrosion is a structural issue regardless of its opening width.

    How long does concrete crack repair last? Epoxy fills in dormant cracks: 10–20 years if properly prepared. Polyurethane sealants in active joints: 5–10 years, depending on movement cycles and UV exposure. Repairs that fail within 1–2 years almost always trace back to inadequate surface preparation or wrong product selection. Use the Concrete Crack Repair Calculator to estimate material quantities before starting.

  • How to Seal Concrete: Products, Coverage Rates & Application

    How to Seal Concrete: Products, Coverage Rates & Application

    Most concrete surfaces need sealing within 28 days of curing — and then every 1–10 years depending on product type, traffic, and exposure. Skip this step and you get water infiltration, freeze-thaw spalling, staining, and surface degradation that shortens slab life by a decade or more.

    Before ordering sealer, calculate your coverage needs precisely. The Concrete Sealer Coverage Calculator takes your surface area and selected product type and returns exact gallons (or litres) required, including a standard 10% waste factor for edges and re-coat overlap.

    Which concrete sealer do you actually need?

    The sealer category determines everything: penetration depth, surface sheen, durability, and whether you need to strip and reapply or can simply recoat. The four main types are not interchangeable.

    Sealer TypeMechanismBest ForReapply Interval
    Acrylic (solvent-based)Surface filmDriveways, patios, decorative concrete1–3 years
    Acrylic (water-based)Surface filmIndoor slabs, low-traffic areas1–2 years
    Penetrating silane/siloxaneSubsurface absorptionExposed aggregate, pavers, bridge decks3–7 years
    PolyurethaneThick surface filmGarage floors, commercial floors3–5 years
    EpoxyChemical bond surface coatWarehouses, workshops, high-load floors5–10 years

    Solvent-based acrylics penetrate slightly better and enhance colour more aggressively than water-based equivalents — useful on stamped or exposed aggregate surfaces. But they off-gas VOCs, require solvent cleanup, and are restricted in some US states (California, specifically). Water-based acrylics are lower-odour and clean up with water, but offer less UV resistance on outdoor surfaces.

    Penetrating sealers (silane, siloxane, or blended silane-siloxane) do not form a film — they chemically react with calcium silicate in the concrete and become part of the matrix. The surface looks unchanged after application. These are the right choice anywhere you need water repellency without altering appearance: exposed aggregate driveways, stamped concrete in HOA-controlled communities, or architectural concrete where sheen would look wrong.

    Coverage rates and how much sealer to buy

    Coverage varies by product and surface porosity. Manufacturers publish theoretical coverage rates, but actual coverage on rough or porous concrete typically runs 15–30% lower than the label figure, with the exact drop depending on product type — see the table below.

    Product TypeTheoretical CoveragePractical Coverage (rough/porous)Coats Required
    Solvent acrylic200–300 sq ft/gal (4.9–7.4 m²/L)150–200 sq ft/gal (3.7–4.9 m²/L)2
    Water-based acrylic250–400 sq ft/gal (6.1–9.8 m²/L)200–300 sq ft/gal (4.9–7.4 m²/L)2
    Silane/siloxane penetrating100–200 sq ft/gal (2.5–4.9 m²/L)80–150 sq ft/gal (2.0–3.7 m²/L)1–2
    Polyurethane300–400 sq ft/gal (7.4–9.8 m²/L)250–350 sq ft/gal (6.1–8.6 m²/L)2
    Epoxy200–250 sq ft/gal (4.9–6.1 m²/L)150–200 sq ft/gal (3.7–4.9 m²/L)2

    Worked example: a 500 sq ft (46.5 m²) driveway sealed with a solvent-based acrylic at a practical rate of 175 sq ft/gal needs 500 ÷ 175 = 2.86 gallons per coat, or 5.71 gallons for two coats. Add 10% for waste and you are ordering 6.3 gallons — round up to 7.

    Step-by-step application: what the manufacturer instructions skip

    Surface preparation

    New concrete must cure for a minimum of 28 days before sealing — 3 days is inadequate regardless of what some product labels suggest. The slab needs to reach full hydration so sealer does not trap bleed water or inhibit strength gain. On existing concrete, remove all oil stains with a degreaser, acid-etch efflorescence with a 10% muriatic acid solution (diluted 1:10 with water), and pressure wash at 3,000 psi (207 bar) minimum. Allow 24–48 hours of drying time after washing — moisture in the slab will cause acrylic sealers to turn white (blushing).

    Application method by product type

    Solvent-based acrylics: apply with a 3/8 inch (9.5 mm) nap roller or pump sprayer. Rollers give better penetration on rough surfaces. Work in 10 ft (3 m) sections and maintain a wet edge to avoid lap marks. For stamped concrete, a pump sprayer followed by a short-nap roller works back-coded sealer into the pattern grooves.

    Penetrating sealers: low-pressure pump sprayer only — rollers spread the product too thinly for absorption. Apply liberally until the surface is wet but not puddling. Wipe back any excess with a dry brush within 15–20 minutes to avoid surface crystallisation.

    Polyurethane and epoxy coatings: these require two-part mixing (for epoxy) or careful humidity control (for polyurethane, which reacts with atmospheric moisture). Apply at temperatures between 50°F and 90°F (10°C and 32°C). Do not apply polyurethane if humidity exceeds 85% — the coating will bubble.

    Common mistakes that waste product and wreck the finish

    Applying to wet concrete. Blushing — the white, cloudy film that appears under acrylic sealers — is almost always caused by residual moisture in the slab. Wait 48 hours after any rain or washing. Test with plastic sheeting: tape a 18 x 18 inch (450 x 450 mm) sheet to the concrete for 16 hours. If condensation forms underneath, it is too wet to seal.

    Over-applying in one heavy coat. One thick coat traps solvent and creates a sticky, peeling finish. Two thin coats at the correct coverage rate bond better and last longer. Allow the first coat to tack off (30–60 minutes for acrylics) before applying the second.

    Sealing over contaminated concrete. Engine oil and food grease polymerise into the concrete surface. Sealer applied over them creates a film that peels in sheets within months. Use a commercial degreaser at full concentration, scrub with a stiff-bristle brush, and rinse. A simple water rinse does nothing to oil — you need the degreaser.

    Using the wrong sealer for the exposure. Acrylic sealers on garage floors exposed to road salts and fuel spills fail within 18 months. Polyurethane or epoxy coatings are the minimum for vehicle traffic. Penetrating sealers are not decorative products — applying one expecting a sheen produces no visible result.

    Related calculators you might need

    If you are sealing a freshly poured slab, start with the Concrete Slab Calculator to confirm your pour volume before moving to sealer quantities. For stamped concrete specifically, the Stamped Concrete Calculator factors in pattern complexity and base slab area together. If you are pricing the full job, the Full Concrete Project Estimator covers materials, labour, and finishing costs in one pass. For resurfacing older concrete before sealing, the Concrete Resurfacing Calculator estimates overlay material quantities by area and depth.

    Frequently asked questions

    How long after pouring concrete can I seal it? Wait a minimum of 28 days. Concrete reaches approximately 70% of its design strength at 7 days and continues hydrating for months. Sealing too early traps bleed water and inhibits hydration, which reduces surface strength and causes the sealer to delaminate.

    How many coats of concrete sealer do I need? Film-forming sealers (acrylic, polyurethane, epoxy) require two coats. The first coat partially absorbs into the surface; the second builds the protective film. Penetrating sealers are typically one coat on smooth concrete, two coats on porous or rough surfaces. More than two coats of acrylic traps solvent and creates a peeling film.

    What is the coverage rate for concrete sealer? Expect 150–300 sq ft per gallon (3.7–7.4 m²/L) depending on product and surface porosity. Smooth, dense concrete covers at the high end; rough, open-textured surfaces absorb more and cover less. Use the Concrete Sealer Coverage Calculator to get a project-specific quantity with waste factor included.

    Can I seal concrete myself or do I need a contractor? Acrylic sealers are routinely applied by homeowners. The process — surface prep, roller or sprayer application, two coats — requires no specialist equipment. Epoxy coatings on garage floors are also DIY-feasible but demand more precise mixing and faster application. Two-part polyurethane and commercial-grade coatings benefit from contractor application due to pot life limitations and humidity sensitivity.

    Why is my concrete sealer turning white and cloudy? This is blushing, caused by moisture trapped under the sealer film during application. The fix depends on severity: light blushing on acrylics sometimes resolves as the moisture escapes through a thin film. Heavy blushing requires stripping the sealer with a xylene solvent or chemical stripper, allowing the slab to dry completely (48–72 hours minimum), and reapplying.

    How long does concrete sealer last? Acrylic sealers last 1–3 years on driveways with vehicle traffic. Penetrating silane/siloxane sealers last 3–7 years. Polyurethane coatings last 3–5 years. Epoxy floor coatings last 5–10 years but are susceptible to UV yellowing if not topcoated with polyurethane.

  • Stamped Concrete vs Plain: Cost and Finish Comparison

    Stamped Concrete vs Plain: Cost and Finish Comparison

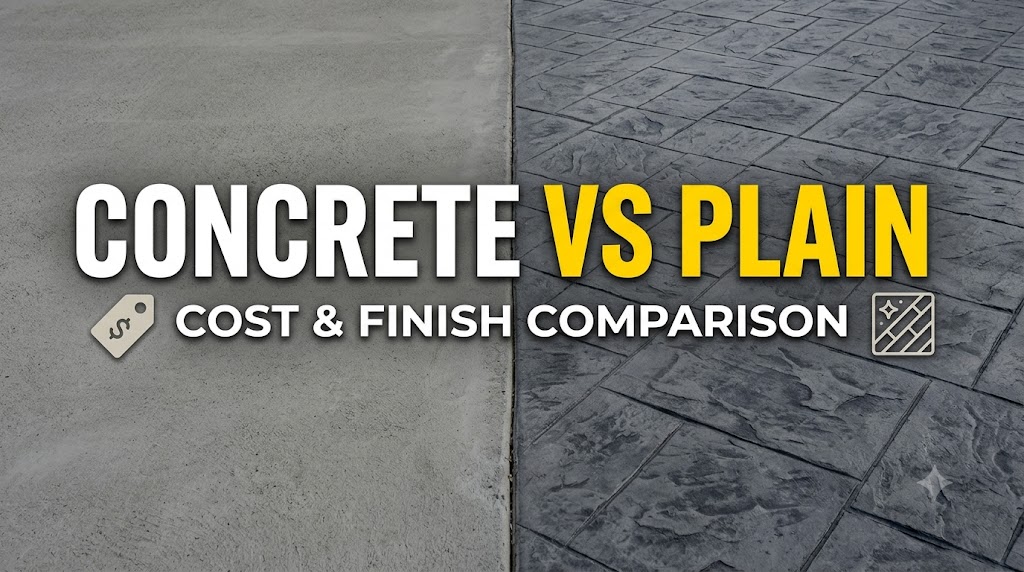
    Stamped concrete costs $12–$22 per sq ft ($129–$237 per m²) installed, versus $5–$8 per sq ft ($54–$86 per m²) for plain broom-finished concrete. The gap is driven by colour hardener, release agent, stamps, and significantly more labour — not by any difference in the underlying mix design.

    To compare your specific project, run both scenarios through the Stamped Concrete Calculator and the Concrete Cost per Square Foot Calculator. The gap widens with pattern complexity, number of colours, and total area — smaller jobs absorb the stamp setup cost less efficiently.

    Side-by-side cost and specification comparison

    FactorStamped ConcretePlain Broom-Finished Concrete
    Installed cost (US)$12–$22/sq ft ($129–$237/m²)$5–$8/sq ft ($54–$86/m²)
    Installed cost (AU)AUD $110–$195/m²AUD $65–$90/m²
    Installed cost (UK)£85–£150/m²£45–£75/m²
    Materials premium+$3–$6/sq ft for colour, release, sealerStandard concrete only
    Labour hours (500 sq ft / 46 m²)40–60 hours (crew of 3)16–24 hours (crew of 2)
    Sealing requirementEvery 1–3 years (mandatory)Every 3–5 years (recommended)
    Lifespan (well maintained)25–40 years30–50 years
    Repair visibilityHigh — colour matching is difficultLow — patches blend with grey
    Slip resistanceModerate (pattern-dependent)Good (broom finish)
    Freeze-thaw performanceMore susceptible (sealer critical)More resilient

    What drives the cost difference between stamped and plain concrete?

    Materials

    The underlying concrete mix is identical — typically 3,000–4,000 psi (20–28 MPa) for residential flatwork. The cost difference comes from three finishing materials that plain concrete does not require:

    Colour hardener: Broadcast dry-shake colour hardener hardens the surface to 6,000–8,000 psi (41–55 MPa) and provides the base colour. Applied at 60–100 lbs per 100 sq ft (2.9–4.9 kg/m²), it costs $0.80–$1.50 per sq ft ($8.60–$16.15 per m²) for materials.

    Release agent: Powder or liquid release prevents stamps from bonding to the fresh concrete while adding a secondary accent colour. At 1 lb per 10 sq ft (0.49 kg/m²), it adds $0.30–$0.60 per sq ft ($3.25–$6.45 per m²)

    Sealer: Stamped concrete must be sealed immediately after finishing to protect the colour and pattern. Acrylic sealer costs $0.20–$0.50 per sq ft ($2.15–$5.40 per m²) in materials per application and needs reapplying every 1–3 years. A 500 sq ft (46.5 m²) driveway accumulates $500–$1,250 in sealer costs over a decade — an ongoing expense that plain concrete largely avoids. The Concrete Sealer Coverage Calculator works out exactly how much sealer each application needs for your area.

    Labour

    Stamping requires a full crew working quickly: concrete is stampable for approximately 20–40 minutes depending on temperature and mix design, and the entire surface must be stamped in one continuous operation. Each tool (stamp mat) covers 2–4 sq ft (0.19–0.37 m²). A 500 sq ft (46.5 m²) patio requires constant, coordinated work from at least 3 experienced finishers. A broom finish on the same slab needs 2 workers and a fraction of the skill. Labour accounts for 50–60% of the total cost premium for stamped work.

    Finish options and where each works

    FinishAppearanceTexture / Slip ResistanceBest Application
    Broom finish (plain)Uniform grey, parallel linesHigh — fine parallel groovesDriveways, sidewalks, utility slabs
    Exposed aggregate (plain)Stone texture, varied colourHigh — natural stone profilePool decks, walkways, patios
    Stamped — ashlar slateLarge stone blocksModerate — shallow texturePatios, courtyards
    Stamped — cobblestone/fanInterlocking round patternModerateDriveways, walkways
    Stamped — wood plankTimber board grain effectLow to moderatePool decks, covered patios
    Stamped — flagstoneIrregular natural stoneModerateGarden paths, patios

    Exposed aggregate is often the better choice when you want visual interest at closer to plain concrete cost. It achieves texture through washing the surface before cure to expose the coarse aggregate — no stamps, no colour hardener, just a surface retarder and pressure washing. Installed cost is typically $6–$10 per sq ft ($65–$108 per m²), splitting the difference between plain and stamped.

    Where stamped concrete fails and plain concrete holds up

    Freeze-thaw cycling is the primary durability weakness of stamped concrete. Colour hardener is broadcast on the surface — it is not a full-depth treatment. Surface delamination (the hardener layer separating from the base concrete) occurs when water infiltrates and freezes beneath the hardened cap. This is most common in cold climates with regular freeze-thaw cycling — the Canadian prairies, the northern US, and most of the UK outside the milder south.

    Sealing prevents the problem when done on schedule. Miss one cycle — a missed re-seal after winter — and spalling can begin within one season. Plain broom-finished concrete does not carry this vulnerability because there is no applied surface layer to delaminate.

    Repair is the other significant practical difference. A cracked or spalled section of plain grey concrete is repaired with a colour-matched patch — which is to say, grey concrete. It blends. A matching repair on stamped concrete requires the same colour hardener, the same release agent, the same stamp pattern, and an experienced finisher. Even then, new vs weathered colour is visible for years. The Concrete Resurfacing Calculator is worth checking if you’re scoping a repair or overlay rather than a full replacement. Do not choose stamped concrete for any application where heavy vehicle loads, point loads from heavy equipment, or tree root intrusion is likely.

    Common mistakes when choosing between stamped and plain concrete

    Choosing stamped without accounting for ongoing maintenance cost. The installed price is the headline figure, but a 500 sq ft (46.5 m²) stamped driveway that needs sealing every 2 years at $0.40/sq ft materials plus 4 hours labour adds up to $1,000–$1,500 in maintenance costs per decade. Over 20 years, that narrows the gap with higher-end alternatives like pavers significantly.

    Specifying stamped concrete in a freeze-thaw climate without a sealing commitment. This is the most common failure path. If you will not reliably seal every 1–2 years, the correct choice in a northern climate is plain concrete or exposed aggregate — both of which are more tolerant of the occasional missed maintenance cycle.

    Using standard concrete mix for stamped work. Stamped concrete should be specified at 4,000 psi (28 MPa) minimum with a water-cement ratio below 0.45 and no more than 3–4 inches (75–100 mm) of slump. High-slump, wet mixes reduce colour hardener bond strength and increase bleed water — both of which cause finish defects. Contractors who quote low prices often achieve them by pouring a cheaper, wetter mix.

    Underestimating the repair cost at the quote stage. A cracked stamped panel is not a $50 fix. Matching and re-stamping a 4 sq ft (0.37 m²) section can cost $200–$400 in labour alone because of the colour matching, mobilisation for a small job, and skill required. Factor realistic repair contingency into your project budget.

    Related calculators you might need

    If you are still deciding on scope, the Concrete Patio Calculator and Concrete Driveway Calculator give you base concrete volumes for the most common stamped applications. For a full financial comparison that includes labour, materials, and delivery, run both options through the Full Concrete Project Estimator. If you are comparing stamped concrete against an asphalt driveway instead, the Concrete vs Asphalt Driveway Cost Comparison runs both scenarios side by side.

    Frequently asked questions

    Is stamped concrete worth the extra cost? For patios and decorative applications where aesthetics drive value: generally yes, if you maintain it. For driveways in cold climates or anywhere you are unlikely to seal consistently: probably not. The 2x–3x cost premium buys appearance only — the underlying structural performance is identical. Exposed aggregate is worth considering as a middle option.

    How long does stamped concrete last? A well-maintained stamped slab lasts 25–40 years. The colour hardener surface layer starts to show wear at 10–15 years without regular sealing, at which point resurfacing or full replacement becomes the only realistic options. Plain concrete in the same conditions lasts 30–50 years

    Can stamped concrete be repaired to match the original? Partially. Colour matching is the primary obstacle — concrete colour changes as it ages and as the sealer weathers. A repair done within 2–3 years of the original pour has a reasonable chance of matching. After 5+ years, an exact match is effectively impossible. Some contractors mitigate this by resealing the entire surface after a repair to create uniform colour across old and new material.

    What PSI concrete is used for stamped concrete? A minimum of 4,000 psi (28 MPa) is recommended for stamped concrete, which is the same specification used for garage floors and light commercial flatwork. Residential plain concrete is often poured at 3,000 psi (21 MPa). The higher strength specification helps the colour hardener bond properly and reduces the likelihood of surface delamination under freeze-thaw cycling.

    Does stamped concrete get slippery when wet? It can. Deep-pattern stamps (cobblestone, rough slate) have sufficient texture for safe foot traffic when wet. Shallow patterns (wood plank, smooth stone) approach the slip resistance of polished stone — which is to say, dangerous around pool areas when wet. If the application is a pool deck, specify an anti-slip additive in the sealer or choose a deep-texture pattern. Use the Concrete Pool Deck Calculator if you are pricing a pool surround.

  • Bags vs Ready-Mix Concrete: Which Saves More Money?

    Bags vs Ready-Mix Concrete: Which Saves More Money?

    Ready-mix concrete is cheaper per cubic yard once you cross approximately 1 cubic yard (0.76 m³) of material — but that threshold shifts depending on local delivery fees, short-load surcharges, and your labour costs. Below that volume, bagged concrete is typically the lower total-cost option when all factors are included. Neither answer applies universally; the correct choice depends on your volume, your location, and whether you’re supplying your own labour.

    The real cost comparison: materials, delivery, and labour

    Ready-mix is quoted per cubic yard or per cubic metre from the plant. In the US, ready-mix prices in 2024 ranged from $125–$180 per cubic yard for standard 3,000 PSI / 20 MPa residential mix, with significant regional variation. Delivery adds $75–$150, and most plants charge a short-load fee of $40–$100 per cubic yard under the minimum (usually 5–8 yd³). A 2 yd³ pour from a plant with a 5 yd³ minimum can therefore attract $120–$300 in short-load surcharges alone.

    Bagged concrete (3,000–4,000 PSI / 20–27 MPa general purpose mixes) runs $5–$7 per 60 lb bag (US retail) and yields 0.45 cu ft per bag. One cubic yard (27 cu ft) requires 60 bags, so materials-only cost is approximately $300–$420 — versus roughly $200–$250 before delivery and short-load fees for the same volume in ready-mix. In practice, a 1 yd³ ready-mix order usually falls under a plant’s minimum, so the realistic delivered cost including short-load is closer to $225–$340 (see the table below). Use the Ready-Mix vs Bagged Concrete Cost Calculator to run this comparison at your local prices.

    Labour is the variable most DIYers undercount. Mixing 60 bags of concrete by hand (the quantity for 1 cubic yard) takes 2–3 hours with a rented electric mixer and 4–5 hours by hand. At a contractor labour rate of $45–$65/hr, that makes bagged concrete cost-equivalent to ready-mix at volumes well under 1 yd³. The Concrete Labor Cost Calculator estimates the labour side specifically, whether you’re pricing your own time or a contractor’s.

    Cost scenarios side by side

    The table below shows total estimated project costs across four volume scenarios using 2024 US national averages. Ready-mix delivery cost assumed $100 flat; short-load fee assumed $60/yd³ for loads under 5 yd³; labour at $50/hr.

    VolumeBags (materials only)Bags (+ labour)Ready-Mix (+ delivery)Verdict
    0.25 yd³ (0.19 m³)~$95~$170$175–$280 (short-load)Bags
    0.5 yd³ (0.38 m³)~$185~$285$215–$300 (short-load)Bags or toss-up
    1 yd³ (0.76 m³)~$370~$520$225–$340 (short-load)Ready-mix
    5 yd³ (3.8 m³)~$1,850~$2,850$900–$1,100 (no short-load)Ready-mix

    These figures are directional. For an accurate number at your location, the Concrete Cost Calculator allows input of local material prices, delivery rates, and labour costs and returns total project cost in both scenarios.

    When bags win — and when they don’t

    Bags are the right choice when:

    The pour is under 0.5 yd³ (0.38 m³) and you can supply the labour. Patch repairs, single post holes, small steps, and equipment pads under 10 sq ft (0.93 m²) all fall here. Bags also win when site access prevents a truck: steep or narrow driveways, backyards accessible only through a gate, and upper-floor deck footings where wheelbarrows can’t reach the pour.

    Bags also give you control over timing. You can mix one bag at a time and work at your own pace — important in hot weather when ready-mix begins to set within 60–90 minutes of discharge. For coloured or decorative work, bagged mixes allow consistent pigment-to-concrete ratios across the job; the Concrete Pigment/Color Calculator helps maintain colour consistency batch-to-batch.

    Ready-mix is the right choice when:

    Volume exceeds 1 yd³ (0.76 m³), the pour needs to be placed and finished within a tight window, or the specification calls for a mix design that isn’t available in bagged form — such as air-entrained concrete for freeze-thaw climates, low water-cement ratio structural mixes, or fibrous concrete. Ready-mix also reduces physical labour significantly: a 5 yd³ pour from bags involves moving, cutting, and mixing 300 × 60 lb bags.

    The short-load fee — the cost most people miss

    Ready-mix plants set minimum loads of 5–8 cubic yards (3.8–6.1 m³). Orders below the minimum are subject to a short-load fee, typically structured as a per-yard penalty for each yard below the minimum. A plant with a 7 yd³ minimum and a $55/yd³ short-load fee will charge an extra $275 on a 2 yd³ order — pushing the effective material cost from $150/yd³ to $287.50/yd³.

    The Short Load Fee Estimator calculates this exact penalty for your plant’s pricing structure. In many cases, combining a driveway approach with a walkway repair or adding a small pad to reach the minimum order threshold is cheaper than paying the surcharge.

    Common mistakes when choosing between bags and ready-mix

    1. Ignoring the short-load fee when pricing ready-mix. Most online ready-mix quotes are for full truckloads. Call the plant and ask for their minimum order and short-load rate before comparing. A $130/yd³ quoted price can become $230/yd³ effective cost on a small pour.

    2. Underestimating how many bags 1 cubic yard actually is. 60 × 60 lb bags weigh 3,600 lb (1,630 kg). Mixing that by hand in summer heat is not a practical option for most people. Rent a towable mixer for any job over 20 bags.

    3. Buying bagged concrete retail when a contractor can access trade pricing. Contractors frequently pay $3.50–$4.50 per 60 lb bag through builders’ merchants — 30–40% less than retail box store pricing. If you’re a contractor comparing bids, use trade pricing in your calculations.

    4. Not accounting for bag waste and partial mixes. The last bag on a job is almost always a partial — wet concrete left in the mixer or mixing trough that hardens before it can be used. Budget 1–2 extra bags per 10 bags ordered for small pours.

    Related calculators you might need

    Before committing to either option, verify your volume estimate with the Concrete Slab Calculator or the relevant project-specific tool. Once you know your volume, the Concrete Bags Calculator converts it into bag counts for 40 lb, 60 lb, and 80 lb bags so you can check pricing at your local supplier. For the delivery side of the equation, the Concrete Delivery Cost Calculator estimates total ready-mix costs including plant price, delivery fee, and short-load surcharge. And if you want to see both options summarised against your full project scope, the Full Concrete Project Estimator rolls materials, delivery, and labour into one number.

    Frequently asked questions

    At what volume does ready-mix become cheaper than bags?

    The crossover point is typically 0.75–1.25 cubic yards (0.57–0.95 m³) in most US markets when you include short-load fees and labour. In markets with high retail bag prices (UK, Australia), ready-mix becomes competitive even below 0.5 m³. Short-load fees push the crossover point higher — the heavier the penalty, the more bags make sense for mid-range volumes of 1–2 yd³.

    How many 60 lb bags equal a yard of concrete?

    60 bags at the standard yield of 0.45 cu ft per bag (27 cu ft per cubic yard ÷ 0.45 cu ft/bag). If you’re mixing by hand rather than with a mechanical mixer, budget roughly 15% extra — about 69 bags — to account for uneven water addition and mixing losses. For 80 lb bags, the equivalent is approximately 45 bags per cubic yard.

    Does bagged concrete have the same strength as ready-mix?

    Standard general-purpose bagged concrete mixes (e.g. Quikrete 5000, Sakrete High Strength) are rated at 4,000–5,000 PSI / 27–34 MPa at 28 days, which meets or exceeds the 3,000 PSI / 20 MPa minimum typical for residential footings and general slabs. For driveways specifically, US practice calls for a 4,000 PSI / 27 MPa minimum, which these higher-rated bagged mixes also satisfy. Where bagged mixes fall short is in specialty applications: air entrainment for freeze-thaw resistance, low-shrinkage mixes, and high-early-strength formulations are difficult to achieve reliably from bags.

    Is it worth renting a concrete mixer for a small job?

    Yes, above 15 bags (roughly 0.25 yd³ / 0.19 m³). Mixer rental runs $50–$85/day from most tool hire companies. The labour time savings more than justify the cost, and mechanical mixing produces a more consistent water-cement ratio than hand mixing — which directly affects final strength. Don’t mix more than 2–3 bags at a time in a standard 3.5 cu ft drum mixer.

    What does a short-load fee typically cost?

    Short-load fees vary by plant, but typical structures in the US charge $40–$75 per cubic yard under the minimum order. A plant with a 6 yd³ minimum and a $60/yd³ short-load rate will add $240 to a 2 yd³ order. Some plants charge a flat short-load fee of $100–$200 regardless of how far below the minimum you are. Always confirm the exact fee structure before ordering.