Author: Rachel Sousa

  • What Is a Stem Wall?

    What Is a Stem Wall?

    A stem wall is a short concrete wall that sits on top of a footing and extends up to the height of the finished floor, creating the vertical connection between the foundation footing below grade and the structure above. Stem walls typically stand 12 to 36 inches (300 to 900 mm) tall and 6 to 12 inches (150 to 300 mm) thick, and are common on sloped sites, crawl space foundations, and slab-on-grade construction where the floor needs to sit above grade for drainage or frost protection.

    How Do You Size a Stem Wall?

    Stem wall thickness is governed by the load above it and the unsupported height — a taller stem wall needs to be thicker or more heavily reinforced to resist lateral soil pressure and bending, the same way a taller unsupported column needs a wider base. A common residential stem wall for a single-story, slab-on-grade home is 8 in (200 mm) thick and 18–24 in (450–600 mm) tall, matched to an 8 in (200 mm) wide footing below it, though taller stem walls on sloped lots or in seismic zones need engineered thickness and reinforcement.

    Worked example: a slab-on-grade house on a lot that slopes 18 in (450 mm) across the building footprint might need a stem wall averaging 18 in (450 mm) tall on the low side to bring the floor level, tapering down to a few inches on the high side, with the footing beneath sized separately based on soil bearing capacity.

    The concrete stem wall calculator takes wall length, height, and thickness and returns the concrete volume needed, which is the number to confirm before ordering, since stem wall volume is usually calculated separately from the footing it sits on.

    Why Use a Stem Wall Instead of a Standard Foundation?

    A stem wall solves two problems that a footing alone can’t: getting the finished floor above grade, and creating a continuous vertical bearing surface for the walls above. Without a stem wall, a slab poured directly at grade level, called a monolithic slab, sits close to ground moisture and needs the footing itself to be much wider and more heavily detailed at the perimeter to compensate; a stem wall raises the floor and lets water drain away from the structure instead of pooling against it.

    On sloped sites, stem walls also solve a grading problem — rather than stepping a foundation down a slope in a series of separate footings at different depths, a stem wall of varying height, taller on the downhill side and shorter uphill, lets the top of the wall stay level while the footing beneath follows the slope, or steps down in defined increments.

    Structurally, a stem wall carries the building’s vertical load down to the footing while also resisting lateral pressure from the soil backfilled against it — particularly relevant for crawl space and basement construction, less so for a shallow slab-on-grade stem wall, which sees much lower lateral soil load.

    Common Mistakes

    Under-sizing stem wall thickness on a taller wall, treating an 18 in stem wall the same as a 30+ in one, ignores that lateral soil pressure and bending moment both increase with height, not linearly with a simple rule of thumb. Taller stem walls need engineering review, not a copy-paste of the dimensions used on a shorter wall elsewhere on the same job.

    Backfilling against a stem wall before it has cured to adequate strength, often to keep a schedule moving, risks cracking or bowing the wall under the lateral soil load before the concrete can resist it. Most stem walls need at least 7 days of cure, longer for taller or thinner walls, before backfill loads are applied.

    Missing or undersized vertical reinforcement — the dowels connecting the stem wall to the footing below and the structure above — is a common oversight on DIY and small residential jobs. Without it, the stem wall relies entirely on the concrete’s own tensile strength at the cold joint with the footing, which is far weaker than a properly doweled connection.

    Not accounting for a sloped lot correctly, using a single stem wall height across the whole perimeter instead of stepping or tapering it to the actual grade change, either leaves the low side under-height, causing drainage problems, or the high side excessively tall, wasting concrete and adding unnecessary lateral load.

    Related Calculators You Might Need

    A stem wall’s design starts with the footing beneath it, so check the concrete footing calculator first to confirm that dimension before sizing the wall above it. On a sloped lot, the frost depth/footing depth calculator helps confirm the footing depth is adequate across the full slope, not just at one point. Vertical reinforcement should be checked with the rebar/reinforcing steel calculator once wall height and thickness are set. And if this stem wall is supporting a basement rather than a crawl space, compare it against the concrete foundation wall calculator, since basement walls carry substantially more lateral load and are sized differently.

    Frequently Asked Questions

    What is the purpose of a stem wall?

    A stem wall raises the finished floor above grade for drainage and frost protection, and provides a continuous, level bearing surface for the structure above even when the footing beneath follows a sloped or stepped grade. It’s the vertical link between the footing, which does the structural work of spreading load into the soil, and the framing or slab above.

    How tall should a stem wall be?

    Most slab-on-grade residential stem walls are 12 to 24 in (300 to 600 mm) tall, enough to get the finished floor above grade and provide drainage clearance. Crawl space stem walls run taller, often 24 to 36+ in (600 to 900+ mm), to leave working clearance underneath the floor framing. Height on a sloped lot varies around the perimeter to keep the top of the wall level.

    Is a stem wall the same as a foundation wall?

    They’re related but not identical — a stem wall is typically shorter, usually under 3 ft (900 mm), and used mainly for slab-on-grade and crawl space construction, while a foundation wall usually refers to a taller wall enclosing a full basement, carrying significantly more lateral soil pressure and requiring different reinforcement, thickness, and drainage detailing to resist that added load safely.

    How much concrete do I need for a stem wall?

    Multiply the wall’s length, height, and thickness to get volume, then convert to cubic yards or cubic meters, but do this separately from the footing below, since the two are usually different depths and widths and are often poured at different times. Use the concrete stem wall calculator to get the volume directly from your wall dimensions, including a standard waste allowance.

    Do you need rebar in a stem wall?

    Yes, in almost all cases — vertical dowels connect the stem wall to the footing below, and horizontal reinforcement resists cracking from shrinkage and lateral soil pressure once backfill is placed. Exact bar size and spacing depend on wall height, thickness, and local code, but an unreinforced stem wall taller than a few inches is a code violation in most US jurisdictions.

  • What Is Concrete Bleed Water?

    What Is Concrete Bleed Water?

    Bleed water is the thin layer of water that rises to the surface of freshly placed concrete as heavier solids — cement and aggregate — settle downward under gravity. It’s a normal part of the hydration process in most mixes, not a defect on its own, but finishing a slab too early while bleed water is still present traps it below the surface and causes scaling, dusting, or delamination later. Bleed water typically appears within 20 to 90 minutes of placement and should fully evaporate or be worked in before final finishing begins.

    How Much Bleed Water Is Normal?

    Bleed rate depends almost entirely on the water-cement ratio and the fineness of the cement and fine aggregate. A mix with a water-cement ratio of 0.45 or lower typically shows minimal bleeding — a thin sheen that disappears in under 30 minutes. A mix at 0.60 or higher, common when extra water is added on-site for workability, can bleed visibly for over an hour and leave a noticeable water layer, sometimes 1/16 to 1/8 in (1.5–3 mm) deep across the surface.

    Worked example: a standard 3,000 PSI (20.7 MPa) driveway mix at a 0.50 water-cement ratio should show light bleeding for 30–45 minutes after placement in moderate weather, finishing once that sheen disappears and the surface can support foot pressure without leaving more than a slight indentation.

    Because bleed rate tracks so directly with mix water content, the water-cement ratio calculator is the right starting point if a slab is bleeding more than expected — it shows how much reducing the ratio, or switching to a water-reducing admixture instead of adding water, would cut bleed time and improve the finished surface. The concrete admixture dosage calculator can help size that water-reducer correctly rather than guessing at a dosage.

    Why Does Bleed Water Cause Problems?

    Bleed water rises because fresh concrete is a suspension, not a solid — cement particles and fine aggregate are denser than water and settle under gravity while the mix is still fluid, pushing excess water toward the surface, and sometimes trapping it beneath larger aggregate particles or rebar, a related issue called plastic settlement.

    The problem isn’t the water itself; it’s timing. ACI 302.1R (Guide for Concrete Floor and Slab Construction) addresses this directly in its section on treating bleeding as a finishing problem: finishing should not begin while bleed water is still present on the surface, and water should never be added during finishing to make troweling easier. If a finisher trowels or applies a curing compound while bleed water is still on or near the surface, that water gets sealed in rather than allowed to evaporate. Trapped water weakens the immediate surface layer, since the water-cement ratio right at the top becomes much higher than the rest of the slab, which shows up later as dusting, scaling, or a soft surface layer that visibly delaminates.

    The reverse problem — finishing too early while bleed water is still actively rising — is just as damaging: troweling wet, bleeding concrete works excess water and fine material into the surface, creating a weak, water-rich layer at the top called a “laitance” layer that dusts under foot traffic.

    The correct sequence is to wait until bleed water has stopped rising and the sheen has evaporated or been removed with a broom or squeegee, then begin finishing operations.

    Common Mistakes

    Finishing the surface while a visible water sheen is still present is the single most common bleed-water error, usually caused by pressure to finish a job on schedule. The fix isn’t complicated — wait for the sheen to disappear, even if that costs 30–60 extra minutes on the schedule.

    Adding water at the truck to make a stiff mix easier to place, without accounting for the extra bleed water it will produce, is common on hot days when a crew is worried about workability. This raises the water-cement ratio beyond the design mix and turns a normally low-bleed pour into one that bleeds heavily and finishes weak at the surface.

    Using a fogging or evaporation retarder without addressing the underlying mix design treats a symptom instead of the cause — evaporation retarders slow surface drying in hot, windy conditions, which is useful, but they don’t reduce bleed water itself, and combining a wet mix with a retardant just extends the wait before finishing is safe.

    Broom-finishing or hard-troweling too aggressively over a slab that still has fine bleed water beneath the surface pushes that water and the finer particles back up, producing a soft, dust-prone finish even on a slab that looked ready.

    Related Calculators You Might Need

    Bleed water almost always traces back to the mix’s water content, so after checking the water-cement ratio above, it’s worth reviewing the full concrete mix ratio calculator to see whether aggregate gradation or cement content is contributing as well — the cement quantity calculator is useful here if you suspect the mix is under-cemented relative to its water content. If bleeding is combined with a slow setting time, check the concrete curing time estimator, since bleed water delays the point at which curing measures can safely begin. And if you’re troubleshooting a slab that’s already showing dusting or scaling from a past bleed-water issue, the concrete resurfacing calculator can help scope an overlay or resurfacing repair.

    Frequently Asked Questions

    What causes bleed water in concrete?

    Bleed water forms because cement and aggregate particles are denser than water and settle under gravity while the mix is still fluid, pushing excess mixing water upward to the surface. Mixes with a higher water-cement ratio, finer cement, or less fine aggregate bleed more; well-proportioned, lower-water mixes bleed less and finish faster. Ambient temperature and slab thickness also influence how quickly that water reaches the top.

    Is bleed water a problem in concrete?

    Not on its own — some bleeding is normal and expected in most mixes. It becomes a problem when finishing happens at the wrong time relative to it: too early and it gets worked into the surface as a weak laitance layer; too late, after sealing or hard-troweling over standing water, and it gets trapped beneath the surface, causing scaling or delamination. Timing the finish correctly is what actually matters.

    How long does it take for bleed water to evaporate?

    Typically 20 to 90 minutes, depending on the water-cement ratio, ambient temperature, humidity, and wind. A well-proportioned mix in moderate weather often finishes bleeding in under 30 minutes; a wet mix in cool, humid, still conditions can take well over an hour, which pushes back the entire finishing schedule and can affect the crew’s timing for the rest of the job.

    How do I stop concrete from bleeding too much?

    Reduce the water-cement ratio, either by using less mixing water or switching to a water-reducing admixture to maintain workability at a lower water content. Use the water-cement ratio calculator to check how much your current ratio exceeds the target for your specified strength before adjusting the mix, and confirm any change with the ready-mix supplier before the pour actually starts.

    Can you finish concrete while bleed water is still present?

    No — finishing over standing bleed water works that excess water and fine particles into the surface, weakening it. Wait until the surface sheen has fully evaporated or been removed, and the surface can support light foot pressure without more than a slight indentation, before starting float or trowel work. Rushing this step is the single biggest cause of a dusting, weak-surface slab.

  • What Is Concrete Curing?

    What Is Concrete Curing?

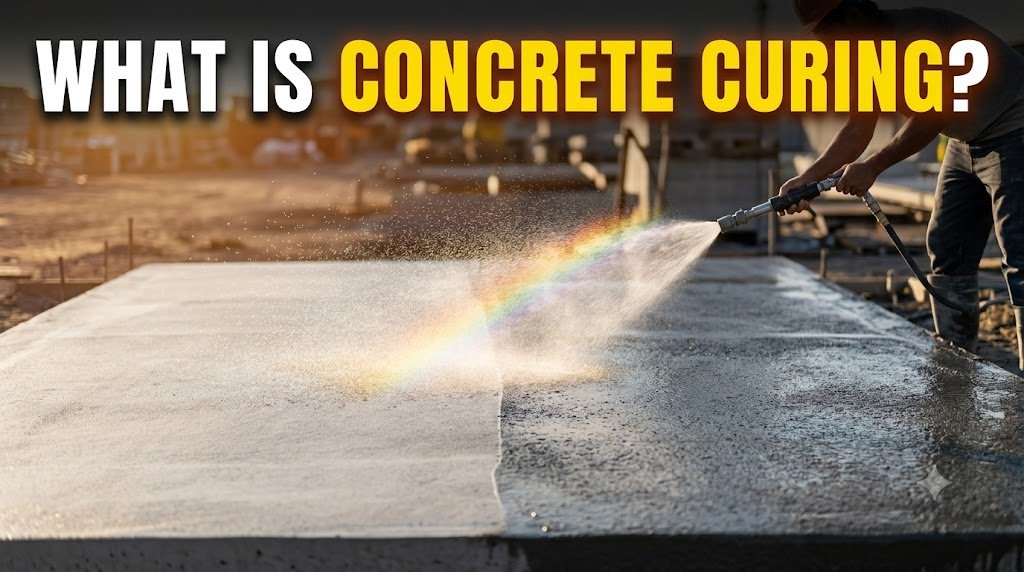
    Concrete curing is the process of keeping freshly placed concrete moist and within a controlled temperature range so cement hydration can continue and the mix can reach its design strength. Curing is not the same as drying — concrete that loses moisture too quickly stops hydrating before the cement has fully reacted, leaving it weaker, more porous, and prone to surface cracking. Under normal curing conditions, concrete reaches roughly 70% of its 28-day design strength by day 7, and close to full strength by day 28. Skipping or shortening the curing period is one of the most common causes of slab failure.

    How Long Does Concrete Take To Cure?

    Cement hydration follows a fairly predictable strength-gain curve when temperature and moisture are held within normal ranges (10–25°C / 50–77°F, kept damp or sealed). At 3 days, a standard mix is around 40% of its 28-day strength. At 7 days it’s near 70%. At 14 days it’s around 90%, and by 28 days — the age used for standard compressive strength testing under ASTM C39 — it’s effectively at design strength, though hydration technically continues for years at a much slower rate.

    Temperature changes that curve significantly. Hydration slows sharply below 10°C (50°F) and essentially stops at freezing (0°C / 32°F), which is why cold-weather pours need insulating blankets or heated enclosures. Above 25°C (77°F), hydration accelerates, but the concrete also loses surface moisture faster, raising the risk of plastic shrinkage cracking before curing measures are even in place.

    Because ambient temperature has this much influence on the schedule, a flat “7 days, then 28 days” rule doesn’t hold for every site. The concrete curing time estimator adjusts the strength-gain timeline for your actual site temperature, giving a more accurate date for form removal, foot traffic, or load-bearing use than the generic rule of thumb.

    What Happens Chemically During Curing?

    Cement hydration is a chemical reaction, not evaporation. Portland cement contains tricalcium silicate (C3S) and dicalcium silicate (C2S), which react with water to form calcium silicate hydrate (C-S-H) gel — the compound that actually binds aggregate together and gives concrete its strength — plus calcium hydroxide as a byproduct. The reaction is exothermic: a large slab pour can measure several degrees warmer at its core than the surrounding air for the first 24–48 hours.

    This reaction needs water present in the capillary pores of the paste to keep going. If the surface dries out before hydration is far enough along, the reaction stops locally even though the interior is still damp — the result is a weak, dusting surface layer and a higher risk of shrinkage cracking, because the dry surface shrinks while the wet interior doesn’t. Three curing methods address this: ponding or continuous wetting (keeps the surface saturated directly), wet burlap or cotton mats (reduces evaporation while topping up moisture), and sprayed-on curing compounds (form a membrane that traps the mix’s own water inside). Plastic sheeting works the same way as a compound but needs to be sealed at the edges, or it just traps humid air instead of holding moisture against the slab.

    Common Mistakes

    Stripping forms too early is one of the most common errors on residential jobs. Forms hold moisture against the edges of a pour; removing them at 24 hours on a cool day exposes those edges to rapid drying and produces spalling and cracking along the perimeter within the first week. Wait until the concrete has reached at least 70% of design strength, generally 5–7 days in normal conditions, longer in cold weather.

    Pouring in hot, dry, or windy weather without a curing plan already in place causes plastic shrinkage cracking — fine, random cracks that appear within the first few hours, before the concrete has even set. Contractors who wait until after finishing to think about curing are usually too late; the fix is scheduling curing compound application or wet covering within 30–60 minutes of finishing on hot or windy days.

    Adding extra water to the mix on-site, thinking a wetter mix cures better, does the opposite. It raises the water-cement ratio, which increases porosity, reduces final strength, and increases both shrinkage and bleed water, which delays finishing and weakens the surface layer.

    Treating curing and drying as the same thing leads to sealing a slab too soon. A sealer or coating applied before the slab has cured properly traps residual moisture underneath, which can cause blistering, delamination, or efflorescence months later. Most sealers shouldn’t go down until at least 28 days after the pour.

    Related Calculators You Might Need

    Curing time is directly affected by the mix itself, so it’s worth checking your water-cement ratio before you’re on-site — the water-cement ratio calculator helps confirm the mix isn’t unnecessarily wet, which shortens strength gain and increases cracking risk. If you need to convert a lab or field compressive strength reading between units, the concrete compressive strength converter handles PSI and MPa conversions so you can compare test results against the design strength you specified. For anyone still finalizing the mix itself, the concrete mix ratio calculator works out cement, sand, and aggregate proportions before the pour, which is the point where curing outcomes are actually decided. And if this is for a new slab, run the numbers first with the concrete slab calculator to confirm volume before ordering.

    Frequently Asked Questions

    How long does concrete need to cure before you can walk on it?

    Concrete is generally safe for foot traffic after 24–48 hours, once it has set and reached roughly 25–30% of its design strength. That’s enough to resist light loads without leaving marks or disturbing the surface, but it’s not enough for anything heavier. Avoid dragging furniture, ladders, or equipment across it during this window, since point loads can still dent a surface that hasn’t fully hardened.

    How long before you can drive on a new concrete driveway?

    Wait a minimum of 7 days before light vehicle traffic, and ideally the full 28 days before parking heavier vehicles like trucks or RVs. At 7 days the slab is only around 70% of its design strength, which is enough for cars but risks surface damage under concentrated loads like jack stands or trailer tongues. Cold weather extends this timeline further, so check actual site temperatures before committing to a date.

    Does concrete cure underwater?

    Yes — cement hydration doesn’t need air, only water, so concrete continues gaining strength when fully submerged, which is why ponding is a valid curing method. Underwater concrete for marine structures uses special mix designs, often with anti-washout admixtures, to prevent the cement paste from washing away before it sets, but standard concrete cured by ponding on land behaves the same way.

    What happens if concrete dries out too fast?

    Rapid surface drying stops hydration in the top few millimeters while the interior is still reacting, which causes plastic shrinkage cracking, a weak dusting surface, and reduced final strength at the surface layer specifically, even if the core strength is fine. This is most common on hot, windy, low-humidity days, and is prevented by covering or applying curing compound within an hour of finishing.

    Do I need to cure concrete in cold weather?

    Yes, and it matters more, not less. Hydration slows dramatically below 10°C (50°F) and essentially stops at freezing, so cold-weather pours need insulating blankets, heated enclosures, or accelerating admixtures to keep the reaction going. Use the concrete curing time estimator to see how a specific site temperature shifts your strength-gain timeline before deciding when forms can come off or loads can be applied.

  • Behind the Site

    Behind the Site

    We built this site to be a set of calculators first, not a media company — but over time we’ve ended up with a small footprint across other platforms too. Here’s an honest walk-through of every one of them: what’s actually there, why it exists, and how you can confirm it’s really us.


    Most people find us because they typed “how much concrete do I need for a 10×10 slab” into Google and landed on a calculator. That’s the main thing this site does, and it’ll stay that way. But we also maintain a handful of accounts elsewhere on the web — some active, some quieter — and we’d rather explain what each one is for than leave people guessing.

    This isn’t a press page. Nobody wrote about us and we’re not claiming otherwise — these are our own accounts, run by our own team, and this post is basically the reasoning behind them written out in full.

    Why we bother keeping accounts off our own domain

    A concrete calculator is a strange kind of product to build trust around. People aren’t just reading an opinion piece — they’re using our output to order material, size a footing, or figure out how many bags of ready-mix to buy for a weekend pour. Get it wrong and it costs someone real money and a wasted trip to the supplier.

    Because of that, we’ve found it worth having a presence in a few places beyond the calculators themselves:

    Somewhere to show, not just tell. Certain calculators — rebar spacing, footing depth, reading a mix-design ratio — are genuinely easier to explain with a short video than a wall of text. We didn’t want to clutter the calculator pages themselves with embedded video, so those live on a couple of dedicated video accounts instead.

    Somewhere permanent for the reference material. Our methodology write-ups reference specific standards (ACI, ASTM) and we wanted at least one copy of that documentation sitting somewhere that isn’t tied to our own uptime.

    Somewhere to just be reachable. A chunk of the accounts below exist mainly so the handle “allconcretecalculator” resolves to something real if someone goes looking, rather than sitting open for someone else to claim.

    None of this replaces the actual product. If you’re here for a calculator, the accounts below aren’t where you want to be — they’re supporting cast, not the main site.

    The video and audio accounts

    Vimeovimeo.com/allconcrete
    This is where the longer calculator walkthroughs live — the ones where watching someone actually enter numbers and read the output is genuinely clearer than a screenshot. Vimeo won hosting duty over YouTube mainly because we wanted a cleaner, ad-free embed for the handful of times we do link out to a video from a guide.

    Dailymotiondailymotion.com/user/AllConcreteCalculator
    A mirror of the same video library, mostly for reach in regions where Dailymotion sees more traffic than Vimeo. Same content, different audience.

    SoundCloudsoundcloud.com/allconcretecalculator
    The smallest and most experimental of the three — short audio walk-throughs for people who’d rather listen than watch while they’re on a job site. Still early, but the format has held up better than we expected.

    The documentation accounts

    Issuuissuu.com/allconcrete
    Longer reference documents — the kind that don’t fit naturally into a calculator page’s layout but that some visitors want as a standalone PDF-style read. Think full methodology breakdowns rather than quick guides.

    DZonedzone.com/users/5547470/allconcrete.html
    More technical write-ups, aimed at the smaller slice of our audience that’s actually curious about how the calculators are built rather than just using the output — formula sourcing, unit conversion edge cases, that kind of thing.

    Internet Archivearchive.org/details/@allconcretecalculator
    An archived copy of key reference material, kept somewhere that will outlast any single hosting decision we make. This one is closer to a backup than a channel.

    The academic and research accounts

    We’re not an academic institution, and we’re not pretending to be — but our methodology leans on published standards, and a few visitors each month are specifically checking sourcing rather than looking for a quick answer. These three accounts exist for them.

    Google Scholarscholar.google.co.in/citations?user=p0NYC-wAAAAJ
    A citations profile tying back to the standards references our calculators are checked against.

    Academia.eduindependent.academia.edu/AqeelAhmed349
    Similar purpose, different audience — some researchers use Academia.edu almost exclusively and never touch Scholar.

    Open Heritage Labslabs.openheritage.eu/profiles/allconcretecalc/activity
    The newest and smallest of the three — an activity profile we’ve kept mostly to stay connected to a couple of research contacts who reference construction-material data.

    The community and review accounts

    This is the least glamorous group and, honestly, the one that gets the least regular attention from us. These exist mostly so we’re reachable in spaces contractors and homeowners already spend time in, rather than because we’re running an active content strategy on each one.

    Disqusdisqus.com/by/allconcretecalculator
    Used when we reply to questions on articles that use Disqus for comments — a byproduct of participating in discussions elsewhere, not a channel we post to directly.

    Goodreadsgoodreads.com/user/show/202684880-concrete-calculator
    Kept mainly for a couple of construction-reference books we occasionally recommend in guides.

    TripAdvisortripadvisor.com/Profile/allconcretecalculato
    The odd one out on this list, kept from an early team member’s contributions and left up rather than deleted. We’re not pretending it’s central to what we do.

    Hatenaprofile.hatena.ne.jp/allconcrete
    A community profile for a small but consistent slice of our traffic coming from Japan.

    Bloglovinbloglovin.com/@concretecalculator3
    Syndicates our guide updates for readers who follow blogs through a feed reader rather than checking sites directly.

    The creative and identity accounts

    Unsplashunsplash.com/@allconcretecalc
    A handful of job-site photos we’ve contributed over time — mostly pours and formwork shots taken while testing calculator scenarios in the field.

    TEDted.com/profiles/51868607
    A community profile, kept mainly for consistency with the rest of the accounts on this list rather than active participation.

    Gravatargravatar.com/allconcretecalculator
    The identity profile tied to the email address our editorial team uses for comments and sign-ups elsewhere, so an avatar shows up consistently rather than a blank default.

    Being straightforward about this

    A few of these seventeen accounts get real, regular use. A few exist mainly to hold the handle and confirm ownership. We’d rather tell you which is which than have every profile pretend to be an active channel — that’s not particularly useful to anyone, and it’s not accurate.

    What this list isn’t

    It’s not press coverage — none of these are third parties writing about us; they’re accounts we run ourselves. It’s not a ranking signal we’re leaning on either — a profile on a platform like this is a weak, supporting signal at best. Mostly, this is just documentation: if you come across one of these accounts on its own and want to know it’s genuinely tied to this site, this post is how you check — every profile above is also listed in this page’s structured data below, which is the standard way sites declare ownership of external accounts to search engines.

    AllConcreteCalculator.com Editorial Team

    We keep this list updated as accounts change or platforms shut down. If something here looks stale or a link is broken, let us know.

  • How Much Does a Concrete Driveway Cost? (US, UK, AU, CA)

    How Much Does a Concrete Driveway Cost? (US, UK, AU, CA)

    A standard concrete driveway costs $8–$18 per square foot (USD) installed in the US, £90–£160 per square metre in the UK, AUD $65–$130 per square metre in Australia, and CAD $10–$22 per square foot in Canada. Those are contractor-installed prices including labour, formwork, finishing, and a basic broom or brushed finish. Stamped, exposed aggregate, and coloured concrete all add cost. The variables that move the number most are site access, existing demolition, soil conditions, and local ready-mix pricing in your area.

    To get an accurate volume and material estimate before you call a contractor, use the concrete driveway calculator — it handles rectangular, L-shaped, and circular configurations and outputs cubic yards/metres, bag counts, and a material cost range.

    What Does a Concrete Driveway Actually Cost by Country?

    The table below reflects 2025–2026 market data for a standard residential driveway, plain broom finish, 4 inches / 100 mm thick, single-car width (approximately 10 ft × 20 ft / 3 m × 6 m) to double-car width (20 ft × 20 ft / 6 m × 6 m). Prices include labour, ready-mix delivery, formwork, and basic finishing. They exclude demolition of existing surfaces.

    CountryLow EndHigh EndNotes
    United States$4,500 (single)$10,800 (double)Varies widely by state — Southern states cheaper, Northeast/West Coast significantly higher
    United Kingdom£2,700 (single)£7,200 (double)Based on 3m × 6m to 6m × 6m; London adds 20–30% premium
    AustraliaAUD $3,900 (single)AUD $15,600 (double)Sydney/Melbourne at upper end; regional QLD/SA cheaper
    CanadaCAD $4,500 (single)CAD $13,200 (double)Prairie provinces cheaper; BC and Ontario at upper end

    What Factors Push the Price Up or Down?

    Thickness is the most controllable cost lever. A 4-inch / 100 mm slab is standard for passenger vehicles. Heavy trucks, RVs, or equipment access require 6 inches / 150 mm, which increases concrete volume by 50% and adds roughly 30–40% to material cost alone.

    Demolition of an existing asphalt or concrete surface typically adds $1.50–$4.00 per square foot (USD) or £15–£40/m² (UK) depending on thickness and disposal costs. If the existing surface is asphalt over a decent base, some contractors will pour directly over it — this is not recommended for longevity but does cut upfront cost.

    Reinforcement makes a meaningful difference. A plain slab relies entirely on the concrete’s compressive strength and proper joint placement. Adding rebar on 18-inch / 450 mm centres or a layer of wire mesh adds $0.50–$1.20/sqft (USD) to labour and material but meaningfully extends slab life in freeze-thaw climates. In the UK and Australia, mesh reinforcement is common practice and often already included in quotes.

    Site preparation — grading, compacting a gravel sub-base, and managing drainage — can add significant cost if the existing ground is poor. A sloped site or one with clay soil typically requires more base work than a level sandy site. Budget at least $1.00–$2.50/sqft (USD) or £10–£25/m² for this if it is not already included in a contractor’s quote.

    Concrete Driveway Cost Breakdown: Materials vs Labour

    On a typical US residential project, material costs (ready-mix, reinforcement, formwork lumber) account for roughly 40–55% of the total installed price. Labour makes up the rest. In the UK and Australia, labour costs proportionally more, reflecting higher hourly rates — labour can be 55–65% of total project cost.

    Cost ComponentUS (per sqft)UK (per m²)AU (per m²)
    Ready-mix concrete$2.50–$4.50£35–£60AUD $130–$200
    Labour (placing, finishing)$3.00–$6.00£40–£75AUD $40–$80
    Formwork & prep$1.00–$2.50£12–£25AUD $15–$30
    Reinforcement (rebar/mesh)$0.50–$1.20£5–£15AUD $8–$20
    Sealing (optional)$0.50–$1.50£6–£14AUD $8–$18

    The ready-mix vs bagged concrete cost calculator is useful if you are deciding between ordering a ready-mix truck or mixing on-site for a smaller section. For most driveways larger than about 0.5 cubic yards / 0.4 m³, ready-mix is cheaper per yard once you factor in your time.

    Concrete vs Asphalt vs Pavers: Is Concrete Worth It?

    MaterialInstalled Cost (US, sqft)LifespanMaintenance
    Concrete$8–$1830–50 yearsSealing every 3–5 years; joint filling
    Asphalt$3–$715–30 yearsSeal-coating every 2–3 years; more frequent
    Interlocking pavers$12–$2525–50 yearsOccasional re-levelling; weed control
    Gravel$1–$3OngoingAnnual top-up; edging maintenance

    Concrete costs more upfront than asphalt in every market but requires less ongoing maintenance and lasts significantly longer under normal residential use. In freeze-thaw climates (Canada, northern US, UK), concrete requires proper joint placement and a sealed surface to resist spalling — skipping these steps is the primary reason driveways fail early. In hot climates (Australia, southern US), concrete holds up better than asphalt, which can soften and rut under sustained heat.

    Common Mistakes That Inflate Cost or Cause Failure

    Skipping the sub-base. Pouring concrete directly on unprepared or soft ground is the single most common cause of cracked driveways. A compacted 4-inch / 100 mm gravel base costs money upfront but is non-negotiable for long-term performance. Contractors who skip this to cut cost are not saving you money — they are moving the cost to a future repair or replacement.

    Ordering the wrong PSI mix. Residential driveways need a minimum 3,500 PSI / 24 MPa mix in moderate climates. In areas with sustained freeze-thaw cycles (most of Canada, northern US, UK), 4,000 PSI / 27.5 MPa with air entrainment is the correct spec. Using a 2,500 PSI / 17 MPa mix — common on some residential pours to cut cost — produces a surface that scales and spalls within a few winters.

    Ignoring control joints. Concrete shrinks as it cures. Without saw-cut or tooled control joints placed every 8–10 feet / 2.4–3 m, the slab will crack where it wants to rather than where you manage it. A contractor who does not include joint placement in their scope is not describing a complete job.

    Accepting a short-load delivery without accounting for the fee. Ready-mix trucks have a minimum charge, typically covering 7–10 cubic yards / 5.4–7.6 m³. A small driveway pour that only needs 3–4 cubic yards will attract a short-load surcharge of $50–$200+ depending on the supplier. Use the short load fee estimator to factor this into your budget before comparing quotes.

    Related Calculators You Might Need

    Once you have your driveway dimensions, the concrete driveway calculator gives you volume in cubic yards and metres plus a material cost estimate. If you are coordinating delivery, the concrete delivery cost calculator breaks down per-yard rates and surcharges by pour size. For projects in the US, the concrete price per yard by state tool gives current regional ready-mix pricing so you can sanity-check supplier quotes. If you are also adding a slab for a garage or shed alongside the driveway, use the full concrete project estimator to combine multiple pours into a single budget figure.

    Frequently Asked Questions

    How much does a concrete driveway cost per square foot?

    In the US, installed concrete driveway cost runs $8–$18 per square foot for a standard 4-inch slab with a broom finish. Plain, single-car driveways in lower-cost states come in at the lower end. Double-wide driveways with decorative finishes in high-cost markets hit the upper end or beyond. Labour is typically 45–55% of that figure.

    Is a concrete driveway cheaper than pavers?

    Concrete is cheaper to install than interlocking pavers in almost every market — typically $8–$18/sqft vs $12–$25/sqft in the US. Pavers offer easier crack repair (replace individual units rather than patching or replacing a slab) and are often preferred for aesthetics, but the installed cost premium is real and significant for large surfaces.

    How long does a concrete driveway last?

    A properly installed concrete driveway with correct mix design (minimum 3,500 PSI), adequate sub-base, control joints, and periodic sealing lasts 30–50 years. Most premature failures — scaling, cracking, spalling — trace back to under-spec mix design, missing control joints, or inadequate base preparation rather than product failure.

    What is the cheapest way to get a concrete driveway?

    Get at least three quotes — prices for identical scopes often vary 20–35% between contractors. Time the pour during shoulder season (spring and early autumn in cold climates) when contractors are less busy. Consider a plain broom finish over decorative options; stamped or exposed aggregate adds $4–$8/sqft. Use the concrete cost calculator to arrive at a rough material figure so you can identify any quotes that seem inflated on material cost.

    Do I need a permit for a concrete driveway?

    In most US jurisdictions, a residential driveway does not require a building permit unless it connects to a public road or involves drainage work. The UK requires permitted development rules compliance — most standard driveways are permitted but permeable surfacing may be required under current PD rules. Australia and Canada vary by municipality; check with your local council or city before pouring.

  • How Much Does a Concrete Patio Cost? (2026 Prices by Country)

    How Much Does a Concrete Patio Cost? (2026 Prices by Country)

    Concrete patio installation costs $6–$20 per square foot in the US, £80–£160 per square metre in the UK, AUD $50–$120 per square metre in Australia, and CAD $8–$20 per square foot in Canada for a standard 4-inch / 100 mm plain or broom-finish slab. Stamped concrete, coloured pours, or exposed aggregate add $5–$15/sqft or £50–£100/m² to those figures. A typical 300 sqft / 28 m² patio in the US costs $1,800–$6,000 installed, with most mid-range projects landing around $3,500–$4,500 for a plain finish.

    Before getting quotes, calculate your volume and material cost with the concrete patio calculator — it outputs cubic yards/metres, bag requirements, and a material cost range based on your dimensions.

    2026 Concrete Patio Prices by Country

    These figures represent contractor-installed pricing including site preparation, formwork, ready-mix delivery, placing, finishing, and basic curing. They exclude demolition of existing surfaces, drainage work, or decorative features unless stated.

    CountryPlain Finish (per sqft/m²)Stamped/DecorativeTypical 300 sqft / 28 m² Total
    United States$6–$12/sqft$12–$20/sqft$1,800–$6,000
    United Kingdom£80–£130/m²£130–£220/m²£2,240–$6,160
    AustraliaAUD $50–$90/m²AUD $90–$160/m²AUD $1,400–$4,480
    CanadaCAD $8–$14/sqftCAD $14–$22/sqftCAD $2,400–$6,600

    Note: UK prices converted to GBP per m²; the pound-per-sqft metric is not commonly used in the UK market. AUD prices reflect national averages — capital city markets (Sydney, Melbourne) sit 15–25% above these ranges.

    What Does Patio Size Do to the Final Bill?

    Per-unit pricing drops as surface area increases because mobilisation costs, formwork setup, and minimum delivery charges are spread across more square footage. A 100 sqft / 9.3 m² patio almost always costs more per unit than a 400 sqft / 37 m² patio from the same contractor.

    Patio SizeUS Total (plain)UK Total (plain)AU Total (plain)
    100 sqft / 9.3 m²$900–$1,500£740–£1,210AUD $465–$840
    200 sqft / 18.6 m²$1,500–$2,800£1,490–£2,420AUD $930–$1,670
    300 sqft / 27.9 m²$1,800–$3,600£2,230–£3,630AUD $1,395–$2,510
    500 sqft / 46.5 m²$2,500–$5,000£3,720–£6,045AUD $2,325–$4,185

    Plain vs Stamped vs Exposed Aggregate: Which Finish Is Worth the Premium?

    Plain broom finish is the cheapest, produces a slip-resistant surface, and is practically maintenance-free. It has no visual interest but holds up as well as any other finish. This is the correct choice for utility patios, side yards, and budget projects.

    Stamped concrete involves pressing patterns into the surface before it cures. It can replicate stone, slate, brick, or wood plank appearances. The labour premium is real — $5–$10/sqft (USD) over plain — because timing is critical and mistakes cannot be undone once the concrete sets. Colouring and annual resealing are required to maintain appearance; the reseal cost runs $0.50–$1.50/sqft every 2–4 years.

    Exposed aggregate involves washing the surface shortly after pour to reveal the stone or gravel within the mix. It offers a textured, slip-resistant finish with more visual character than a plain slab at a lower premium than stamped — typically $2–$5/sqft over plain. Popular in Australia and increasingly common in the UK. The aggregate choices (river pebble, crushed granite, basalt) significantly affect final appearance.

    Use the stamped concrete calculator if you are pricing a decorative patio — it factors in the higher material and labour costs for coloured, stamped, or textured pours.

    Common Mistakes That Cost More Than They Should

    Skipping drainage planning. A patio slab poured without adequate slope away from the house foundation causes water pooling and long-term drainage problems that are expensive to fix after the fact. The correct slope is 1/8 to 1/4 inch per foot (1–2%) away from any structure. Verify this is in the contractor’s scope, not an afterthought.

    Under-specifying mix design for the climate. In Canada, the northern US, and the UK, a patio slab exposed to freeze-thaw cycling needs a minimum 4,000 PSI / 27.5 MPa mix with air entrainment (4–7% air). Patios poured with standard 3,000 PSI / 20.5 MPa mixes in these climates will surface-scale within a few winters. In Australia’s hot climates, a low water-cement ratio is more important than air entrainment for durability.

    Pouring without control joints. Patio slabs thicker than 3 inches / 75 mm need saw-cut or hand-tooled control joints every 8–10 feet / 2.4–3 m to manage shrinkage cracking. Without them, random cracking appears within the first year. A contractor who does not include joint placement in the quote description is missing a critical step.

    Accepting verbal quotes without written specs. Concrete work involves too many variables — mix design, thickness, reinforcement, finish type, sub-base work, joint placement, curing method — for a verbal quote to be meaningful. Get the PSI spec, slab thickness, sub-base depth, and included/excluded items in writing before any work starts.

    Related Calculators You Might Need

    Start with the concrete patio calculator for volume and material estimates. If you are deciding between ready-mix delivery and on-site mixing for a smaller patio, the ready-mix vs bagged concrete cost calculator shows the break-even point in cubic yards. For decorative pours, the concrete pigment and colour calculator helps size pigment quantities. Once you have a volume figure, the concrete cost calculator gives a full installed cost estimate with labour included.

    Frequently Asked Questions

    How much does a 20×20 concrete patio cost?

    A 20×20 foot / 6×6 metre patio (400 sqft / 37 m²) costs roughly $2,400–$6,000 in the US for a plain broom finish, or $4,800–$10,000 for stamped. In the UK, expect £3,000–£5,200 for plain and £5,200–£8,800 for decorative. In Australia, AUD $1,850–$3,330 for a plain pour. These are installed costs — use the concrete patio calculator for a more precise estimate based on your local material pricing.

    Is a concrete patio cheaper than pavers?

    Concrete is consistently cheaper to install than individual pavers — often by 30–50% per square foot. Pavers offer easier repair (swap individual units) and no cracking risk from shrinkage, but the material and labour premium is significant. A poured concrete patio with proper joint placement and sealing performs comparably over its lifespan for most residential uses.

    How long does a concrete patio last?

    A properly installed concrete patio with correct mix design, adequate sub-base, control joints, and periodic sealing lasts 25–40 years in most climates. Failure modes are almost always tied to under-spec mix design (wrong PSI or missing air entrainment), absent control joints, or inadequate drainage causing pooling and freeze-thaw damage.

    Can I pour a concrete patio myself to save money?

    DIY is viable for small patios under 200 sqft / 18.6 m² if you have experience with concrete work. The main risks are incorrect mix water ratio (too wet = weaker slab), poor joint placement, and inadequate curing. For larger pours, the logistics of coordinating a ready-mix truck delivery with adequate labour to place and finish the concrete before it sets makes DIY significantly harder. Most DIY mistakes are unfixable after the concrete cures.

    Does a concrete patio add value to a home?

    In most markets, a well-executed concrete patio adds usable outdoor living space and is viewed positively by buyers, but the return-on-investment is not dollar-for-dollar. US remodelling surveys consistently show outdoor concrete work returning 50–70% of project cost in resale value. The return is higher in climates where outdoor living is year-round and lower where the patio season is short.

  • Ready-Mix Concrete Prices Worldwide (2026 Data)

    Ready-Mix Concrete Prices Worldwide (2026 Data)

    Ready-mix concrete is priced per cubic yard in the US and Canada and per cubic metre in the UK, Australia, and most of Europe. As of 2025–2026, benchmark prices are roughly $130–$175 per cubic yard in the US, £120–£185 per cubic metre in the UK, AUD $200–$350 per cubic metre in Australia, CAD $160–$220 per cubic yard in Canada, and €100–€160 per cubic metre in Western Europe. These are ex-plant or delivered prices for standard residential-grade 3,500–4,000 PSI / 24–27.5 MPa mixes. High-strength, fibre-reinforced, or specialty admixture mixes add to those figures.

    The concrete price per yard by state gives current regional pricing for US buyers. For volume and delivery planning, the concrete truck load calculator shows how many truckloads your pour requires.

    Ready-Mix Concrete Price by Country (2026)

    The figures below represent standard structural residential mixes (3,500–4,500 PSI / 24–31 MPa) delivered to site. Ex-plant (pickup) prices are 5–15% lower than delivered prices. High-strength and specialty mixes carry a 15–40% premium over standard grades.

    Country / RegionStandard Mix (per m³ or yd³)UnitNotes
    United States (national avg)$130–$175per cubic yardSouthern states at lower end; Northeast, West Coast at upper end
    United States (high-cost markets)$175–$220per cubic yardNYC, LA, San Francisco, Boston
    United Kingdom£120–£185per cubic metreLondon adds 10–20% premium; Northern England and Scotland at lower end
    Australia (national avg)AUD $200–$300per cubic metrePerth and Darwin often higher due to logistics
    Australia (Sydney / Melbourne)AUD $260–$350per cubic metreCapital city premium reflects labour and demand
    Canada (national avg)CAD $160–$220per cubic yardPrairie provinces at lower end; BC and Ontario at upper end
    Germany / France / Netherlands€100–€145per cubic metreLocal aggregates and energy costs drive variation
    Spain / Portugal / Italy€85–€130per cubic metreCheaper labour and materials vs Northern Europe
    UAE / Gulf statesAED 250–400 / SAR 250–380per cubic metreLarge volume projects get significant discounts
    India₹5,000–₹8,000per cubic metreVaries sharply by city; metro areas at upper end

    Note: All prices are approximate and based on publicly available supplier data and industry reporting from 2024–2025. Ready-mix pricing fluctuates with cement commodity prices, diesel fuel costs (which affect delivery), and local aggregate availability. Verify current pricing with local suppliers before budgeting.

    What Is Driving Ready-Mix Prices in 2026?

    Cement costs. Portland cement is the primary cost driver in ready-mix concrete. Global cement prices rose 15–25% between 2021 and 2024 due to energy cost increases (cement kilns are energy-intensive) and logistics disruption. In 2025–2026, prices have partially stabilised but remain above 2020 levels in most markets.

    Diesel fuel and delivery logistics. Ready-mix trucks run on diesel, and fuel costs directly affect delivery charges. In markets where the delivery surcharge is itemised separately (common in the US and UK), expect $15–$35 per truckload in fuel surcharges on top of the per-yard price. Rural sites or difficult-access locations may see higher surcharges or even refusal of service.

    Aggregate availability and transport. Sand and crushed stone make up 60–75% of concrete by weight. In regions where local aggregate sources are limited or quarrying is restricted (parts of the UK, urban Australia, island markets), aggregate transport cost adds meaningfully to the mix price. This is why coastal and island markets often have the highest ready-mix prices.

    Minimum load charges and short-load fees. Ready-mix trucks hold 7–10 cubic yards / 5.4–7.6 m³. Orders below the minimum attract a short-load surcharge — typically $50–$200 (USD) or £50–£150 (UK) per pour. This makes small residential pours disproportionately expensive on a per-yard basis. Use the short load fee estimator to quantify this before deciding between ready-mix and on-site bagged mixing.

    Standard Mix Grades and Their Price Relationship

    Ready-mix is sold by compressive strength grade. Higher grades require more cement content, which directly increases per-yard cost. The table below shows approximate US price premiums by grade relative to a baseline 3,000 PSI mix.

    Mix GradePSIMPa EquivalentUS Price vs 3,000 PSI BaselineTypical Use
    Standard residential3,00020.5 MPaBaselineSlabs, flatwork, non-structural
    Standard structural3,50024 MPa+$5–$10/ydDriveways, footings, walls
    Heavy-duty residential4,00027.5 MPa+$10–$20/ydDriveways in freeze-thaw climates, commercial floors
    High-strength5,00034.5 MPa+$20–$35/ydStructural columns, high-load beams, industrial
    Ultra high-strength6,000+41+ MPa+$35–$60/ydPre-stressed elements, bridges, heavy industrial

    To convert between PSI and MPa for ordering or spec-checking, use the concrete PSI to MPa converter — useful when working with international suppliers or reading specs written in the other unit system.

    Common Mistakes When Buying Ready-Mix

    Not confirming the mix spec before ordering. Ready-mix suppliers will provide whatever grade you order. If you do not specify PSI, slump, air content, and admixture requirements, you may receive a generic mix that does not meet your structural or environmental needs. Always request the mix design sheet and verify it matches your project specification before the truck arrives.

    Failing to account for waste and overage. Ordering exact cubic yardage is a mistake. Formwork is never perfect, sub-base irregularities consume extra volume, and spillage during the pour is inevitable. A 5–10% waste factor is standard on most residential pours. The concrete waste factor calculator handles this calculation properly.

    Ignoring slump requirements. Slump measures concrete workability — how easily it flows and places. A 4-inch slump is standard for most flatwork. Requesting extra water on-site to increase slump (because the mix arrived too stiff) dramatically weakens the finished concrete. If workability is needed, it should be achieved through admixtures, not water addition.

    Not planning pour timing. Ready-mix has a usable working time of 60–90 minutes from batching, which varies with temperature (shorter in heat, longer in cold). Confirm the plant-to-site travel time, have adequate crew and equipment ready before the truck arrives, and schedule delivery at a time that avoids peak-hour traffic.

    Related Calculators You Might Need

    The concrete bags calculator helps compare the cost of on-site mixing vs ready-mix for smaller pours by converting your volume directly into bag counts. For delivery logistics, the concrete truck load calculator tells you exactly how many truckloads your pour requires and flags whether you will hit minimum load thresholds. The concrete delivery cost calculator factors delivery surcharges and minimum load fees into your total pour cost. For the complete project budget including labour, the full concrete project estimator combines material and labour costs into a single figure.

    Frequently Asked Questions

    How much does a yard of concrete cost in 2026?

    In the US, a cubic yard of standard 3,500–4,000 PSI ready-mix concrete costs $130–$175 delivered, with high-cost markets (Northeast, West Coast) reaching $175–$220. Canadian pricing runs CAD $160–$220 per cubic yard. These are delivered prices; ex-plant (self-pickup) is typically 5–15% lower, but most residential pours are not economical to pick up in small loads.

    Why is ready-mix concrete so expensive right now?

    Cement prices are the main factor — they spiked 15–25% between 2021 and 2024 driven by energy cost increases in cement manufacturing and have not fully retreated. Diesel fuel surcharges on delivery remain elevated above pre-2021 levels. In some markets, aggregate transport costs and tighter quarrying regulations also contribute. Pricing has stabilised in 2025–2026 but is not returning to 2020 levels.

    Is it cheaper to mix concrete yourself than use ready-mix?

    For volumes under about 0.5 cubic yards / 0.4 m³, on-site mixing with bagged concrete is cost-competitive once you factor in the short-load surcharge on ready-mix. Above that volume, ready-mix is almost always cheaper per unit of finished concrete, and the quality is more consistent. Use the ready-mix vs bagged concrete cost calculator to find the break-even point for your pour size.

    How much does a cubic metre of concrete cost in the UK?

    Standard residential-grade ready-mix (C25/30 equivalent, approximately 3,600–4,350 PSI) costs £120–£185 per cubic metre delivered in the UK. London and the Southeast carry a 10–20% premium. Specialty mixes with accelerators, fibres, or plasticisers add £15–£40/m³. Ex-plant pricing is available from some suppliers for self-collection but is uncommon for residential quantities.

    How do I calculate how much concrete I need?

    Multiply length × width × depth (all in the same unit), then convert to cubic yards or metres. For a 20 × 10 foot slab at 4 inches deep: 20 × 10 × 0.333 = 66.6 cubic feet ÷ 27 = 2.47 cubic yards — add 10% for waste = 2.7 cubic yards. The concrete coverage calculator does this automatically and handles non-rectangular shapes.

  • Concrete Cost per Square Metre vs Square Foot: Global Guide

    Concrete Cost per Square Metre vs Square Foot: Global Guide

    An installed concrete slab costs $8–$18 per square foot (USD) or $85–$200 per square metre across most English-speaking markets, depending on thickness, finish, reinforcement, and local labour rates. That wide range exists because ‘concrete cost’ means different things in different contexts: some quotes cover material only, others include a complete installed price. This guide standardises the comparison across the US, UK, Canada, and Australia, and shows how to convert between units without errors.

    Use the Concrete Cost per Square Foot Calculator to enter your actual slab dimensions, thickness, and finish type and get an installed cost estimate calibrated to current material and labour pricing.

    The conversion formula and why getting it wrong costs money

    1 square foot = 0.0929 square metres. 1 square metre = 10.764 square feet. These are fixed. Where estimators go wrong is applying a per-square-foot rate directly to a square metre count, or vice versa, without adjusting the unit price.

    If a US contractor quotes $12/sq ft and a UK contractor quotes £110/sq m, you cannot compare them without two adjustments: unit conversion and currency conversion. The correct comparison, at the time of writing with GBP/USD approximately 1.27:

    Original QuoteUnit ConversionCurrency ConversionUSD/sq ft Equivalent
    $12.00/sq ft (USD)$12.00/sq ft
    £110/sq m (GBP)£110 ÷ 10.764 = £10.22/sq ft£10.22 × 1.27 = $12.98/sq ft$12.98/sq ft
    AUD $165/sq mAUD 165 ÷ 10.764 = AUD 15.33/sq ftAUD 15.33 × 0.65 = $9.96/sq ft$9.96/sq ft
    CAD $155/sq mCAD 155 ÷ 10.764 = CAD 14.40/sq ftCAD 14.40 × 0.74 = $10.65/sq ft$10.65/sq ft

    Currency rates move, so always apply the current rate at time of comparison. The unit conversion is fixed.

    Regional installed cost benchmarks: what full project pricing looks like

    The figures below reflect a standard 4 in (100 mm) residential flatwork slab — driveway, patio, or garage floor — with broom finish and basic rebar or wire mesh reinforcement. They include material, delivery, labour, forming, finishing, and a 5–8% waste allowance. They exclude demolition, subgrade excavation, permits, and sealing.

    United States

    Project TypeThicknessUSD/sq ftUSD/sq m
    Standard driveway (broom finish)4 in / 100 mm$8–$14$86–$151
    Decorative/stamped driveway4 in / 100 mm$14–$22$151–$237
    Garage floor (broom or float)4 in / 100 mm$7–$12$75–$129
    Patio (broom finish)4 in / 100 mm$8–$13$86–$140
    Commercial parking lot6 in / 150 mm$10–$17$108–$183

    Regional variation within the US is significant: labour rates in California and New York run 30–50% above the national average; rural Midwest rates can be 20–30% below it.

    United Kingdom

    Project TypeThicknessGBP/sq mUSD/sq ft equiv.
    Domestic driveway (plain)100 mm / 4 in£75–£120$8.85–$14.16
    Domestic patio (brushed)100 mm / 4 in£70–£110$8.27–$12.99
    Garage floor (power float)100 mm / 4 in£65–£100$7.68–$11.81
    Commercial hardstanding150 mm / 6 in£90–£150$10.63–$17.71

    UK ready-mix pricing averages £90–£115 per cubic metre for C25/30 concrete (equivalent to 3,625–4,350 PSI). Fuel levies and aggregate tax add a variable surcharge, particularly in Scotland and Wales.

    Canada

    Project TypeThicknessCAD/sq mUSD/sq ft equiv.
    Driveway (broom finish)100 mm / 4 inCAD $140–$220$9.63–$15.13
    Garage floor100 mm / 4 inCAD $130–$200$8.95–$13.76
    Exposed aggregate patio100 mm / 4 inCAD $175–$280$12.04–$19.26

    Ontario and British Columbia are highest; Prairie provinces run 10–20% lower. Air entrainment is standard across most of Canada due to freeze-thaw requirements — this typically adds CAD $8–$12/m³ to the mix cost. Minimum footing depths run 1.2–1.8 m depending on frost zone, which affects all foundation-connected slabs.

    Australia

    Project TypeThicknessAUD/sq mUSD/sq ft equiv.
    Driveway (broom finish)100 mm / 4 inAUD $100–$180$6.05–$10.88
    Exposed aggregate driveway100 mm / 4 inAUD $150–$250$9.08–$15.13
    Residential slab-on-grade100 mm / 4 inAUD $80–$140$4.84–$8.47
    Pool surround (honed)100 mm / 4 inAUD $175–$300$10.58–$18.15

    Sydney and Melbourne labour rates are highest; regional Queensland and Western Australia typically run 15–25% lower. AS 3600 governs structural concrete in Australia; residential driveways require minimum N20 grade concrete (20 MPa / 2,900 PSI).

    Why costs differ even at the same specification

    Labour market. Labour is the largest variable after material. In high-cost cities (San Francisco, London, Sydney), labour alone can account for 50–60% of an installed slab cost. In lower-cost labour markets, it may be 30–40%.

    Ready-mix pricing by region. Ready-mix concrete is a local commodity. Batch plant proximity to aggregate sources, fuel costs, and local demand all affect the price per cubic yard or cubic metre. The Concrete Price per Yard by State provides current US state-level ready-mix benchmarks.

    Finish specification. A plain broom-finish driveway and a hand-seeded exposed aggregate driveway involve the same concrete volume but two to three times the labour on the decorative version. Finish is the single biggest driver of cost variation at a fixed thickness.

    Site conditions. Pump hire, access surcharges, and poor subgrade conditions can add $1.50–$3.50 per square foot ($16–$38 per square metre) to any project. These are site-specific and cannot be predicted from a benchmark rate.

    Common mistakes

    1. Comparing quotes in different units without converting. A contractor quoting $11/sq ft and another quoting $120/sq m look similar but are not. $120/sq m converts to $11.15/sq ft — effectively identical. $140/sq m converts to $13.01/sq ft — a 18% difference. Always convert to the same unit before comparing. The Imperial to Metric Concrete Converter handles all concrete unit conversions in one tool.

    2. Using a cost-per-square-foot rate from one thickness for another. A 4 in (100 mm) slab and a 6 in (150 mm) slab use 50% more concrete per square foot. The labour and forming costs are nearly identical. Applying a $/sq ft rate from a 4 in slab to a 6 in design will underestimate material cost by roughly 30–35%.

    3. Applying US rates to Australian or UK projects without labour adjustment. US ready-mix is among the cheapest in the developed world; US contractor labour (excluding major metro areas) is typically lower than Australian and comparable to UK rates. An Australian estimator using US benchmark figures will underprice their project by 15–40% depending on the finish and region.

    4. Treating all-in quotes and material-only quotes as equivalent. A quote of $6/sq ft material-only and a quote of $6/sq ft installed are not comparable. They differ by the entire cost of labour, delivery, and forming. Always confirm the scope before comparing unit prices.

    Related calculators you might need

    To get from a per-square-foot or per-square-metre rate to an actual project cost, enter your area and thickness into the Concrete Cost Calculator. If the project involves stamped or decorative flatwork, the Stamped Concrete Calculator applies the relevant finish multipliers to your base cost. For a complete picture that includes material, labour, and waste in a single output, the Full Concrete Project Estimator is the most comprehensive starting point. If you need to verify that your concrete volume calculation is correct before pricing, use the Concrete Slab Calculator to confirm the cubic yard or cubic metre figure your cost rate is being applied to.

    Frequently asked questions

    How much does a concrete driveway cost per square metre in the UK? A standard plain concrete driveway in the UK costs £75–£120 per square metre installed, including ready-mix (C25/30), formwork, placing, and a broom or brushed finish. This equates to roughly £7–£11 per square foot. Decorative options such as exposed aggregate or pattern-imprinted concrete add £30–£80 per square metre depending on complexity.

    What is the cost per square foot for a concrete slab in the US? An installed residential concrete slab — driveway, patio, or garage floor — costs $8–$14 per square foot for a standard 4 in (100 mm) thick broom finish with wire mesh or rebar. Stamped or decorative concrete runs $14–$22. These figures include material, delivery, forming, labour, and finishing. They exclude demolition, permits, and sealers.

    How do I convert concrete cost from per square metre to per square foot? Divide the per-square-metre price by 10.764 to get the per-square-foot equivalent. Example: AUD $160/sq m ÷ 10.764 = AUD $14.86/sq ft. Then apply the exchange rate for a USD equivalent. Use the Imperial to Metric Concrete Converter to handle unit conversion automatically.

    Is concrete cheaper in Australia or the US? On a USD-adjusted basis, residential concrete flatwork is cheaper in Australia than in the US coastal metro areas, and comparable to the US Midwest and South. Australian ready-mix material costs are higher (AUD $130–$180/m³ vs USD $120–$165/yd³ equivalent), but this is partly offset by lower pump hire and forming costs on typical residential jobs. The wider variance in Australian exposed aggregate pricing reflects the high labour intensity of the finish.

    Why does concrete cost vary so much within the same country? Ready-mix pricing is set at the local batch plant level and varies with aggregate haulage distance, fuel costs, and local demand. Labour rates are set by local market conditions and vary by 30–60% between major metros and regional areas in the US, UK, and Australia. Site conditions — access, slope, subgrade quality — add a variable surcharge that no regional benchmark can predict.

    Does a thicker slab always cost more per square metre? Yes, in terms of total cost, because it requires more concrete. But the relationship is not linear: the labour, forming, and delivery costs are nearly identical for 100 mm and 150 mm slabs. Only the material volume increases. On a 150 mm slab, material cost rises by approximately 50% versus a 100 mm slab, but the installed $/sq m increase is typically 20–30% because labour and fixed costs are diluted across the same surface area.

  • Hidden Costs in Concrete Projects Most People Miss

    Hidden Costs in Concrete Projects Most People Miss

    Most concrete project budgets are blown not by the material itself but by costs that never make it onto the initial quote. The ready-mix concrete typically accounts for 25–40% of a project’s total spend. The rest — site prep, waste, access, finishing, curing, and contingency — frequently adds 60–100% on top. If your budget only covers the pour, you are already underfunded.

    The Full Concrete Project Estimator captures all cost layers in one calculation: material, labour, delivery, waste, and finishing — so nothing is omitted before you price the job or approve a quote.

    What the concrete material quote leaves out

    The price per cubic yard (or cubic metre) of ready-mix covers one thing: the concrete. Everything below is typically excluded.

    Cost ItemTypical Range (USD)Why It’s Missed
    Site excavation and grading$500–$3,500Often assumed as ‘prep work’ with no separate line item
    Sub-base gravel (4–6 in / 100–150 mm)$300–$1,800Required under most slabs; skipped on tight budgets
    Vapour barrier (6-mil poly)$0.10–$0.25/sq ftMandatory for interior slabs; forgotten on exterior quotes
    Formwork (lumber or rental)$1.50–$4.00/lin ftReused lumber underestimated; rental cost ignored
    Rebar or wire mesh$0.40–$1.20/sq ftSpec’d on drawings but not priced separately
    Finishing labour (trowel, broom, stamp)$1.00–$4.00/sq ftAssumed included in pour price — often not
    Curing compound or wet curing$0.08–$0.30/sq ftSkipped entirely on small jobs
    Short-load fee (under 5 cy / 3.8 m³)$50–$250 flatApplies on most residential pours; not in base quotes
    Concrete pump hire$600–$1,200/dayRequired when truck cannot access the pour location
    Saturday / after-hours surcharge$150–$500Charged by most batch plants on non-standard pour times

    Waste and over-ordering: the calculation error that doubles losses

    Concrete cannot be returned. Any material ordered beyond what is poured is either wasted or used on an unplanned area. Most contractors add a waste factor of 5–10% for standard flat pours, and 10–15% for complex shapes, steps, or curved formwork.

    On a 10-cubic-yard (7.6 m³) order, a 10% waste buffer is 1 extra yard — roughly $140–$180 at current ready-mix prices. Under-ordering is worse: a short second load carries a short-load fee of $50–$250 per delivery plus the cost of the extra concrete, and the cold joint created between pours can become a structural liability.

    Use the Concrete Waste Factor Calculator to set the right buffer for each job type before placing the order.

    Access, logistics, and site conditions add up fast

    Pump hire

    A concrete pump is non-negotiable when the pour location is more than 18 inches (450 mm) above or below the truck chute height, or when the horizontal distance exceeds roughly 40 feet (12 m). Boom pump hire typically runs $600–$1,200 for a half-day minimum. Line pump hire is cheaper at $300–$700 but requires more setup time. Neither figure includes the additional labour to operate the pump or move hoses.

    Truck access and standby time

    Ready-mix trucks are billed in 5–7 minute increments after the first free window (typically 5–10 minutes per yard). A truck held on site for 45 minutes past its free time can add $200–$400 in standby charges. Tight driveways, locked gates, narrow alleys, or poor site organisation are the primary causes. The Concrete Delivery Cost Calculator includes delivery zone rates and helps forecast standby exposure.

    Post-pour costs that appear weeks later

    The concrete is in the ground, the forms are stripped, and the invoice is paid. These costs arrive later.

    Joint sealing: Control joints cut into slabs require sealing to prevent moisture infiltration. A 20 x 20 ft (6 x 6 m) driveway slab generates roughly 80 linear feet (24 m) of joints. Sealing with a pourable polyurethane or silicone sealant costs $0.75–$2.50 per linear foot, depending on the product and whether it is self-levelling or tooled.

    Sealer application: Most residential and commercial slabs benefit from a penetrating or film-forming sealer applied 28 days after placement, once the concrete reaches design strength. Sealer material runs $0.08–$0.40 per square foot; labour adds the same again if contracted out.

    Crack repair: Hairline cracks from shrinkage are expected; structural cracks from subgrade settlement or overload are not. Budget at least 3–5% of the original pour cost as a contingency for crack investigation and repair within the first 12 months.

    Common mistakes

    1. Using material cost as a proxy for project cost. The price of ready-mix concrete per cubic yard is the most visible number in any quote. Homeowners and first-time project managers frequently use it to back-calculate the full job cost. Material is typically 25–40% of total spend. Multiply the material quote by 2.5 to get a rough project floor before detailed line items are added.

    2. Skipping sub-base grading because the ground looks flat. Visually level ground can have soft spots, fill material, organic content, or inadequate compaction. A slab poured directly on uncompacted fill will settle unevenly, crack, and eventually require full removal and replacement. A standard 4 in (100 mm) compacted gravel sub-base prevents most settlement cracking at a fraction of the replacement cost.

    3. Not accounting for the short-load fee on small residential jobs. Any pour under roughly 5 cubic yards (3.8 m³) — a typical patio or small driveway apron — is almost certain to trigger a short-load charge. On a 3-yard (2.3 m³) pour, that fee can represent 8–15% of the total material cost. The Short Load Fee Estimator quantifies this before the order is placed.

    4. Pricing labour as a single line item without scope definition.‘Finishing labour’ means different things to different contractors. Broom finish, float finish, trowel finish, exposed aggregate, and stamped concrete each have different labour rates and time requirements. Without a clear scope, labour quotes are incomparable and overruns are inevitable. The Concrete Labor Cost Calculator separates labour by task type so comparisons are valid.

    Related calculators you might need

    If you are building out a full project budget, start with the Full Concrete Project Estimator which consolidates material, labour, delivery, and waste into a single output. For projects where you are deciding between bagged concrete and ready-mix, the Ready-Mix vs Bagged Concrete Cost Calculator breaks down the real cost differential at different volumes. Once you have a volume figure, run it through the Concrete Delivery Cost Calculator to check whether delivery zone surcharges or standby fees apply to your site. For jobs where waste management is a concern, the Concrete Demolition and Removal Cost Estimator covers haul-off and disposal pricing by region.

    Frequently asked questions

    How much extra should I budget on top of the concrete material quote? For a basic residential slab — driveway, patio, or walkway — budget 80–120% on top of the ready-mix material cost to cover site prep, formwork, reinforcement, labour, finishing, and a 10% contingency. On complex pours with pumping, stamps, or difficult access, the multiplier can reach 150–200%.

    What is a short-load fee and how do I avoid it? Ready-mix suppliers impose a short-load fee when an order is below their minimum load threshold, typically 5–8 cubic yards (3.8–6.1 m³). To avoid it, combine multiple small pours into one order, schedule your pour the same day as a neighbouring site’s order, or use bagged concrete for volumes under 1 cubic yard (0.76 m³). Use the Short Load Fee Estimator to calculate whether the fee changes your sourcing decision.

    Are pump hire costs always necessary for residential projects? No. A standard ready-mix truck chute reaches roughly 18 feet (5.5 m) horizontally and can be extended with an additional chute section to about 25 feet (7.6 m). If the pour location is within that range and truck access is unobstructed, a pump is not needed. Pump hire becomes necessary for elevated slabs, locations behind tight access points, or basement pours where the truck cannot back in.

    Why does concrete finishing cost vary so much between contractors? Finishing price is driven by surface specification, not just area. A basic broom finish on a driveway runs $0.75–$1.50 per square foot in labour. A steel-trowel interior floor finish costs $1.50–$3.00. Stamped concrete with colour and release agents runs $3.00–$8.00. Quotes without a specified finish level are not comparable.

    What is the typical total cost per square foot for a concrete driveway including all hidden costs? In the US, an installed concrete driveway — material, sub-base, formwork, finishing, sealing, and labour — ranges from $8 to $18 per square foot ($86–$194 per m²), depending on thickness, finish, local labour rates, and site conditions. The base material cost alone is typically $2.50–$4.50 per square foot.

    Do I need a vapour barrier under an outdoor concrete slab? For outdoor slabs like driveways and patios, a vapour barrier is not always required, but it is recommended in climates with high moisture or freeze-thaw cycles to reduce heave risk. For interior slabs — garage floors, basement floors, and any slab on which flooring will be installed — a 6-mil (0.15 mm) polyethylene vapour barrier is standard practice and required by most residential building codes.

  • How to Write a Winning Concrete Bid or Proposal

    How to Write a Winning Concrete Bid or Proposal

    Concrete bids that win are not the lowest — they are the most credible. A bid that clearly separates material costs, labour scope, access conditions, and exclusions signals a contractor who knows what can go wrong. A vague lump-sum number tells the client they are taking on all the risk. Use the Concrete Bid/Proposal Generator to structure and output professional bid documents with all line items calculated.

    What a concrete bid must include to be taken seriously

    A winning bid contains seven core components. Each serves a specific function — either protecting your margin or giving the client the information they need to say yes.

    Bid ComponentWhat to IncludeWhy It Matters
    Project scope descriptionDimensions, thickness, finish spec, reinforcement typeEliminates scope disputes after contract signing
    Concrete volume and mix specCubic yards/metres, PSI/MPa, w/c ratio, admixturesClient can verify the quote is based on real quantities
    Material cost breakdownReady-mix price per yard, delivery, waste factorSeparates controllable from variable cost
    Labour breakdown by taskForming, pouring, finishing, stripping, clean-upPrevents under-pricing a labour-intensive finish
    Site conditions and accessPump required? Standby risk? Slope or clearance issue?Protects against claims if conditions are worse than expected
    Exclusions listWhat is NOT in scope: excavation, demo, permits, sealingThe most important legal protection in the document
    Payment scheduleDeposit %, pour date milestone, final payment triggerCashflow protection tied to real project milestones

    How to calculate the numbers before you write the bid

    A bid is only as accurate as its underlying quantity takeoff. The sequence below produces numbers that hold up when the client checks your work.

    Step 1: Volume and material

    Calculate the concrete volume first. For a slab: Length × Width × Thickness in consistent units, then convert to cubic yards or cubic metres. Add a waste factor — typically 8% for standard flatwork, 12–15% for irregular shapes or steps. Use the Concrete Cost Calculator to apply current ready-mix pricing to your final volume.

    For a 20 x 30 ft (6.1 x 9.1 m) driveway at 4 in (100 mm) thick: 20 × 30 × (4/12) = 200 cubic feet ÷ 27 = 7.41 cubic yards. Add 8% waste: 8.0 cubic yards to order. At $145 per yard, material cost is $1,160 before delivery.

    Step 2: Labour rate calculation

    Labour is priced by scope, not by the yard. Separate the tasks: forming and setup, placing and screeding, finishing (specify type), curing, formwork strip, and site clean-up. Each has a different labour intensity. A broom-finish driveway runs approximately $1.00–$1.75 per square foot in finishing labour; a steel-trowel commercial floor runs $2.50–$4.50. The Concrete Labor Cost Calculator breaks labour into task categories with regional rate adjustments.

    What makes one bid win over another at the same price

    When two bids come in within 5% of each other, the decision shifts to perceived risk. These elements tip the balance toward your bid:

    Quantity proof. Show your volume calculation — dimensions, thickness, waste percentage, and the resulting order quantity. Clients who understand concrete will verify it. Clients who don’t will be reassured by the transparency.

    Specific exclusions. List every item not in scope: demo and haul-off, subgrade compaction, permits, saw-cutting beyond control joints, sealers, or landscaping restoration. Exclusions are not a red flag — they prevent disputes. A bid without exclusions forces the client to assume everything is included.

    Mix specification. State the PSI rating (e.g. 3,500 PSI / 24 MPa for a residential driveway), the aggregate size, and any admixtures (air entrainment for freeze-thaw climates, fibres for crack resistance). This demonstrates technical credibility and prevents a supplier downgrade after contract signing.

    Concrete delivery contingency. Note that ready-mix pricing is locked to the pour date and that changes to schedule may result in price adjustments. This is standard practice. State it before, not after, the price changes.

    Bid ElementWeak VersionStrong Version
    VolumeApprox. 8 yards of concrete8.0 cy (7.41 cy net + 8% waste) per takeoff dated [date]
    FinishStandard finishBroom finish, medium texture, per ACI 302.1R guidelines
    ReinforcementWire mesh included#3 rebar at 18 in / 450 mm on centre, per structural spec
    Exclusions(None listed)Excludes: demo, grading, permits, sealer, landscaping restoration
    DeliveryConcrete delivered to siteReady-mix delivered; pump hire required if truck cannot access — quoted separately

    Common mistakes

    1. Quoting a volume but not a waste factor. If you order 7.41 yards and the plant delivers exactly 7.41 yards, you will run short. Experienced clients know this. A bid that does not include a waste buffer looks like it was written by someone who has not poured concrete. State the net volume and the gross order quantity as separate figures.

    2. Omitting the pump hire question. Site access issues are the single most common source of post-contract disputes. If there is any chance the truck cannot reach the pour location — tight driveway, overhead obstruction, elevation change, basement pour — get eyes on the site before submitting the bid and quote pump hire explicitly or as an allowance. A retroactive pump hire quote after contract signing damages trust and delays the pour.

    3. Single-line labour pricing.‘Labour: $2,400’ tells the client nothing. If they counter at $2,000, you have no basis for holding the number. Breaking labour into forming, placement, finishing, and clean-up lets you defend each component separately and shows you know what the work involves.

    4. No payment schedule tied to milestones. A bid that says ‘payment due upon completion’ exposes you to disputes over what ‘complete’ means. Tie payment triggers to specific, verifiable events: 50% deposit before mobilisation, 40% on pour day, 10% after final inspection at 28 days. Clear milestones protect both parties.

    Related calculators you might need

    Before writing the bid, calculate the material volume accurately with the Concrete Slab Calculator or the relevant flatwork calculator for the surface type. For jobs where you need to price material delivery accurately, the Concrete Delivery Cost Calculator factors in zone surcharges and short-load fees. The Concrete Cost per Square Foot Calculator is useful for cross-checking your total against regional benchmarks before you submit. And if the project involves rebar, the Rebar/Reinforcing Steel Calculator calculates steel quantities and cost from your slab dimensions and spacing spec.

    Frequently asked questions

    What should a concrete bid include? A complete bid includes: project dimensions and thickness, concrete volume and mix specification (PSI, aggregate, admixtures), a separate material and labour breakdown, access and site condition notes, a specific list of exclusions, and a payment schedule tied to milestones. Bids that combine all costs into a single number give the client no basis for comparison and give you no defence if a line item is challenged.

    How do I price a concrete bid without losing money? Calculate volume first, then apply a waste factor (8–15% depending on job complexity). Price material at a locked ready-mix rate tied to the pour date. Price labour by task with regional rates. Add an access contingency for pump hire or standby risk. Build in 5–8% overhead and profit margin as explicit line items — not as an unspecified markup. Under-pricing usually comes from omitting waste, access costs, or finishing time.

    Should I include mix design details in a residential bid? Yes. At minimum, state the PSI rating, entrained air if the climate requires freeze-thaw durability, and whether reinforcement is rebar or wire mesh. Clients increasingly check these specifications before signing, especially on larger jobs. Specifying ACI 301 or local code compliance adds credibility without extra work.

    How do contractors handle ready-mix price changes between bid and pour? Most contractors lock the material price to the pour date and include a clause that price changes from the batch plant are passed through if the schedule slips by more than a specified number of days (typically 30 days). State this in the bid. It is standard practice; clients who have received multiple bids will expect it.

    What is a typical concrete contractor markup? Overhead and profit margins on concrete work typically range from 15–25% for commercial contractors and 20–35% for residential specialists. Margins vary by region, project complexity, and current demand. Labour-intensive jobs like stamped concrete or decorative flatwork carry higher margins because of skill requirements and rework risk.

    How do I handle a client who says my bid is too high? Break the bid down to cost per square foot and compare to regional benchmarks. If your price is within the normal range, show the calculation. If a competitor is lower, ask whether their bid includes the same scope, mix specification, and exclusions. A lower number with a vague scope is not comparable. The Concrete Cost per Square Foot Calculator provides benchmark ranges by project type you can reference in the conversation.