Author: Rachel Sousa

  • Concrete Patio Planning: Size, Thickness & Cost Guide

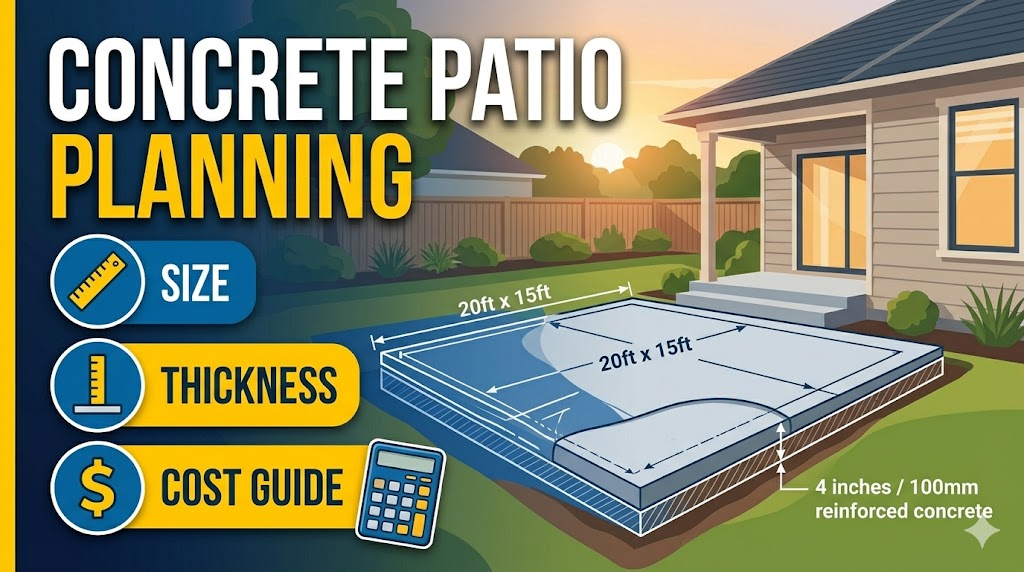
    Concrete Patio Planning: Size, Thickness & Cost Guide

    A standard residential concrete patio — 12 ft × 16 ft (3.6 × 4.9 m) at 4 inches (100 mm) thick — requires 2.6 cubic yards (1.9 m³) of concrete and costs $1,400–$2,800 installed, depending on location, finishes, and reinforcement. That range is wide because finishing choices (broom, exposed aggregate, stamped) vary in both material and labour cost more than the concrete itself. Understanding which variables drive cost gives you actual control over your budget.

    Calculating concrete volume for a patio

    The formula is: Volume = Length × Width × Thickness. For imperial: convert thickness from inches to feet (divide by 12). For metric: convert thickness from mm to metres (divide by 1000).

    Example — imperial: 14 ft × 20 ft × 4 in thick = 14 × 20 × 0.333 = 93.3 cu ft ÷ 27 = 3.46 yd³. Add 10% waste: order 3.8 yd³.

    Example — metric: 4.3 m × 6.1 m × 100 mm = 4.3 × 6.1 × 0.1 = 2.62 m³. Add 10% waste: order 2.9 m³.

    The Concrete Patio Calculator handles both unit systems and outputs volume in cubic yards and cubic metres, plus bag counts and estimated cost ranges. Enter your patio dimensions and it returns the order quantity with waste factored in.

    Recommended patio sizes — and how they affect concrete volume

    ‘What size should my patio be?’ is a function of intended use. The table below shows common functional sizes with corresponding concrete volumes at 4 inches (100 mm) thick, the standard for pedestrian patio applications. All volumes include 10% waste.

    Use CaseRecommended SizeArea (sq ft / m²)Volume (4 in / 100 mm)
    Small seating area (2 chairs)8×10 ft / 2.4×3 m80 sq ft / 7.4 m²1.1 yd³ / 0.82 m³
    4-person dining set12×12 ft / 3.6×3.6 m144 sq ft / 13.4 m²2.0 yd³ / 1.5 m³
    6–8 person dining + grill14×20 ft / 4.3×6.1 m280 sq ft / 26 m²3.8 yd³ / 2.9 m³
    Large entertaining patio20×30 ft / 6.1×9.1 m600 sq ft / 55.7 m²8.1 yd³ / 6.2 m³
    Pool surround (rectangular)12 ft border / 3.6 m border480 sq ft / 44.6 m²6.5 yd³ / 5.0 m³
    Covered porch slab10×16 ft / 3×4.9 m160 sq ft / 14.9 m²2.2 yd³ / 1.7 m³

    A 10 ft clearance on all sides of an outdoor dining table is the practical minimum for comfortable movement. Tables up to 42 inches (1.06 m) wide need 5 ft (1.5 m) of clear space on the chair-pull side.

    Patio thickness: when 4 inches is enough and when it isn’t

    Standard 4 inch / 100 mm slab

    4 inches / 100 mm is correct for patios with pedestrian use only — seating areas, dining, outdoor kitchens that won’t see vehicle access. This thickness meets the ACI 302.1R recommendations for interior and exterior slabs on grade under light foot traffic loads. Rebar is optional at this thickness on a well-compacted granular subbase, though wire mesh (6×6 W1.4×W1.4 / 150×150 mm 4.5 gauge) is standard practice and costs approximately $0.15–$0.25 per sq ft in materials.

    When to upgrade to 5 or 6 inches

    Upgrade to 5 inches / 125 mm if: the patio will be used for vehicle access at any point (even occasional), the subgrade is clay or poorly draining soil, or the patio connects directly to a driveway section. Upgrade to 6 inches / 150 mm for patios that include a vehicle pullout or parking area, or in areas with expansive clay soils (Atterberg Plasticity Index > 15).

    Each additional inch / 25 mm of thickness adds approximately 0.31 yd³ per 100 sq ft (0.024 m³/m²) to your concrete volume. On a 300 sq ft (27.9 m²) patio, going from 4 to 5 inches adds 0.93 yd³ (0.71 m³) — roughly $115–$165 in additional material at average ready-mix pricing.

    Patio concrete cost breakdown

    The full cost of a concrete patio has four components: material, delivery, labour, and finishing. The table below shows typical cost ranges per square foot for the most common residential patio options in the US (2024 figures, national average).

    Finish TypeMaterial + Labour ($/sq ft)Total Cost (12×16 ft patio)
    Broom finish (standard)$6–$10$1,150–$1,920
    Exposed aggregate$8–$12$1,536–$2,304
    Stamped (single pattern)$12–$18$2,304–$3,456
    Stamped (multi-colour)$16–$25$3,072–$4,800
    Coloured/integral pigment$10–$15$1,920–$2,880
    Resurfaced/overlay (existing slab)$4–$7$768–$1,344

    The Concrete Cost Per Square Foot Calculator lets you enter your local labour rates and material costs to get a project-specific figure, rather than relying on national averages.

    Expansion joints and surface drainage — the details that determine longevity

    Concrete patios fail early almost always due to two causes: missing or incorrectly spaced expansion joints, and improper surface drainage slope.

    Expansion joints should be placed at intervals no greater than 2–3 times the slab thickness in feet — so a 4 inch slab needs joints every 8–12 ft (2.4–3.7 m). Joints cut wider than 1 inch (25 mm) or deeper than 1/4 of the slab thickness serve no purpose and become debris traps. The Concrete Expansion Joint Spacing Calculator determines the correct spacing and depth for your slab thickness and local temperature range.

    Surface slope of 1/8 to 1/4 inch per foot (1–2%) away from the house is required for drainage. A 12 ft deep patio at 1/4 in/ft slope has its far edge 3 inches lower than the house wall edge. This is not optional — water pooling against a house foundation accelerates both foundation damage and slab frost heave.

    Common mistakes when planning a concrete patio

    1. Not getting a permit for a large patio. In most US jurisdictions, patios over 200–300 sq ft (18.6–27.9 m²) require a building permit, particularly if they’re attached to the house or include structures (pergola footings, outdoor kitchen base). Unpermitted flatwork can create title problems at sale. Check with your local building department before pouring.

    2. Placing concrete directly on uncompacted fill. Freshly placed fill, topsoil, or organic material will settle. Minimum compaction standard is 95% Proctor density for the top 6 inches (150 mm) of subgrade. On fill over 12 inches (300 mm) deep, allow at least 90 days after compaction before pouring.

    3. Pouring a stamped or coloured patio in direct sun above 90°F / 32°C. Hot, dry conditions accelerate surface drying relative to the slab interior, causing plastic shrinkage cracking that is impossible to repair invisibly in decorative concrete. Pour early morning, use evaporation retarder, and erect shading if ambient conditions exceed 85°F / 29°C with wind.

    4. Skipping the curing compound or wet curing. Concrete typically reaches 65–70% of its 28-day design strength within 7 days of proper curing, with the 28-day mark treated as its full design strength — but only if moisture is maintained throughout. Unsealed concrete in low-humidity conditions loses surface moisture within hours of placing, reducing surface strength by 15–25%. Apply a curing compound immediately after finishing, or keep wet-cured under plastic for a minimum of 7 days. The Concrete Curing Time Estimator adjusts these timelines for your local temperature and humidity.

    Related calculators you might need

    Before finalising your order, verify your total concrete volume with the Concrete Patio Calculator. If you’re adding a stamped or coloured finish, the Stamped Concrete Calculator estimates the additional material cost for stamps, release agents, and sealers. For budget planning, the Full Concrete Project Estimator combines material volume, delivery, labour, and finishing in one figure. If you’re working with an existing slab that needs repair rather than replacement, the Concrete Resurfacing Calculator calculates material quantities for overlay applications.

    Frequently asked questions

    How much does a 12×12 concrete patio cost?

    A 12×12 ft (3.6×3.6 m) concrete patio at 4 inches thick requires 2.0 cubic yards (1.5 m³) including 10% waste. At national average pricing, installed cost runs $865–$1,440 for a standard broom finish. Stamped or coloured finishes add $6–$15 per sq ft, bringing the total to $1,730–$3,310 for 144 sq ft. Regional pricing varies substantially — the Concrete Cost Per Square Foot Calculator lets you enter local rates for an accurate estimate.

    What is the best thickness for a concrete patio?

    4 inches / 100 mm is the standard and sufficient for patios with pedestrian use only. If your patio connects to a driveway, will ever have vehicle access (even a golf cart or wheelbarrow), or is built on clay soil, use 5 inches / 125 mm. Pool decks and patios with heavy planters or outdoor kitchen islands should be 5 inches minimum, with the kitchen island area at 6 inches if it will see concentrated point loads.

    How long before I can walk on a new concrete patio?

    Foot traffic is safe at 24–48 hours for standard mixes in normal weather conditions (65–75°F / 18–24°C). High-early-strength mixes (Type III cement) can accept foot traffic at 10–12 hours. Furniture and heavy loads should wait until 7 days. Do not allow vehicle traffic for 28 days. In cold weather (below 50°F / 10°C), all timelines extend by 1.5–2× depending on temperature. The Concrete Curing Time Estimator gives a temperature-adjusted schedule for your specific conditions.

    Do I need rebar in a concrete patio?

    Wire mesh (6×6 W1.4×W1.4 welded wire fabric) is standard for residential patios on stable subgrade. Rebar (#3 or #4 / 10 mm or 13 mm) is preferable for patios on fill, clay soils, or sites with frost depth greater than 18 inches (450 mm). Rebar at 18 inch (450 mm) centres both ways adds approximately $0.40–$0.65 per sq ft to material cost but meaningfully reduces cracking risk over the slab’s service life. The Rebar Spacing Calculator lays out the grid for your specific patio dimensions.

    How much slope should a concrete patio have?

    1/8 inch per foot (1%) is the minimum slope for a covered patio. 1/4 inch per foot (2%) is the standard for exposed patios that receive rainfall directly. This means a 16 ft deep patio at 1/4 in/ft pitch has its outer edge 4 inches lower than the house-side edge. Confirm the required cross-slope with your local building department — some jurisdictions specify a minimum in code for patios adjacent to foundations.

  • How Much Concrete Do I Need? The Global Calculator Guide

    How Much Concrete Do I Need? The Global Calculator Guide

    The amount of concrete you need equals the volume of the space you’re filling. Calculate that volume, add 10% for waste, then convert to cubic yards or cubic metres depending on your supplier. Most residential projects — slabs, footings, driveways — fall between 1 and 10 cubic yards (0.76–7.65 m³). Get that number wrong and you’re either stopping work to reorder or paying for concrete you can’t use.

    How to calculate concrete volume — the core formula

    The formula is the same for every project: Volume = Length × Width × Thickness. Use consistent units throughout. For slabs and flatwork, thickness in imperial is usually expressed in inches, which must be converted to feet before multiplying (divide inches by 12). In metric, thickness in millimetres must be converted to metres (divide by 1000).

    Worked example — imperial: A slab 12 ft × 20 ft × 4 in thick = 12 × 20 × (4/12) = 80 cu ft. Divide by 27 to convert to cubic yards: 80 ÷ 27 = 2.96 cubic yards. Add 10% waste: 3.26 cubic yards — order 3.5 yds to be safe.

    Worked example — metric: A slab 3.6 m × 6 m × 100 mm thick = 3.6 × 6 × 0.1 = 2.16 cubic metres. Add 10% waste: 2.38 m³. Round up to 2.5 m³ when ordering.

    Use the Concrete Slab Calculator to handle the arithmetic automatically — input length, width, and thickness in any unit and it returns cubic yards, cubic feet, cubic metres, and bag counts simultaneously.

    Concrete volumes for common project types

    Different projects have standard thickness requirements that directly drive volume. The table below shows representative scenarios across the most common project types — figures are the raw calculated volume before the waste factor covered later in this guide, so add 10% (or more, depending on your site) before ordering.

    ProjectTypical DimensionsThicknessApprox. Volume
    Residential driveway16 ft × 20 ft (4.9 × 6.1 m)5 in / 125 mm4.9 yd³ / 3.7 m³
    Standard patio12 ft × 16 ft (3.6 × 4.9 m)4 in / 100 mm2.4 yd³ / 1.8 m³
    Sidewalk (50 linear ft)50 ft × 3 ft (15.2 × 0.9 m)4 in / 100 mm1.9 yd³ / 1.4 m³
    Garage floor22 ft × 24 ft (6.7 × 7.3 m)4 in / 100 mm6.5 yd³ / 4.9 m³
    Column footing24 in × 24 in × 12 in deep (0.6 × 0.6 × 0.3 m)12 in / 300 mm0.15 yd³ / 0.11 m³
    Shed pad10 ft × 12 ft (3 × 3.6 m)3.5 in / 90 mm1.3 yd³ / 1.0 m³

    For complex shapes — L-shaped patios, round piers, stepped footings — break the area into rectangles or cylinders, calculate each section separately, then add the volumes. The Concrete Volume Multi-Shape Calculator handles composite shapes in one pass.

    Imperial vs metric: unit conversion that matters

    Ordering errors happen most often at the unit conversion step. In the US, concrete is ordered in cubic yards. In the UK, Canada, and Australia, suppliers quote in cubic metres. The conversion factor is: 1 cubic yard = 0.765 cubic metres; 1 cubic metre = 1.308 cubic yards.

    For bagged concrete: a standard 60 lb / 27 kg bag yields approximately 0.45 cu ft (0.0127 m³) of mixed concrete. An 80 lb / 36 kg bag yields roughly 0.60 cu ft (0.017 m³). At those yields, a 10 yd³ pour (270 cu ft) requires approximately 600 × 60 lb bags — which is why ready-mix becomes cost-effective above 1 cubic yard (0.76 m³) for most regions. The Concrete Bags Calculator converts your required volume directly into bag counts by bag size.

    When working across unit systems, the Imperial to Metric Concrete Converter avoids manual conversion errors — particularly useful when a US project spec is being quoted to a metric supplier.

    How the 10% waste factor works — and when to adjust it

    The 10% waste allowance accounts for spillage, over-excavation, subbase irregularities, and the difficulty of mixing the last fraction of a batch consistently. It is not optional — undercounting leads to short pours where the top lift hardens before you can finish it.

    Adjust the waste factor upward in these situations:

    Irregular or sloped subgrade: Use 12–15%. Soft spots that require additional fill can consume 20% more material than planned on poorly surveyed sites.

    Forms with complex curves or angles: Budget 12% — curves are harder to fill completely without voids.

    Hand-mixing from bags: Add 15% because batch-to-batch variation in water content affects yield by up to 5%.

    Pumped concrete: Pump lines hold 0.2–0.5 yd³ (0.15–0.38 m³) of concrete that cannot be recovered — factor this as a fixed addition to your total.

    The Concrete Waste Factor Calculator lets you set a custom waste percentage and see the adjusted order quantity and its cost impact in a single calculation.

    Common mistakes when estimating concrete volume

    The four errors that account for the majority of mis-orders:

    1. Not converting thickness to the right unit before multiplying. Calculating 12 × 20 × 4 (where 4 is inches, not feet) gives 960 cu ft — 12× too much. Always divide inch measurements by 12 before the multiplication.

    2. Forgetting the waste factor entirely. A 2% short-pour on a 5 yd³ slab means finishing crews are scrambling. Always add a minimum of 10% and round up to the nearest quarter-yard or 0.25 m³.

    3. Treating the slab area as if the subgrade is perfectly flat. A 1 inch (25 mm) average low spot across a 400 sq ft (37 m²) slab isn’t a rounding error — it adds roughly 33 cu ft, or about 1.2 cubic yards (0.9 m³), of extra concrete needed to fill it. That’s a full unplanned yard on a mid-size slab. Survey your subgrade before calculating, not after the truck arrives.

    4. Using manufacturer-stated bag yield without accounting for mixing losses. Bags are rated at full dry yield. Real mixed yield after water addition and mixing loss runs 3–5% below the stated figure. Use 0.43 cu ft per 60 lb bag (not 0.45) for hand-mixed work.

    Related calculators you might need

    Once you have your concrete volume, the next step depends on how you’re sourcing the material. If you’re mixing on-site, the Concrete Bags Calculator converts cubic yards into 40 lb, 60 lb, and 80 lb bag counts — and shows you the cost difference between bag sizes. If you’re ordering ready-mix, the Concrete Truck Load Calculator tells you how many full and partial truck loads your volume requires. Short loads below about 5 yd³ (3.8 m³) typically trigger a short load surcharge — the Short Load Fee Estimator quantifies that cost so you can decide whether to add a neighbouring project or pay the premium. For total budget planning, the Full Concrete Project Estimator combines material volume, delivery, labour, and finishing into a single project cost figure.

    Frequently asked questions

    How much concrete do I need for a 10×10 slab?

    A 10 ft × 10 ft (3 × 3 m) slab at 4 inches (100 mm) thick requires 100 sq ft × 0.333 ft = 33.3 cu ft = 1.23 cubic yards (0.94 m³). With a 10% waste allowance, order 1.4 cubic yards (1.04 m³). At 5 inches / 125 mm thick for vehicle-rated slabs, that becomes 1.7 yd³ including waste. Small pours like this often fall under a supplier’s short-load threshold, so check the short-load fee note below before ordering.

    How many bags of concrete do I need for 1 cubic yard?

    One cubic yard of concrete (27 cu ft) requires approximately 90 × 40 lb bags, 60 × 60 lb bags, or 45 × 80 lb bags. These figures assume standard bag yield (0.30 / 0.45 / 0.60 cu ft respectively) before waste. For hand-mixed work, use a 15% buffer — bump to roughly 69 × 60 lb bags per cubic yard. The Cubic Yards to Bags Converter handles these conversions for any bag size.

    What is the standard concrete thickness for a driveway?

    Residential driveways in the US should be 4 inches / 100 mm minimum for passenger vehicles, and 5 inches / 125 mm if SUVs, pickup trucks, or light delivery vehicles will use it. For RV parking or areas that will see occasional 3-axle trucks, 6 inches / 150 mm with added rebar is the standard. In colder, freeze-thaw-prone climates, going with 5 to 6 inches instead of the 4-inch minimum reduces frost heave damage. Use the Concrete Driveway Calculator to size your specific driveway once you know which thickness applies.

    How do I calculate concrete for a round footing?

    Volume of a cylinder = π × radius² × depth. For a 12-inch / 300 mm diameter tube footing 36 inches / 900 mm deep: π × (0.5 ft)² × 3 ft = 2.36 cu ft = 0.087 yd³ (0.067 m³). Multiply by the number of footings and add 10% waste. For multiple sonotube footings on a deck or post frame, the Concrete Tube/Sonotube Calculator calculates all footings simultaneously.

    Is it cheaper to use bags or ready-mix concrete?

    For volumes under 0.5 cubic yards (0.38 m³), bagged concrete is usually cheaper once you account for ready-mix minimum order charges and delivery fees. Above 1 cubic yard (0.76 m³), ready-mix is typically 15–30% less expensive per cubic yard when all costs are included. Labour is the deciding factor — mixing by hand above 1 yd³ is impractical. The Ready-Mix vs Bagged Concrete Cost Calculator compares both options at your local prices.

  • Concrete for Garage Floors: Full Planning Guide

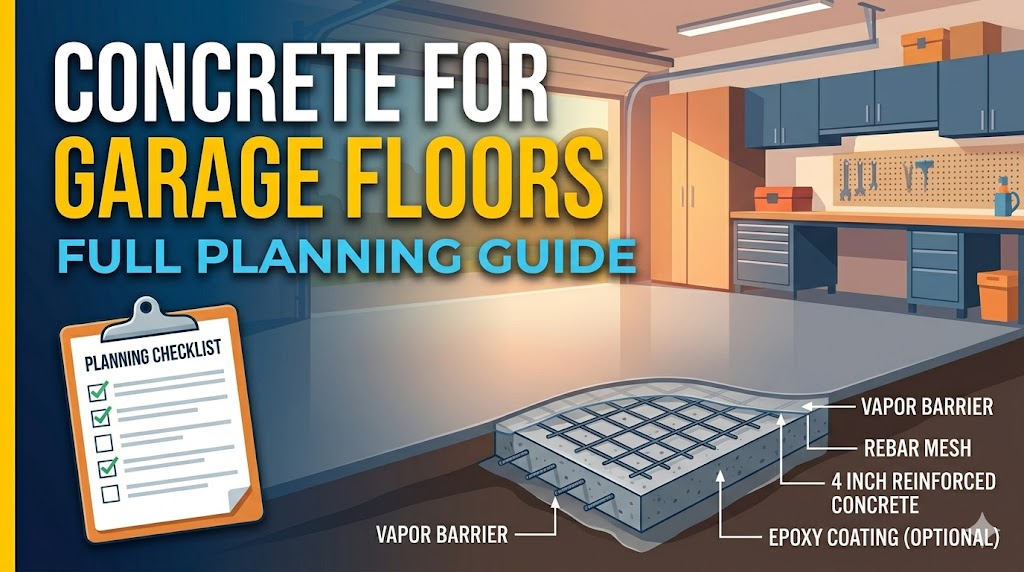
    Concrete for Garage Floors: Full Planning Guide

    The minimum specification for a residential garage floor is 4 inches / 100 mm thick, 3,000 psi / 21 MPa concrete, with 6×6 / W1.4×W1.4 welded wire mesh or equivalent reinforcement. A two-car garage measures roughly 20×22 ft / 6.1×6.7 m and requires approximately 5.4 cubic yards / 4.1 m³ of concrete at 4-inch thickness. Every deviation from those baseline numbers — heavier vehicles, softer subbase, colder climate — changes the spec.

    How to calculate concrete volume for a garage floor

    The formula is straightforward:

    Volume (cubic yards) = Length (ft) × Width (ft) × Thickness (in) ÷ 324

    The divisor 324 converts the result from cubic feet at inches of thickness directly to cubic yards (12 × 27). For metric: Volume (m³) = Length (m) × Width (m) × Thickness (m).

    Worked example for a standard 20×22 ft / 6.1×6.7 m two-car garage at 4 inches / 102 mm:

    20 × 22 × 4 ÷ 324 = 5.43 cubic yards / 4.15 m³

    Add a 10% waste factor for form overpour, subbase variation, and spillage: 5.97 cubic yards / 4.56 m³ — round up to 6 yards for ordering.

    Use the concrete garage floor calculator for irregular shapes, multiple bays, or when you need outputs in both cubic yards and bags in a single step.

    Concrete volume by garage size and slab thickness

    Garage size4 in / 102 mm (yd³)5 in / 127 mm (yd³)6 in / 152 mm (yd³)
    12×20 ft / 3.7×6.1 m (1 car)2.963.704.44
    18×20 ft / 5.5×6.1 m (1.5 car)4.445.566.67
    20×22 ft / 6.1×6.7 m (2 car)5.436.798.15
    24×24 ft / 7.3×7.3 m (2 car)7.118.8910.67
    24×30 ft / 7.3×9.1 m (3 car)8.8911.1113.33
    30×40 ft / 9.1×12.2 m (4 car)14.8118.5222.22

    Volumes above do not include a waste factor. Add 10% for standard residential pours; 5% if the subbase is laser-levelled and forms are precisely set.

    What thickness does a garage floor need?

    Standard residential vehicles

    A 4-inch / 100 mm slab supports standard passenger cars and light trucks. This covers nearly all residential garages where vehicles do not exceed 10,000 lb / 4,500 kg gross weight. The 4-inch minimum assumes a compacted granular subbase of at least 4 inches / 100 mm and a subgrade with no soft spots.

    Heavy vehicles, workshops, and commercial use

    Step to 5 inches / 127 mm for: pickup trucks over 3/4-ton, recreational vehicles, camper trailers, and any garage used as a workshop where forklifts, heavy machinery, or car lifts are installed. Car lifts anchored to slab require a minimum 6-inch / 152 mm slab with #4 rebar at 12-inch / 305 mm centres in both directions around the anchor bolt locations. A 5,000 psi / 34 MPa mix is recommended for anchor bolt zones. The anchor bolt/embed plate calculator sizes embedment depth and edge distance for lift anchor points before you pour.

    The concrete slab thickness selector determines minimum thickness based on vehicle weight and subbase bearing capacity, taking the guesswork out of this specification decision.

    Concrete mix specification for garage floors

    The minimum acceptable mix for a residential garage floor in a temperate climate is 3,000 psi / 21 MPa. In freeze-thaw climates (any location where temperatures drop below 32°F / 0°C regularly), use 4,000 psi / 28 MPa with 5–7% air entrainment. Air-entrained concrete resists scaling caused by de-icing salts and freeze-thaw cycling — the air entrainment calculator dials in the target percentage for your climate and mix design.

    Water-cement ratio for garage floors should not exceed 0.50. A lower ratio — 0.40 to 0.45 — produces a denser, less permeable surface. Every 0.10 increase in the water-cement ratio above 0.50 reduces 28-day strength by approximately 1,000 psi / 7 MPa. The water-cement ratio calculator models this relationship.

    Fibre reinforcement — polypropylene fibres at 1.5 lb/yd³ / 0.89 kg/m³ — reduces plastic shrinkage cracking during the first 24 hours of curing. It does not replace structural rebar or mesh for heavy-load applications, but it is a low-cost addition on any pour.

    Reinforcement: mesh, rebar, or fibres?

    Welded wire mesh (6×6 / W1.4×W1.4 or 6×6 / W2.0×W2.0) is the standard for residential garage floors and sits on chairs at mid-slab depth. It controls crack width if cracking occurs but does not add significant structural strength. Many contractors argue that correctly placed control joints and fibre reinforcement outperform mesh in practice — mesh that sits on the subbase instead of mid-slab contributes nothing.

    Rebar — typically #3 bar at 18-inch / 457 mm centres or #4 bar at 24-inch / 610 mm centres — is used for slabs carrying heavy point loads (car lifts, lathes, press equipment) or where the subbase is weak. The rebar and reinforcing steel calculator calculates total rebar length and weight for the floor area.

    For fibres, the dosage depends on fibre type: synthetic macro fibres at 3–5 lb/yd³ / 1.8–3.0 kg/m³ can substitute for mesh in non-structural applications. Steel fibres at 25–40 lb/yd³ / 15–24 kg/m³ are used in industrial applications and are excessive for residential garages. The fiber reinforcement calculator converts a target dosage into the total fibre weight needed for your pour volume.

    Subbase, control joints, and slope

    A properly prepared subbase is as important as the concrete specification. Remove all organic material and soft spots. Compact to a minimum 95% Standard Proctor density. Install 4–6 inches / 100–152 mm of compacted gravel (crushed stone or dense-graded aggregate) — this provides drainage and a consistent bearing surface.

    Control joints are saw-cut or tooled into the slab to direct where cracking occurs. Space them no further apart than 2–3 times the slab thickness in feet — so a 4-inch / 100 mm slab needs control joints every 8–12 feet / 2.4–3.7 m. Joints should be cut to one-quarter of the slab depth (1 inch / 25 mm for a 4-inch slab). Saw-cut within 6–12 hours of finishing before shrinkage cracking initiates.

    Garage floors slope 1/8 to 1/4 inch per foot / 10–21 mm per metre toward the door or a floor drain. A 20-foot / 6.1 m deep garage needs a 2.5–5 inch / 63–127 mm elevation change from back to front. Confirm the slope direction before pouring — it is extremely expensive to correct after the fact.

    Common mistakes in garage floor concrete projects

    Pouring on a frozen or frost-heaved subbase. A subbase that appears firm in winter may have frost lenses 6–12 inches / 152–305 mm below the surface. When the frost thaws, the slab loses uniform support and cracks. Never pour on frozen ground. In cold climates, install a vapour barrier and confirm subgrade temperatures are above 40°F / 4°C to a depth of 6 inches / 152 mm before beginning.

    Overworking the surface finish. Re-trowelling garage floors after bleed water has fully risen brings water and fine particles to the surface, creating a weak, dusty, high-permeability layer. This is the primary cause of surface scaling and dusting in new garage floors. Stop trowelling when bleed water is no longer visible and the surface can be walked on without leaving deep impressions.

    Skipping curing. Concrete loses up to 40% of its potential strength if it is allowed to dry out in the first 7 days. Residential contractors frequently strip forms and walk away. The correct approach is to cure for a minimum 7 days using curing compound, wet burlap, or plastic sheeting. In hot or windy conditions, begin curing within 20 minutes of finishing. The concrete curing time estimator adjusts curing duration by temperature.

    Undersizing the mix for the climate. Using a non-air-entrained 3,000 psi / 21 MPa mix in a location that regularly uses rock salt or calcium chloride de-icers causes surface scaling within two winters. The scaling is permanent and cannot be repaired cost-effectively — the floor eventually needs to be ground and resurfaced. Air-entrained 4,000 psi / 28 MPa concrete with a low water-cement ratio is the correct specification for any garage in a freeze-thaw climate.

    Related calculators you might need

    After sizing the slab, the concrete cost per square foot calculator gives you a cost-per-square-foot figure that is easy to compare against contractor quotes. For rebar layout, the rebar spacing calculator optimises bar spacing to hit a target area of steel. If you are pricing the subbase as well, the gravel and crushed stone calculator calculates aggregate volume and tonnage for the compacted base layer. Once the floor is cured, the concrete sealer coverage calculator tells you how much sealer to buy for the finished area. For a complete project cost breakdown including labour, the full concrete project estimator is the most comprehensive starting point.

    Frequently asked questions

    How thick should a garage floor be?

    4 inches / 100 mm is the residential minimum for standard passenger vehicles. Use 5 inches / 127 mm for 3/4-ton pickups and heavier trucks, and 6 inches / 152 mm for any slab that will have a car lift installed. Thickness should be measured at the thinnest point — not the average — so subbase levelling matters.

    What PSI concrete for a garage floor?

    3,000 psi / 21 MPa minimum in mild climates. 4,000 psi / 28 MPa with 5–7% air entrainment in any climate where de-icing salts are used or temperatures regularly drop below freezing. Higher-strength mixes add modest cost per yard but significantly extend the floor’s service life in harsh conditions.

    How many yards of concrete does a 2-car garage need?

    A 20×22 ft / 6.1×6.7 m slab at 4 inches / 100 mm requires approximately 5.4 cubic yards / 4.1 m³. Add 10% waste factor and round up — order 6 yards. A 24×24 ft / 7.3×7.3 m garage at the same thickness needs 7.1 yards before waste; with 10% added, order 8. Use the concrete garage floor calculator to get exact volumes for your specific dimensions.

    Do I need rebar in a garage floor?

    Welded wire mesh is sufficient for standard residential garage floors with passenger cars. Rebar is required when installing a car lift, when the subgrade is weak or poorly compacted, or when vehicles over 10,000 lb / 4,500 kg will use the space. Fibres added to the mix reduce plastic shrinkage cracking and complement mesh or rebar — they do not replace structural reinforcement.

    How long does a garage floor need to cure before parking on it?

    At 70°F / 21°C, standard concrete reaches sufficient strength for light foot traffic in 24 hours and can accept vehicle traffic at 7 days. Full design strength takes 28 days. In cold conditions — below 50°F / 10°C — extend vehicle traffic to 10–14 days. The concrete curing time estimator gives temperature-adjusted timelines so you can plan around the weather.

    Should I seal a garage floor after pouring?

    Yes, for any garage in a freeze-thaw climate or where de-icing products are tracked in from vehicles. Apply a penetrating silane/siloxane sealer 28 days after the pour — earlier application traps moisture and can cause discolouration. Acrylic topical sealers provide a gloss finish and chemical resistance but require reapplication every 2–3 years. Penetrating sealers last longer and are more appropriate for working garages.

  • How to Calculate Concrete for a Driveway (Imperial & Metric)

    How to Calculate Concrete for a Driveway (Imperial & Metric)

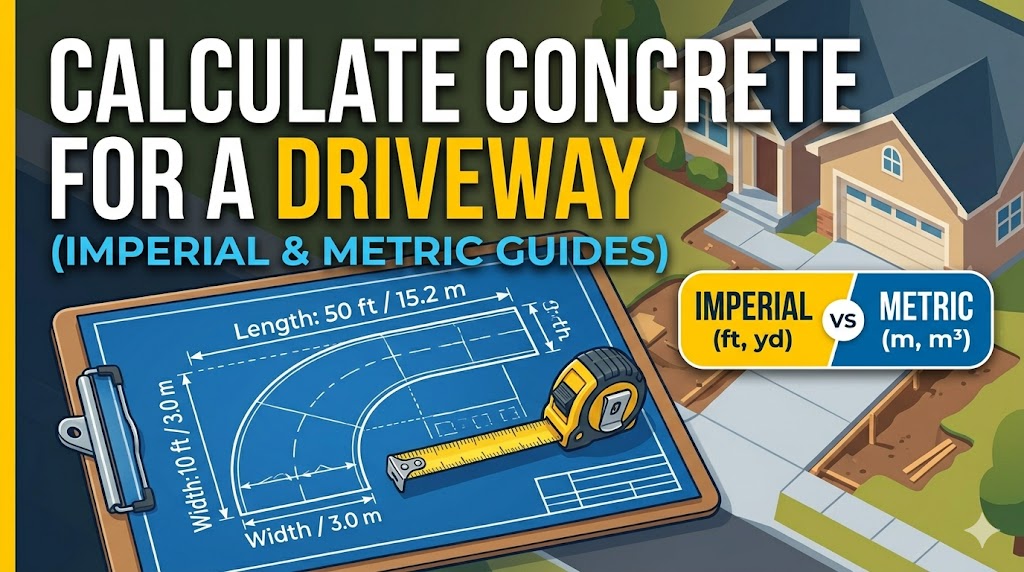
    A standard two-car residential concrete driveway — 16 ft wide by 38 ft long at 5 inches thick — requires approximately 9.4 cubic yards (7.2 m³) of concrete. That figure shifts based on width, length, thickness, and whether you include the apron. Getting the calculation wrong in either direction means either a short pour mid-job or overpaying for concrete and disposal of unused material.

    The driveway concrete formula — imperial and metric

    The core calculation is: Volume = Length × Width × Thickness (all in the same unit).

    Imperial: Convert all dimensions to feet. Thickness in inches ÷ 12 = thickness in feet. Then: Length (ft) × Width (ft) × Thickness (ft) = Volume in cubic feet ÷ 27 = cubic yards.

    Metric: Convert all dimensions to metres. Thickness in mm ÷ 1000 = thickness in metres. Then: Length (m) × Width (m) × Thickness (m) = cubic metres.

    Example — imperial: A driveway 18 ft wide × 40 ft long × 5 in thick = 18 × 40 × (5/12) = 300 cu ft ÷ 27 = 11.1 yd³. Add 10% waste: order 12.2 yd³, round to 12.5 yd³.

    Example — metric: Same driveway = 5.5 m × 12.2 m × 0.125 m = 8.4 m³. Add 10% waste: order 9.2 m³, round up to 9.5 m³.

    Why add 10% at all? Uneven subgrade, spillage, and over-excavation routinely eat into your margin — the Concrete Waste Factor Calculator lets you adjust that percentage based on how irregular your site actually is, rather than applying a flat 10% blindly.

    The Concrete Driveway Calculator handles both unit systems and outputs cubic yards, cubic metres, and bag counts simultaneously — useful when comparing quotes from suppliers using different units.

    Standard driveway dimensions and resulting concrete volumes

    The table below covers the most common residential and light commercial driveway configurations. All volumes include a 10% waste factor.

    ConfigurationDimensions (ft / m)ThicknessVolume (incl. 10% waste)
    Single car (1 lane)10×20 ft / 3×6.1 m4 in / 100 mm2.7 yd³ / 2.0 m³
    Single car (1 lane)10×30 ft / 3×9.1 m4 in / 100 mm4.1 yd³ / 3.0 m³
    Double car (2 lane)16×20 ft / 4.9×6.1 m5 in / 125 mm5.4 yd³ / 4.1 m³
    Double car (2 lane)20×40 ft / 6.1×12.2 m5 in / 125 mm13.6 yd³ / 10.2 m³
    RV/boat pad addition12×30 ft / 3.6×9.1 m6 in / 150 mm7.3 yd³ / 5.4 m³
    Curved/irregular (est.)18×38 ft / 5.5×11.6 m5 in / 125 mm11.6 yd³ / 8.8 m³

    For curved or irregular-shaped driveways, sketch the plan and break it into rectangles. Calculate each section independently, then sum. If the shape curves significantly, reduce the measured length by 5% to account for the difference between arc length and chord length on shallow curves.

    Driveway thickness: what the standards actually require

    Residential passenger vehicles (cars, SUVs, light pickups)

    The minimum thickness is 4 inches / 100 mm per ACI 330R (Guide for the Design and Construction of Concrete Parking Lots and Driveways). In practice, most concrete contractors pour at 5 inches / 125 mm on residential work to provide margin against subgrade settlement and local traffic. On a 16×20 ft double-car driveway, upgrading from 4 to 5 inches adds approximately 1.0 yd³ (0.75 m³) — roughly $130–$180 in material.

    Heavy vehicles and RV parking

    Pickup trucks over 8,500 lb GVWR, loaded trailers, and RVs require a minimum of 6 inches / 150 mm. Areas regularly used for RV storage should have 6 inch slabs with #4 (13 mm) rebar at 18 inch (450 mm) centres both ways. Undersized slabs under heavy vehicles develop transverse cracking within 3–5 years in most climates.

    The driveway apron: don’t forget this concrete

    The driveway apron — the transition section from the street to the private driveway — is often calculated separately or forgotten entirely. In most US jurisdictions, aprons are owned by the homeowner but must meet municipal specifications: typically 6 inches / 150 mm thickness with a specific cross-slope (1–2%) for drainage compliance.

    A standard single-car apron is approximately 10 ft × 6 ft (3 m × 1.8 m) and adds about 1.2 yd³ (0.9 m³). A two-car apron is typically 18–20 ft × 6 ft (5.5–6.1 m × 1.8 m). At 6 inches / 150 mm thick, a two-car apron adds roughly 2.3 yd³ (1.7 m³) to your order — a quantity that’s easy to miss when calculating only the main driveway section. The Concrete Driveway Apron Calculator calculates the apron separately so it can be added to your total.

    Concrete mix specification for driveways

    US residential driveways should use a minimum 4,000 PSI / 27 MPa mix. In freeze-thaw climates (US Exposure Class F1/F2), air-entrained concrete with 5–7% air content is required to prevent surface scaling. Non-air-entrained 4,000 PSI concrete placed in a freeze-thaw environment will show surface delamination within 2–5 winters.

    Canadian driveways are specified differently. Under CSA A23.1, a plain (non-structurally-reinforced) residential driveway falls under Exposure Class C-2 — concrete exposed to chlorides and freeze-thaw, the same class covering walkways, patios, and steps. C-2 calls for a minimum 32 MPa (≈4,600 PSI) mix at 5–8% air content, which is meaningfully stronger than the 4,000 PSI US baseline. Don’t substitute the US figure on a Canadian job. The PSI to MPa Converter makes it easy to check a supplier’s quoted strength against whichever spec applies to your location.

    The water-cement ratio must be 0.45 or less for driveway applications in freeze-thaw conditions (ACI 318 requirements; CSA A23.1 sets the same 0.45 ceiling for C-2). Higher w/c ratios increase permeability, allowing deicers to penetrate and cause internal damage. The Water-Cement Ratio Calculator shows how w/c ratio affects compressive strength so you can verify your mix design meets the spec.

    Common mistakes when calculating driveway concrete

    1. Calculating only the driveway and forgetting the apron. The apron from street to property line often adds 10–20% to total volume. Always calculate both sections and sum them before ordering.

    2. Using 4-inch thickness for the whole driveway when it includes an RV pad or boat storage area. Those sections need 6 inches / 150 mm. Calculate the two zones at different thicknesses and add the volumes — don’t average the thickness across the whole area.

    3. Not accounting for the subbase compaction depth. If your subbase drops 2 inches (50 mm) more than planned after compaction in any section, that’s additional concrete volume. Survey the finished subbase with a straightedge before finalising your order, and use the Gravel & Crushed Stone Calculator to work out how much base material you need to compact in the first place.

    4. Ordering ready-mix without checking the truck access route or minimum load. A standard ready-mix truck requires 10–12 ft (3–3.6 m) of clearance and weighs approximately 66,000 lb (30,000 kg) loaded. Soft ground, low-clearance overhangs, and tight turns can prevent direct delivery. Chute reach is typically 18 ft (5.5 m); beyond that, you’ll need a pump or wheelbarrow relay. Small driveways and single-car pads often fall under the supplier’s minimum order — check with the Concrete Truck Load Calculator how many yards your job needs relative to a full truck, and if you’re ordering less than a full load, the Short Load Fee Estimator shows what surcharge to expect so it doesn’t show up as a surprise on the invoice.

    Related calculators you might need

    After calculating your driveway volume, use the Concrete Cost Per Square Foot Calculator to convert your volume figure into a total material cost at local pricing. If rebar is required — and it should be for RV pads, areas over poor soil, and any pour over 5 yards — the Rebar/Reinforcing Steel Calculator calculates bar quantities and spacing. The Concrete Slab Thickness Selector is also worth checking before finalising thickness, particularly if you’re unsure whether 4 or 5 inches applies to your load scenario. And once your driveway is placed, the Concrete Sealer Coverage Calculator tells you how much sealer you’ll need at 28 days post-pour.

    Frequently asked questions

    How many cubic yards of concrete do I need for a 2-car driveway?

    A typical two-car driveway — 20 ft wide by 40 ft long at 5 inches thick — requires approximately 13.6 cubic yards including 10% waste. A more compact version at 16 ft × 30 ft at 5 inches requires 8.1 cubic yards. The actual number depends on your dimensions, so measure the exact length and width before ordering. Use the Concrete Driveway Calculator with your specific measurements for an accurate figure.

    How thick should a concrete driveway be?

    4 inches / 100 mm is the minimum for passenger vehicles. 5 inches / 125 mm is the practical standard for residential work — it provides a margin for subgrade variation and handles the occasional delivery truck. 6 inches / 150 mm is required for driveways with regular heavy vehicle use (RVs, trailers, loaded trucks). In freeze-thaw climates, never go below 5 inches and always specify air-entrained concrete.

    Does concrete driveway thickness affect cost much?

    Yes, meaningfully. On a 20×40 ft (6.1×12.2 m) driveway, upgrading from 4 to 5 inches adds approximately 2.5 yd³ (1.9 m³) — roughly $350–$475 in materials and $150–$200 in labour. Upgrading from 4 to 6 inches adds about 4.9 yd³ (3.7 m³) — adding $685–$930 in materials. For most residential applications, the 5-inch thickness offers the best value balance between cost and longevity.

    How do I calculate concrete for an L-shaped or curved driveway?

    Divide the shape into rectangles. For an L-shape: calculate each leg separately and sum. For a curved driveway, use the chord length (straight-line distance) of each curved section, reduced by 3–5% to account for curvature. For sweeping curves with a radius under 20 ft (6 m), reduce by 8%. Alternatively, use the Concrete Volume Multi-Shape Calculator which accepts multiple sections and handles irregular geometries.

    Is the concrete spec different for a driveway in Canada vs the US?

    Yes. US practice typically specifies 4,000 PSI (27 MPa) as the residential driveway minimum. Canada’s CSA A23.1 classifies plain residential driveways under Exposure Class C-2, which requires a minimum 32 MPa (≈4,600 PSI) mix at 5–8% air content — noticeably stronger than the US baseline. If you’re ordering concrete in Canada, quote the MPa figure to your supplier, not the PSI one, and confirm C-2 is the class specified on the ticket.

  • Post Hole Concrete: Exactly How Much Do You Need?

    Post Hole Concrete: Exactly How Much Do You Need?

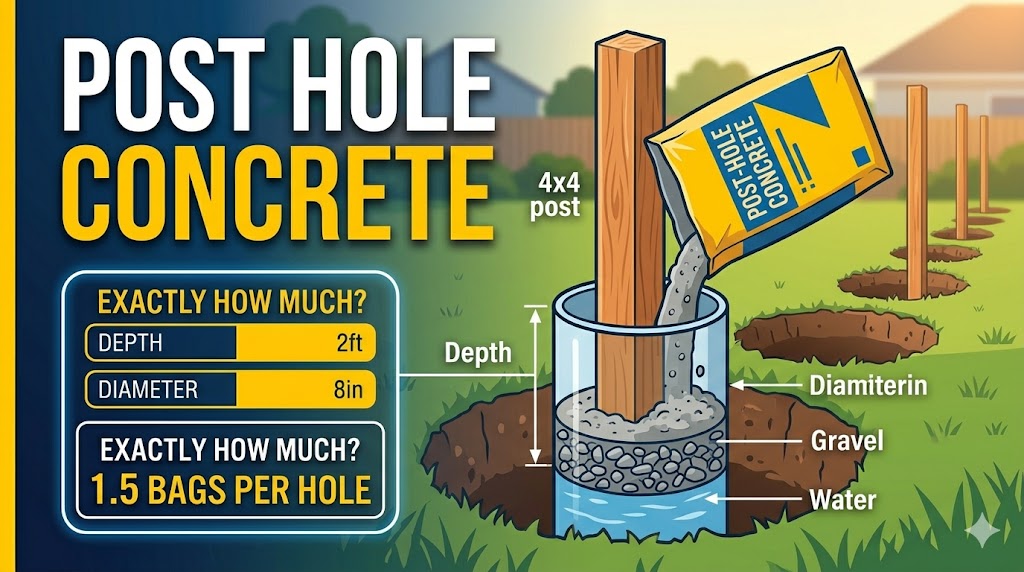
    A standard 4-inch / 100 mm diameter post in a 10-inch / 254 mm wide hole requires roughly 0.46 cubic feet / 0.013 m³ of concrete per foot of depth — but the actual volume depends on your hole diameter, hole depth, and post size. Get those three numbers right, and waste drops to near zero.

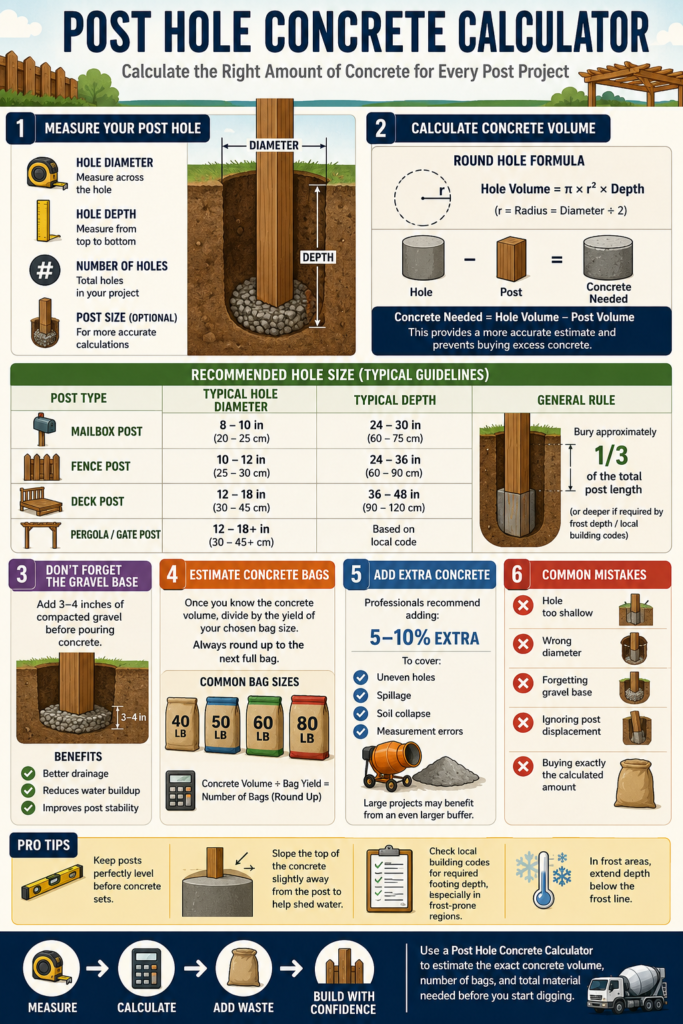
    INFOGRAPHICS ON Post Hole Concrete

    How to Calculate Post Hole Concrete Volume

    The formula treats the hole as a cylinder and subtracts the volume of the post itself:

    Volume = π × r² × depth − post cross-section × depth

    Where r is the radius of the hole. In practice, the post volume is small enough that most contractors skip the subtraction for wood posts — it matters more for large-diameter steel or concrete posts.

    Worked example: a 10-inch / 254 mm diameter hole, 36 inches / 914 mm deep, for a 4×4 (3.5-inch / 89 mm actual) wood post.

    • Hole radius = 5 inches / 127 mm = 0.417 ft / 0.127 m
    • Hole volume = π × (0.417)² × 3 ft = 1.636 ft³ / 0.0463 m³
    • Post cross-section = 3.5 × 3.5 = 12.25 in² = 0.0851 ft²
    • Post volume = 0.0851 × 3 = 0.255 ft³ / 0.0072 m³
    • Net concrete volume = 1.636 − 0.255 = 1.38 ft³ / 0.039 m³

    A 60 lb bag yields approximately 0.45 ft³. With a 10% waste allowance, this hole needs 1.38 × 1.10 = 1.52 ft³, or 3.4 bags — round up to four 60 lb bags. For a fence project with 20 identical holes, that’s roughly 68 bags total calculated in bulk off total volume, rather than rounding up per hole, which wastes more material.

    Skip the manual calculation — the post hole concrete calculator handles this for any hole size, depth, and post dimension, and outputs total bags across multiple holes at once.

    Post Hole Concrete Volume by Common Hole and Depth Combinations

    The table below shows net concrete volume (after subtracting a standard 4×4 post) for the most common post hole configurations, with bag counts including a 10% waste allowance.

    Hole diameterDepthNet volume (ft³)60 lb bags needed
    8 in / 203 mm24 in / 610 mm0.532
    8 in / 203 mm36 in / 914 mm0.792
    10 in / 254 mm36 in / 914 mm1.384
    10 in / 254 mm48 in / 1219 mm1.845
    12 in / 305 mm42 in / 1067 mm2.456
    12 in / 305 mm48 in / 1219 mm2.807
    16 in / 406 mm48 in / 1219 mm5.2513

    A 60 lb bag yields approximately 0.45 ft³ / 0.013 m³. An 80 lb bag yields roughly 0.60 ft³ / 0.017 m³. If you’re buying 80 lb bags instead, divide net volume (× 1.10 for waste) by 0.60 rather than 0.45. Ordering across many holes with different diameters? The waste factor calculator lets you set a custom percentage instead of the flat 10% used here.

    How deep do post holes need to be?

    Depth is determined by two factors: frost depth and the structural load the post carries.

    In cold climates, the bottom of the footing must sit below the local frost depth or frost heave will push the post up over successive freeze-thaw cycles. Frost depth ranges from 0 in parts of Florida and southern California to over 60 inches / 1524 mm in Minnesota and northern Canada. The frost depth and footing depth calculator gives region-specific depths by US zip code and Canadian province.

    The rule of thumb used by most fence and deck contractors is to set posts at least one-third of their above-ground height into the ground. A 6-foot / 1.83 m fence post needs a minimum 2-foot / 610 mm embedment, but in freeze-prone zones that often extends to 3–4 feet / 914–1219 mm.

    For structural applications — deck posts carrying live loads, carport columns, pergola supports — engineered footings sized by a structural engineer replace rule-of-thumb depths. In those cases, the concrete column and pier calculator is the more appropriate tool.

    Common mistakes when filling post holes with concrete

    Adding too much water to the mix. Contractors and DIYers frequently add extra water to make bagged mix easier to pour into the hole. Every additional pint of water above the recommended ratio raises the water-cement ratio and drops final compressive strength. A mix that pours like soup may hit only 2,000 psi / 14 MPa instead of the 4,000 psi / 28 MPa printed on the bag. Add water conservatively — the mix should be stiff enough to hold a mound shape before it settles into the hole.

    Skipping the gravel drainage layer. Placing concrete directly on undisturbed soil in clay-heavy ground traps moisture against the post base. The correct approach is 4–6 inches / 100–152 mm of compacted gravel at the bottom of the hole before pouring — use the gravel and crushed stone calculator to size that layer for your hole count. This allows water to drain away from the post and reduces post rot in wood applications.

    Undersizing hole diameter for the post. A hole only slightly wider than the post leaves no room to plumb the post accurately before the concrete sets, and the thin concrete shell around the post lacks the bearing area to resist lateral loads. The minimum hole diameter is roughly 3× the post width for wood posts — so a 4×4 / 89 mm post needs at least a 10–12 inch / 254–305 mm hole depending on which standard auger bit you’re working with (10 inches for light fence work, 12 inches for structural applications). If you’re forming the hole with a sonotube rather than digging free-form, the concrete tube / sonotube calculator keeps the diameter consistent top to bottom and calculates volume directly from the tube size.

    Pouring in cold weather without precautions. Fresh concrete that freezes before reaching initial set will not gain strength and will be permanently weakened. Below 40°F / 4°C, use warm mix water and cover the exposed hole opening with insulating blankets for at least 24–48 hours. Below 20°F / -7°C, postpone the pour or use a heated enclosure.

    Related calculators you might need

    For more foundation and footing tools beyond post holes, browse the full foundations and footings calculator hub. Once you know how many cubic feet of concrete each hole requires, the concrete bags calculator converts total volume into exact bag counts across 40 lb, 60 lb, and 80 lb sizes — useful when buying in bulk from a home centre. For larger post and column footings poured from a ready-mix truck, the concrete truck load calculator helps you determine whether you need a full load or will be paying a short-load surcharge. If your project also includes a deck or slab over the posts, the concrete footing calculator handles pad-style and continuous footings. For total project budgeting, the full concrete project estimator rolls materials, labour, and delivery into a single cost figure.

    Frequently asked questions

    How many bags of concrete do I need for a fence post?

    For a standard 8-inch / 203 mm diameter hole at 30 inches / 762 mm deep, plan on two 60 lb bags. For a 10-inch / 254 mm hole at 36 inches / 914 mm deep, plan on four 60 lb bags. These figures include a 10% waste allowance. For multiple posts, it’s more efficient to total the volume first and divide by bag yield once, rather than rounding up per hole. The post hole concrete calculator gives exact figures for any combination of hole size and depth.

    What is the right concrete mix for post holes?

    A minimum 3,000 psi / 21 MPa mix is standard for fence posts; 4,000 psi / 28 MPa is preferred for deck and structural posts. Most bagged fast-setting mixes (Quikrete Fast Setting, SAKRETE, and equivalents) reach 4,000 psi at 28 days. Do not use general-purpose sand mix — it lacks the coarse aggregate needed for load-bearing footings.

    Can I pour dry concrete into a post hole without mixing first?

    Yes, for fast-setting mixes specifically labelled for dry-pour use. You pour dry mix into the hole, then add water on top; the mix absorbs moisture from the surrounding soil and the added water. This technique works in moist soil conditions. In dry, sandy soil the mix may not hydrate fully — in that case, mix in a bucket first. Standard bagged concrete should always be pre-mixed before pouring.

    How long before I can hang a gate on a concrete-set post?

    Fast-setting concrete reaches sufficient strength to accept light loads (fence rails, gate hardware) in 4 hours at 70°F / 21°C. Standard concrete needs 24–48 hours before loading. Full design strength takes 28 days regardless of mix type. The concrete curing time estimator adjusts cure timelines by temperature, so you can plan accurately in cold or hot conditions.

    How deep should a post hole be for a 6-foot fence?

    The structural minimum is one-third of above-ground height — 2 feet / 610 mm for a 6-foot / 1.83 m fence. In frost-prone climates, the code minimum is often 3–4 feet / 914–1219 mm to clear the frost line. Check your local building code; most jurisdictions require permits and inspections for fence installations on boundary lines.

    Does the shape of the hole bottom affect how much concrete I need?

    Yes. A flat-bottomed hole requires less concrete than a rounded or irregular bottom. Hand-dug holes in rocky ground often have irregular profiles that can add 15–20% more volume than the calculated cylinder. Flare the bottom of structural footings — a bell shape 1.5× the hole diameter — to increase bearing area in soft soil, but account for that added volume when ordering bags.

  • What Is a Short-Load Fee and How to Avoid It

    What Is a Short-Load Fee and How to Avoid It

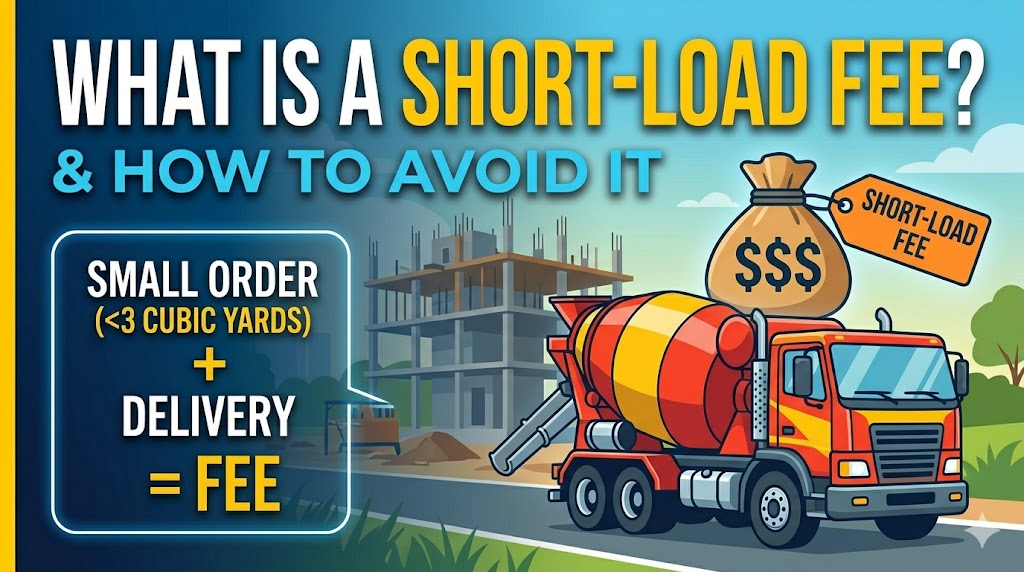
    A short-load fee is a surcharge applied by ready-mix concrete suppliers when your order falls below their minimum delivery volume — typically 8–10 cubic yards / 6.1–7.6 m³. The fee ranges from $50 to $250 per cubic yard under the minimum, which can add $400–$1,200 to a small pour that was already borderline on budget.

    How short-load fees are calculated

    Ready-mix plants price their trucks on a full-load model. A standard transit mixer carries 8–10 cubic yards / 6.1–7.6 m³. When a customer orders less, the plant still dispatches the same truck, burns the same fuel, and ties up the driver for the same amount of time. The short-load fee compensates for the unused capacity.

    The fee structure varies by supplier but typically follows one of two models:

    • Flat-rate model: a fixed dollar amount charged per cubic yard below the minimum. If the minimum is 8 yards and you order 5 yards, you pay for 3 yards of shortfall at the surcharge rate.
    • Graduated model: a smaller per-yard penalty near the minimum and a steeper one on smaller orders, designed to push customers toward the threshold.

    Use the short load fee estimator to see your exact surcharge exposure before you call the plant, based on your order volume and supplier minimum.

    A realistic example: you need 6.5 cubic yards / 4.97 m³ for a driveway apron and walkway extension. Your local plant charges $75 per yard under an 8-yard minimum — that’s a $112.50 short-load fee on top of base concrete costs.

    Short-load fee comparison by typical order size

    Order volume (yd³)Minimum threshold (yd³)Shortfall (yd³)Fee at $75/yd
    3.08.05.0$375
    5.08.03.0$225
    6.58.01.5$112.50
    7.58.00.5$37.50
    8.0+8.00$0

    Fee rates vary significantly by region and supplier. Urban markets with multiple plants tend to be more competitive; rural or remote sites often face higher minimums and steeper surcharges. Check the concrete price per yard by state page to see how your local market compares before you negotiate.

    How to avoid paying a short-load fee

    The most direct approach is to reach the minimum volume. Look at adjacent projects coming up in the next few weeks — a neighbour’s driveway apron, a garden retaining wall, or a shed pad that’s been deferred. Combining orders into a single truck pour eliminates the fee entirely and often lowers per-yard delivery costs too.

    If there’s no adjacent pour to combine with, work out whether it’s cheaper to order up to the minimum and use the extra concrete, or pay the surcharge and order exactly what you need. Extra concrete can go toward walkway extensions, step repairs, or a small ancillary pad — plan the use before the truck arrives, since concrete doesn’t wait around.

    Volumetric or metered trucks are a legitimate alternative for small pours. These trucks mix on-site and charge by the cubic yard actually dispensed — no minimum, no short-load fee. The per-yard cost runs 15–25% higher than plant-mixed concrete, but on a 3–4 yard order that premium is often less than the short-load surcharge from a conventional plant.

    For truly small pours — under 1 cubic yard / 0.76 m³ — bagged concrete mixed on-site is almost always cheaper. Use the ready-mix vs bagged concrete cost calculator to find the crossover point for your specific volume and local pricing.

    Timing matters too. Some plants waive or reduce short-load charges for off-peak deliveries — early morning, mid-week — when trucks would otherwise run light. Always ask the dispatcher directly; it costs nothing to ask.

    Common mistakes that lead to unexpected short-load charges

    • Not asking the supplier’s minimum before ordering. Short-load minimums aren’t always published. A customer assumes 5 yards because that’s what a neighbour said; the actual minimum is 8. Confirm the minimum volume and exact surcharge rate on the first call, before giving any project details.
    • Calculating volume without a waste factor. Contractors often order the theoretical volume and find the pour runs short due to subbase variation, form blowouts, or measurement error. A second delivery to cover the gap triggers a separate short-load fee. Build in a 5–10% waste factor up front with the concrete waste factor calculator so the first order is enough.
    • Treating the short-load fee as fixed. Many customers accept the quoted fee without pushing back. Plants have discretion, especially for repeat customers, commercial accounts, or an early-morning slot. A short conversation with the plant manager can eliminate or halve the fee on small orders.
    • Defaulting to ready-mix when bagged or volumetric is the right tool. For isolated pours under 2 cubic yards / 1.53 m³ with no adjacent work, a standard ready-mix truck is the wrong call from the start — short-load fees, minimum charges, and drum residuals make it economically irrational. Compare total cost across supply methods before booking a truck.

    Related calculators you might need

    Before calling a supplier, know your exact volume. The concrete truck load calculator shows how many cubic yards your pour requires and whether it fills a standard truck. For the cost decision, the concrete delivery cost calculator builds up total delivered cost including base price, fuel surcharge, and short-load fees by region. If the numbers tip toward bagged concrete, the cubic yards to bags converter translates your volume into bag quantities across multiple bag sizes. If you’re quoting the job for a client, the concrete bid proposal generator turns your numbers into a client-ready estimate. For a full project cost summary, the full concrete project estimator rolls materials, delivery, and labour into a single line-item breakdown.

    Frequently asked questions

    What is a short load fee for concrete?

    A short-load fee is a surcharge charged by ready-mix concrete plants when an order falls below their minimum delivery quantity. Minimums are typically 8–10 cubic yards; fees range from $50–$250 per yard under the threshold depending on the supplier and region. The fee exists because the plant incurs the full cost of dispatching a truck regardless of how much concrete it carries.

    How do I avoid a short load concrete fee?

    The three main strategies are: combine the pour with adjacent work to reach the minimum volume; use a volumetric (metered) truck that charges only for what’s dispensed; or choose bagged concrete for pours under 2 cubic yards / 1.53 m³. For borderline volumes, ask the supplier about off-peak delivery slots — plants sometimes waive fees to avoid running trucks empty.

    Is it cheaper to use bags or ready-mix for a small pour?

    For pours under 1 cubic yard / 0.76 m³, bagged concrete mixed on-site is almost always cheaper once short-load fees are factored in. Between 1 and 3 yards, it depends on local bag prices and the specific supplier’s fee structure. Use the ready-mix vs bagged concrete cost calculator to compare totals for your specific pour size and location.

    Are volumetric trucks always cheaper than paying a short-load fee?

    Not always — it depends on order size. Volumetric trucks charge 15–25% more per yard than plant-mixed concrete, but they have no minimum. On a 3–4 yard order, that premium is usually smaller than the short-load surcharge you’d pay from a conventional plant. On orders close to the minimum already, a standard truck plus the fee can still work out cheaper. Run both numbers before booking.

    Do all concrete suppliers charge short-load fees?

    Most ready-mix plants charge some form of short-load or minimum-order fee, but the threshold and rate vary widely. Some large operations in competitive urban markets have reduced minimums to 5 or 6 yards. Volumetric concrete suppliers typically don’t charge short-load fees — they charge per actual yard dispensed, making them cost-effective for small pours.

    Can I order extra concrete to avoid the fee and use the leftovers?

    Yes, and it’s often the right financial decision. Compare the per-yard cost of the extra concrete against the short-load surcharge. If your supplier charges $150/yd for concrete and the short-load fee is $75/yd for a 1-yard shortfall, ordering an extra yard costs $150 but gives you a usable cubic yard of material. Plan a use for it in advance — driveway patch, step footing, shed pad — so nothing goes to waste.

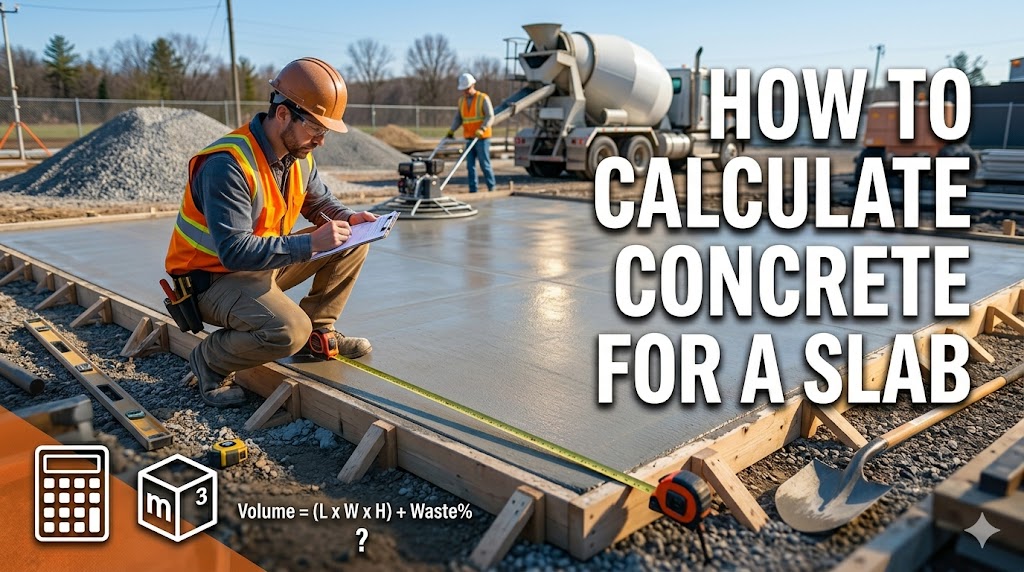
  • How to Calculate Concrete for a Slab: The Complete Step-by-Step Guide (2026)

    How to Calculate Concrete for a Slab: The Complete Step-by-Step Guide (2026)


    Whether you’re pouring a backyard patio, a garage floor, or a shed foundation, one question always comes first: how much concrete do I actually need? Ordering too little means a frustrating mid-pour emergency. Ordering too much wastes money. This guide walks you through every step of calculating concrete for a slab — accurately, confidently, and without guesswork.

    💡 Save time: Use our Concrete Slab Calculator to get your number instantly, then use this guide to understand exactly what that number means.


    What You’ll Learn in This Guide

    • The exact formula for calculating concrete volume
    • How to convert measurements to cubic yards
    • How thick your slab actually needs to be
    • How to account for waste (and why it matters)
    • Bags vs. ready-mix: which to choose
    • Common mistakes to avoid
    • How to use our free calculators to speed up the process

    Step 1: Understand the Basic Formula

    Calculating concrete volume comes down to one simple formula:

    Volume = Length × Width × Thickness
    

    The tricky part is unit consistency. Concrete is ordered and sold by the cubic yard in the United States, but most people measure their slab in feet and inches. So you need to convert everything to feet first, then divide by 27 (because 1 cubic yard = 27 cubic feet).

    The full formula:

    Cubic Yards = (Length ft × Width ft × Thickness ft) ÷ 27
    

    Example: 10×12 Patio at 4 Inches Thick

    • Length: 10 ft
    • Width: 12 ft
    • Thickness: 4 inches = 4 ÷ 12 = 0.333 ft
    10 × 12 × 0.333 = 40 cubic feet
    40 ÷ 27 = 1.48 cubic yards
    

    That’s your raw volume. But you’re not done yet — you still need to add for waste (more on that in Step 4).

    🔢 Skip the math: Plug your dimensions directly into our Concrete Patio Calculator and get cubic yards, cubic feet, and bag count in seconds.


    Step 2: Decide on the Right Slab Thickness

    Thickness is the single biggest variable in your concrete calculation — and getting it wrong is expensive. A slab that’s 1 inch too thin might need replacing in 5 years. A slab that’s 2 inches too thick costs you significantly more concrete than needed.

    Here are the standard thickness guidelines:

    Project TypeRecommended Thickness
    Pedestrian walkway / sidewalk3–4 inches
    Residential patio4 inches
    Garage floor (passenger vehicles)4–5 inches
    Driveway (passenger vehicles)4 inches
    Driveway (trucks / heavy vehicles)5–6 inches
    Workshop / shed floor4 inches
    RV pad or heavy equipment6 inches

    📐 Not sure what thickness your project needs? Our Slab Thickness Selector recommends the right depth based on your load type and soil conditions.

    Pro Tip: If you’re in an area with freeze-thaw cycles, increase thickness by at least half an inch and always use air-entrained concrete. Frost heave is one of the leading causes of slab cracking in colder climates.


    Step 3: Measure Your Area Accurately

    Sounds obvious, but measurement errors are the #1 cause of ordering mistakes. Here’s how to do it right:

    Rectangular Slabs

    Measure length and width at multiple points, especially if your space isn’t perfectly square. Use the largest measurement for each dimension to make sure you don’t come up short.

    L-Shaped or Irregular Slabs

    Break the shape into two or more rectangles. Calculate the volume of each section separately, then add them together.

    Example: L-shaped patio

    • Section A: 12 ft × 8 ft × 0.333 ft = 32 cubic feet
    • Section B: 6 ft × 10 ft × 0.333 ft = 20 cubic feet
    • Total: 52 cubic feet ÷ 27 = 1.93 cubic yards

    Round or Circular Slabs

    Use the circular volume formula:

    Volume = π × radius² × thickness
    

    For a 12-foot diameter fire pit pad at 4 inches thick:

    • Radius = 6 ft
    • Volume = 3.14159 × 36 × 0.333 = 37.7 cubic feet ÷ 27 = 1.4 cubic yards

    🔵 Round or irregular slab? Our Concrete Volume Multi-Shape Calculator handles circular and L-shaped areas automatically — just enter your dimensions.


    Step 4: Always Add a Waste Factor

    This is the step most beginners skip — and it’s the reason so many DIY pours run out of concrete before the job is done.

    Why do you need extra concrete?

    • Subgrade is never perfectly level (low spots consume more concrete)
    • Spillage during pouring and finishing
    • Slight variations in your forms
    • Over-excavation beyond your planned dimensions

    Standard waste factors:

    • 5% — Experienced contractors with precision-built forms
    • 10% — Typical residential DIY project (recommended starting point)
    • 15% — Irregular shapes, uneven terrain, or first-time DIYers
    • 20% — Complex projects with curves, slopes, or steps

    Applying the Waste Factor

    Final Order = Calculated Volume × (1 + Waste Factor)
    

    For our 10×12 patio (1.48 cubic yards) with 10% waste:

    1.48 × 1.10 = 1.63 cubic yards → order 1.7 cubic yards
    

    Not sure which percentage fits your project? Run your numbers through the Concrete Waste Factor Calculator to get a specific recommendation instead of guessing.

    Running short mid-pour is a serious problem. When fresh concrete sits while you wait for more, the earlier pour begins to set. The joint where old meets new concrete is called a cold joint — it’s structurally weak and prone to cracking. Always have enough.

    ⚠️ Important: Most ready-mix suppliers have a full-truck minimum of 8–10 cubic yards, and orders below that threshold get hit with a short-load fee — often $50–$250 per yard under the minimum. An emergency mid-pour reorder falls into this bracket every time. Check your exposure with the Short-Load Fee Estimator before you order — it’s far cheaper than finding out mid-pour.


    Step 5: Bags or Ready-Mix Concrete?

    Once you know your volume, you need to decide how to buy your concrete. This is a bigger decision than most people realize — and the two options don’t cover every volume equally well. Below about 1 cubic yard, bags win easily. Above the truck minimum (8–10 yards), ready-mix wins easily. In between, you’re often better off with a volumetric/metered truck or accepting a short-load fee — see the short-load fee guide above for that math.

    Bagged Concrete (DIY Mix)

    Best for: Small projects under 1 cubic yard (27 cubic feet)

    Common bag sizes and yields:

    • 40 lb bag → approximately 0.30 cubic feet
    • 60 lb bag → approximately 0.45 cubic feet
    • 80 lb bag → approximately 0.60 cubic feet

    For a small 4×4 stepping pad at 4 inches thick:

    4 × 4 × 0.333 = 5.33 cubic feet
    5.33 ÷ 0.60 = 8.9 → need 9 bags of 80 lb concrete
    

    Pros: Available at any hardware store, no minimum order, mix as you go Cons: Labor-intensive, time-consuming, inconsistent mixing, expensive per cubic yard

    🛍️ How many bags do you need? Use our Concrete Bags Calculator to convert any cubic footage into bag counts by size.

    Ready-Mix Concrete (Truck Delivery)

    Best for: Projects at or near a full truck load (8–10 cubic yards), or anything larger

    Ready-mix concrete arrives in a mixer truck already batched to your specified PSI. It’s faster, more consistent, and usually cheaper per cubic yard for larger pours.

    Average ready-mix cost (2026): $150–$200 per cubic yard depending on your region and PSI specification.

    Pros: Consistent mix, fast pour, no manual labor for mixing Cons: Full-truck minimums, short-load fees on smaller orders, delivery fees, time pressure (concrete must be placed within 90 minutes)

    💰 Want to compare costs? Our Concrete Cost Calculator breaks down bags vs. ready-mix pricing for your specific project volume.


    Step 6: Choose the Right PSI (Concrete Strength)

    Not all concrete is the same strength. PSI (pounds per square inch) indicates compressive strength — the higher the number, the stronger the concrete.

    PSIBest Use Case
    2500 PSIFootings, non-structural fills
    3000 PSIResidential driveways, patios, slabs (most common)
    3500 PSIDriveways with heavy vehicles
    4000 PSICommercial floors, structural elements
    5000+ PSIHigh-load structural applications

    For the vast majority of residential concrete slabs — patios, garage floors, sidewalks — 3000 PSI is the standard. It balances cost and durability perfectly.

    Higher PSI mixes typically cost $10–$20 more per cubic yard from a ready-mix supplier but can be worth it for long-term durability, especially in high-traffic areas. If your supplier quotes you in MPa instead of PSI, the PSI to MPa Converter translates it instantly.


    Step 7: Don’t Forget Reinforcement

    Concrete is strong in compression but weak in tension — meaning it resists being crushed but can crack when pulled or flexed. Reinforcement adds tensile strength to prevent cracking.

    Wire Mesh (Welded Wire Fabric)

    • Used in residential slabs, patios, and garage floors
    • Placed in the middle of the slab (use chairs to elevate it)
    • Prevents cracks from spreading after they form
    • Cost: ~$0.10–$0.15 per square foot

    Use the Wire Mesh Calculator to figure out how many sheets or rolls your slab needs, including standard overlap.

    Rebar (Steel Reinforcing Bar)

    • Used in driveways, footings, structural slabs
    • #3 rebar (3/8 inch) on 18-inch grid is standard for residential driveways
    • Provides structural strength, not just crack control
    • Cost: ~$0.50–$1.00 per linear foot

    📏 Calculate your rebar needs: Use our Rebar Calculator to determine total linear feet, or the Rebar Spacing Calculator to dial in the right grid for your slab.

    Fiber Reinforcement

    • Mixed directly into the concrete
    • Controls surface shrinkage cracking
    • Does NOT replace rebar for structural strength
    • Best used in combination with mesh or rebar

    The Fiber Reinforcement Calculator tells you the right dosage per cubic yard for your mix.


    Step 8: Prepare Your Site Properly

    Even a perfectly calculated concrete order will fail if your site preparation is poor. This is the step that separates lasting slabs from ones that crack within a year.

    The proper base sequence:

    1. Excavate to the correct depth (slab thickness + 4 inches for gravel base)
    2. Add 4 inches of compacted gravel (crushed stone #57 is ideal)
    3. Compact with a plate compactor until the surface is firm — you should leave no footprints when walking on it
    4. Install forms (2×4 or 2×6 lumber depending on slab thickness)
    5. Lightly dampen the base just before pouring — this prevents the dry subgrade from sucking water out of the concrete too fast
    6. Place vapor barrier (inside slabs only) to prevent moisture migration

    A 4-inch compacted gravel base does three things: provides drainage, prevents ground movement from cracking the slab, and gives you a stable, level surface to pour against. Use the Gravel & Crushed Stone Calculator to figure out how much base material to order alongside your concrete.


    Putting It All Together: Complete Example

    Let’s calculate everything for a 12×20 ft garage floor at 4 inches thick:

    Step 1 — Raw Volume:

    12 × 20 × 0.333 = 79.92 cubic feet ÷ 27 = 2.96 cubic yards
    

    Step 2 — Add 10% waste:

    2.96 × 1.10 = 3.26 cubic yards → order 3.5 cubic yards
    

    Step 3 — PSI: 3000 PSI (standard residential garage)

    Step 4 — Reinforcement: Wire mesh or #3 rebar on 18-inch grid

    Step 5 — Ready-mix vs. bags: At 3.5 cubic yards, you’re well below most 8–10 yard truck minimums, so expect a short-load fee — check the Short-Load Fee Estimator before you call. Bagging this project would take ~158 bags of 80 lb concrete — exhausting and time-consuming, and not realistic at this volume.

    Step 6 — Base: 4 inches of compacted gravel = 12 × 20 × 0.333 ft = 2.96 cubic yards of gravel

    🏗️ Get the full breakdown in one click: Our Concrete Garage Floor Calculator outputs cubic yards, bag count, waste-adjusted totals, and cost estimates all at once.


    Common Mistakes to Avoid

    1. Measuring in inches but forgetting to convert Always convert thickness to feet before calculating. 4 inches = 0.333 ft, not 4.

    2. Skipping the waste factor Even a 5% overage is better than nothing. Running short mid-pour costs far more than the extra concrete.

    3. Pouring on unprepared ground No gravel base = slab will settle unevenly and crack within 1–2 years.

    4. Under-ordering for round or irregular shapes These shapes are harder to estimate mentally. Always use a calculator and add extra waste.

    5. Ordering PSI that’s too low 2500 PSI is technically sufficient for footings, but don’t use it for driveways or garage floors where you need durability.

    6. Not checking weather Concrete should not be poured when temperatures are below 40°F or above 90°F without special precautions. Cold slows curing; heat accelerates it, causing surface cracking.


    Quick Reference: Concrete Calculators for Every Project

    Your slab is just one of many concrete projects you might tackle. Here are the tools available to you on All Concrete Calculator:


    Final Thoughts

    Calculating concrete correctly before you pour is one of the most important steps in any concrete project — and it’s not complicated once you know the formula. Measure your slab, apply the right thickness for your use case, add a waste factor, and decide between bags and ready-mix based on your volume.

    The math is simple. The preparation matters more than most people realize. And having the right tools makes both effortless.

    Ready to calculate your project? Head to our Concrete Slab Calculator — it takes under 60 seconds and gives you everything you need to order with confidence.


    Found this guide helpful? Browse more articles in our Concrete Learning Hub for tips on mixing, curing, finishing, and more.