
Category: Glossary

  • What Is a Stem Wall?

    What Is a Stem Wall?

    A stem wall is a short concrete wall that sits on top of a footing and extends up to the height of the finished floor, creating the vertical connection between the foundation footing below grade and the structure above. Stem walls typically stand 12 to 36 inches (300 to 900 mm) tall and 6 to 12 inches (150 to 300 mm) thick, and are common on sloped sites, crawl space foundations, and slab-on-grade construction where the floor needs to sit above grade for drainage or frost protection.

    How Do You Size a Stem Wall?

    Stem wall thickness is governed by the load above it and the unsupported height — a taller stem wall needs to be thicker or more heavily reinforced to resist lateral soil pressure and bending, the same way a taller unsupported column needs a wider base. A common residential stem wall for a single-story, slab-on-grade home is 8 in (200 mm) thick and 18–24 in (450–600 mm) tall, matched to an 8 in (200 mm) wide footing below it, though taller stem walls on sloped lots or in seismic zones need engineered thickness and reinforcement.

    Worked example: a slab-on-grade house on a lot that slopes 18 in (450 mm) across the building footprint might need a stem wall averaging 18 in (450 mm) tall on the low side to bring the floor level, tapering down to a few inches on the high side, with the footing beneath sized separately based on soil bearing capacity.

    The concrete stem wall calculator takes wall length, height, and thickness and returns the concrete volume needed, which is the number to confirm before ordering, since stem wall volume is usually calculated separately from the footing it sits on.

    Why Use a Stem Wall Instead of a Standard Foundation?

    A stem wall solves two problems that a footing alone can’t: getting the finished floor above grade, and creating a continuous vertical bearing surface for the walls above. Without a stem wall, a slab poured directly at grade level, called a monolithic slab, sits close to ground moisture and needs the footing itself to be much wider and more heavily detailed at the perimeter to compensate; a stem wall raises the floor and lets water drain away from the structure instead of pooling against it.

    On sloped sites, stem walls also solve a grading problem — rather than stepping a foundation down a slope in a series of separate footings at different depths, a stem wall of varying height, taller on the downhill side and shorter uphill, lets the top of the wall stay level while the footing beneath follows the slope, or steps down in defined increments.

    Structurally, a stem wall carries the building’s vertical load down to the footing while also resisting lateral pressure from the soil backfilled against it — particularly relevant for crawl space and basement construction, less so for a shallow slab-on-grade stem wall, which sees much lower lateral soil load.

    Common Mistakes

    Under-sizing stem wall thickness on a taller wall, treating an 18 in stem wall the same as a 30+ in one, ignores that lateral soil pressure and bending moment both increase with height, not linearly with a simple rule of thumb. Taller stem walls need engineering review, not a copy-paste of the dimensions used on a shorter wall elsewhere on the same job.

    Backfilling against a stem wall before it has cured to adequate strength, often to keep a schedule moving, risks cracking or bowing the wall under the lateral soil load before the concrete can resist it. Most stem walls need at least 7 days of cure, longer for taller or thinner walls, before backfill loads are applied.

    Missing or undersized vertical reinforcement — the dowels connecting the stem wall to the footing below and the structure above — is a common oversight on DIY and small residential jobs. Without it, the stem wall relies entirely on the concrete’s own tensile strength at the cold joint with the footing, which is far weaker than a properly doweled connection.

    Not accounting for a sloped lot correctly, using a single stem wall height across the whole perimeter instead of stepping or tapering it to the actual grade change, either leaves the low side under-height, causing drainage problems, or the high side excessively tall, wasting concrete and adding unnecessary lateral load.

    Related Calculators You Might Need

    A stem wall’s design starts with the footing beneath it, so check the concrete footing calculator first to confirm that dimension before sizing the wall above it. On a sloped lot, the frost depth/footing depth calculator helps confirm the footing depth is adequate across the full slope, not just at one point. Vertical reinforcement should be checked with the rebar/reinforcing steel calculator once wall height and thickness are set. And if this stem wall is supporting a basement rather than a crawl space, compare it against the concrete foundation wall calculator, since basement walls carry substantially more lateral load and are sized differently.

    Frequently Asked Questions

    What is the purpose of a stem wall?

    A stem wall raises the finished floor above grade for drainage and frost protection, and provides a continuous, level bearing surface for the structure above even when the footing beneath follows a sloped or stepped grade. It’s the vertical link between the footing, which does the structural work of spreading load into the soil, and the framing or slab above.

    How tall should a stem wall be?

    Most slab-on-grade residential stem walls are 12 to 24 in (300 to 600 mm) tall, enough to get the finished floor above grade and provide drainage clearance. Crawl space stem walls run taller, often 24 to 36+ in (600 to 900+ mm), to leave working clearance underneath the floor framing. Height on a sloped lot varies around the perimeter to keep the top of the wall level.

    Is a stem wall the same as a foundation wall?

    They’re related but not identical — a stem wall is typically shorter, usually under 3 ft (900 mm), and used mainly for slab-on-grade and crawl space construction, while a foundation wall usually refers to a taller wall enclosing a full basement, carrying significantly more lateral soil pressure and requiring different reinforcement, thickness, and drainage detailing to resist that added load safely.

    How much concrete do I need for a stem wall?

    Multiply the wall’s length, height, and thickness to get volume, then convert to cubic yards or cubic meters, but do this separately from the footing below, since the two are usually different depths and widths and are often poured at different times. Use the concrete stem wall calculator to get the volume directly from your wall dimensions, including a standard waste allowance.

    Do you need rebar in a stem wall?

    Yes, in almost all cases — vertical dowels connect the stem wall to the footing below, and horizontal reinforcement resists cracking from shrinkage and lateral soil pressure once backfill is placed. Exact bar size and spacing depend on wall height, thickness, and local code, but an unreinforced stem wall taller than a few inches is a code violation in most US jurisdictions.

  • What Is Concrete Bleed Water?

    What Is Concrete Bleed Water?

    Bleed water is the thin layer of water that rises to the surface of freshly placed concrete as heavier solids — cement and aggregate — settle downward under gravity. It’s a normal part of the hydration process in most mixes, not a defect on its own, but finishing a slab too early while bleed water is still present traps it below the surface and causes scaling, dusting, or delamination later. Bleed water typically appears within 20 to 90 minutes of placement and should fully evaporate or be worked in before final finishing begins.

    How Much Bleed Water Is Normal?

    Bleed rate depends almost entirely on the water-cement ratio and the fineness of the cement and fine aggregate. A mix with a water-cement ratio of 0.45 or lower typically shows minimal bleeding — a thin sheen that disappears in under 30 minutes. A mix at 0.60 or higher, common when extra water is added on-site for workability, can bleed visibly for over an hour and leave a noticeable water layer, sometimes 1/16 to 1/8 in (1.5–3 mm) deep across the surface.

    Worked example: a standard 3,000 PSI (20.7 MPa) driveway mix at a 0.50 water-cement ratio should show light bleeding for 30–45 minutes after placement in moderate weather, finishing once that sheen disappears and the surface can support foot pressure without leaving more than a slight indentation.

    Because bleed rate tracks so directly with mix water content, the water-cement ratio calculator is the right starting point if a slab is bleeding more than expected — it shows how much reducing the ratio, or switching to a water-reducing admixture instead of adding water, would cut bleed time and improve the finished surface. The concrete admixture dosage calculator can help size that water-reducer correctly rather than guessing at a dosage.

    Why Does Bleed Water Cause Problems?

    Bleed water rises because fresh concrete is a suspension, not a solid — cement particles and fine aggregate are denser than water and settle under gravity while the mix is still fluid, pushing excess water toward the surface, and sometimes trapping it beneath larger aggregate particles or rebar, a related issue called plastic settlement.

    The problem isn’t the water itself; it’s timing. ACI 302.1R (Guide for Concrete Floor and Slab Construction) addresses this directly in its section on treating bleeding as a finishing problem: finishing should not begin while bleed water is still present on the surface, and water should never be added during finishing to make troweling easier. If a finisher trowels or applies a curing compound while bleed water is still on or near the surface, that water gets sealed in rather than allowed to evaporate. Trapped water weakens the immediate surface layer, since the water-cement ratio right at the top becomes much higher than the rest of the slab, which shows up later as dusting, scaling, or a soft surface layer that visibly delaminates.

    The reverse problem — finishing too early while bleed water is still actively rising — is just as damaging: troweling wet, bleeding concrete works excess water and fine material into the surface, creating a weak, water-rich layer at the top called a “laitance” layer that dusts under foot traffic.

    The correct sequence is to wait until bleed water has stopped rising and the sheen has evaporated or been removed with a broom or squeegee, then begin finishing operations.

    Common Mistakes

    Finishing the surface while a visible water sheen is still present is the single most common bleed-water error, usually caused by pressure to finish a job on schedule. The fix isn’t complicated — wait for the sheen to disappear, even if that costs 30–60 extra minutes on the schedule.

    Adding water at the truck to make a stiff mix easier to place, without accounting for the extra bleed water it will produce, is common on hot days when a crew is worried about workability. This raises the water-cement ratio beyond the design mix and turns a normally low-bleed pour into one that bleeds heavily and finishes weak at the surface.

    Using a fogging or evaporation retarder without addressing the underlying mix design treats a symptom instead of the cause — evaporation retarders slow surface drying in hot, windy conditions, which is useful, but they don’t reduce bleed water itself, and combining a wet mix with a retardant just extends the wait before finishing is safe.

    Broom-finishing or hard-troweling too aggressively over a slab that still has fine bleed water beneath the surface pushes that water and the finer particles back up, producing a soft, dust-prone finish even on a slab that looked ready.

    Related Calculators You Might Need

    Bleed water almost always traces back to the mix’s water content, so after checking the water-cement ratio above, it’s worth reviewing the full concrete mix ratio calculator to see whether aggregate gradation or cement content is contributing as well — the cement quantity calculator is useful here if you suspect the mix is under-cemented relative to its water content. If bleeding is combined with a slow setting time, check the concrete curing time estimator, since bleed water delays the point at which curing measures can safely begin. And if you’re troubleshooting a slab that’s already showing dusting or scaling from a past bleed-water issue, the concrete resurfacing calculator can help scope an overlay or resurfacing repair.

    Frequently Asked Questions

    What causes bleed water in concrete?

    Bleed water forms because cement and aggregate particles are denser than water and settle under gravity while the mix is still fluid, pushing excess mixing water upward to the surface. Mixes with a higher water-cement ratio, finer cement, or less fine aggregate bleed more; well-proportioned, lower-water mixes bleed less and finish faster. Ambient temperature and slab thickness also influence how quickly that water reaches the top.

    Is bleed water a problem in concrete?

    Not on its own — some bleeding is normal and expected in most mixes. It becomes a problem when finishing happens at the wrong time relative to it: too early and it gets worked into the surface as a weak laitance layer; too late, after sealing or hard-troweling over standing water, and it gets trapped beneath the surface, causing scaling or delamination. Timing the finish correctly is what actually matters.

    How long does it take for bleed water to evaporate?

    Typically 20 to 90 minutes, depending on the water-cement ratio, ambient temperature, humidity, and wind. A well-proportioned mix in moderate weather often finishes bleeding in under 30 minutes; a wet mix in cool, humid, still conditions can take well over an hour, which pushes back the entire finishing schedule and can affect the crew’s timing for the rest of the job.

    How do I stop concrete from bleeding too much?

    Reduce the water-cement ratio, either by using less mixing water or switching to a water-reducing admixture to maintain workability at a lower water content. Use the water-cement ratio calculator to check how much your current ratio exceeds the target for your specified strength before adjusting the mix, and confirm any change with the ready-mix supplier before the pour actually starts.

    Can you finish concrete while bleed water is still present?

    No — finishing over standing bleed water works that excess water and fine particles into the surface, weakening it. Wait until the surface sheen has fully evaporated or been removed, and the surface can support light foot pressure without more than a slight indentation, before starting float or trowel work. Rushing this step is the single biggest cause of a dusting, weak-surface slab.

  • What Is Concrete Curing?

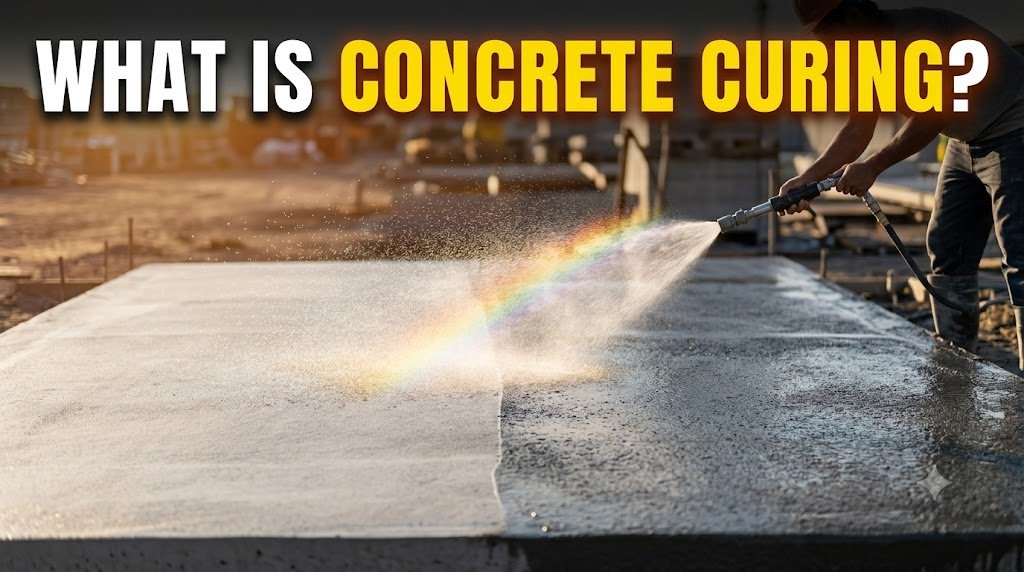
    What Is Concrete Curing?

    Concrete curing is the process of keeping freshly placed concrete moist and within a controlled temperature range so cement hydration can continue and the mix can reach its design strength. Curing is not the same as drying — concrete that loses moisture too quickly stops hydrating before the cement has fully reacted, leaving it weaker, more porous, and prone to surface cracking. Under normal curing conditions, concrete reaches roughly 70% of its 28-day design strength by day 7, and close to full strength by day 28. Skipping or shortening the curing period is one of the most common causes of slab failure.

    How Long Does Concrete Take To Cure?

    Cement hydration follows a fairly predictable strength-gain curve when temperature and moisture are held within normal ranges (10–25°C / 50–77°F, kept damp or sealed). At 3 days, a standard mix is around 40% of its 28-day strength. At 7 days it’s near 70%. At 14 days it’s around 90%, and by 28 days — the age used for standard compressive strength testing under ASTM C39 — it’s effectively at design strength, though hydration technically continues for years at a much slower rate.

    Temperature changes that curve significantly. Hydration slows sharply below 10°C (50°F) and essentially stops at freezing (0°C / 32°F), which is why cold-weather pours need insulating blankets or heated enclosures. Above 25°C (77°F), hydration accelerates, but the concrete also loses surface moisture faster, raising the risk of plastic shrinkage cracking before curing measures are even in place.

    Because ambient temperature has this much influence on the schedule, a flat “7 days, then 28 days” rule doesn’t hold for every site. The concrete curing time estimator adjusts the strength-gain timeline for your actual site temperature, giving a more accurate date for form removal, foot traffic, or load-bearing use than the generic rule of thumb.

    What Happens Chemically During Curing?

    Cement hydration is a chemical reaction, not evaporation. Portland cement contains tricalcium silicate (C3S) and dicalcium silicate (C2S), which react with water to form calcium silicate hydrate (C-S-H) gel — the compound that actually binds aggregate together and gives concrete its strength — plus calcium hydroxide as a byproduct. The reaction is exothermic: a large slab pour can measure several degrees warmer at its core than the surrounding air for the first 24–48 hours.

    This reaction needs water present in the capillary pores of the paste to keep going. If the surface dries out before hydration is far enough along, the reaction stops locally even though the interior is still damp — the result is a weak, dusting surface layer and a higher risk of shrinkage cracking, because the dry surface shrinks while the wet interior doesn’t. Three curing methods address this: ponding or continuous wetting (keeps the surface saturated directly), wet burlap or cotton mats (reduces evaporation while topping up moisture), and sprayed-on curing compounds (form a membrane that traps the mix’s own water inside). Plastic sheeting works the same way as a compound but needs to be sealed at the edges, or it just traps humid air instead of holding moisture against the slab.

    Common Mistakes

    Stripping forms too early is one of the most common errors on residential jobs. Forms hold moisture against the edges of a pour; removing them at 24 hours on a cool day exposes those edges to rapid drying and produces spalling and cracking along the perimeter within the first week. Wait until the concrete has reached at least 70% of design strength, generally 5–7 days in normal conditions, longer in cold weather.

    Pouring in hot, dry, or windy weather without a curing plan already in place causes plastic shrinkage cracking — fine, random cracks that appear within the first few hours, before the concrete has even set. Contractors who wait until after finishing to think about curing are usually too late; the fix is scheduling curing compound application or wet covering within 30–60 minutes of finishing on hot or windy days.

    Adding extra water to the mix on-site, thinking a wetter mix cures better, does the opposite. It raises the water-cement ratio, which increases porosity, reduces final strength, and increases both shrinkage and bleed water, which delays finishing and weakens the surface layer.

    Treating curing and drying as the same thing leads to sealing a slab too soon. A sealer or coating applied before the slab has cured properly traps residual moisture underneath, which can cause blistering, delamination, or efflorescence months later. Most sealers shouldn’t go down until at least 28 days after the pour.

    Related Calculators You Might Need

    Curing time is directly affected by the mix itself, so it’s worth checking your water-cement ratio before you’re on-site — the water-cement ratio calculator helps confirm the mix isn’t unnecessarily wet, which shortens strength gain and increases cracking risk. If you need to convert a lab or field compressive strength reading between units, the concrete compressive strength converter handles PSI and MPa conversions so you can compare test results against the design strength you specified. For anyone still finalizing the mix itself, the concrete mix ratio calculator works out cement, sand, and aggregate proportions before the pour, which is the point where curing outcomes are actually decided. And if this is for a new slab, run the numbers first with the concrete slab calculator to confirm volume before ordering.

    Frequently Asked Questions

    How long does concrete need to cure before you can walk on it?

    Concrete is generally safe for foot traffic after 24–48 hours, once it has set and reached roughly 25–30% of its design strength. That’s enough to resist light loads without leaving marks or disturbing the surface, but it’s not enough for anything heavier. Avoid dragging furniture, ladders, or equipment across it during this window, since point loads can still dent a surface that hasn’t fully hardened.

    How long before you can drive on a new concrete driveway?

    Wait a minimum of 7 days before light vehicle traffic, and ideally the full 28 days before parking heavier vehicles like trucks or RVs. At 7 days the slab is only around 70% of its design strength, which is enough for cars but risks surface damage under concentrated loads like jack stands or trailer tongues. Cold weather extends this timeline further, so check actual site temperatures before committing to a date.

    Does concrete cure underwater?

    Yes — cement hydration doesn’t need air, only water, so concrete continues gaining strength when fully submerged, which is why ponding is a valid curing method. Underwater concrete for marine structures uses special mix designs, often with anti-washout admixtures, to prevent the cement paste from washing away before it sets, but standard concrete cured by ponding on land behaves the same way.

    What happens if concrete dries out too fast?

    Rapid surface drying stops hydration in the top few millimeters while the interior is still reacting, which causes plastic shrinkage cracking, a weak dusting surface, and reduced final strength at the surface layer specifically, even if the core strength is fine. This is most common on hot, windy, low-humidity days, and is prevented by covering or applying curing compound within an hour of finishing.

    Do I need to cure concrete in cold weather?

    Yes, and it matters more, not less. Hydration slows dramatically below 10°C (50°F) and essentially stops at freezing, so cold-weather pours need insulating blankets, heated enclosures, or accelerating admixtures to keep the reaction going. Use the concrete curing time estimator to see how a specific site temperature shifts your strength-gain timeline before deciding when forms can come off or loads can be applied.

  • Behind the Site

    Behind the Site

    We built this site to be a set of calculators first, not a media company — but over time we’ve ended up with a small footprint across other platforms too. Here’s an honest walk-through of every one of them: what’s actually there, why it exists, and how you can confirm it’s really us.


    Most people find us because they typed “how much concrete do I need for a 10×10 slab” into Google and landed on a calculator. That’s the main thing this site does, and it’ll stay that way. But we also maintain a handful of accounts elsewhere on the web — some active, some quieter — and we’d rather explain what each one is for than leave people guessing.

    This isn’t a press page. Nobody wrote about us and we’re not claiming otherwise — these are our own accounts, run by our own team, and this post is basically the reasoning behind them written out in full.

    Why we bother keeping accounts off our own domain

    A concrete calculator is a strange kind of product to build trust around. People aren’t just reading an opinion piece — they’re using our output to order material, size a footing, or figure out how many bags of ready-mix to buy for a weekend pour. Get it wrong and it costs someone real money and a wasted trip to the supplier.

    Because of that, we’ve found it worth having a presence in a few places beyond the calculators themselves:

    Somewhere to show, not just tell. Certain calculators — rebar spacing, footing depth, reading a mix-design ratio — are genuinely easier to explain with a short video than a wall of text. We didn’t want to clutter the calculator pages themselves with embedded video, so those live on a couple of dedicated video accounts instead.

    Somewhere permanent for the reference material. Our methodology write-ups reference specific standards (ACI, ASTM) and we wanted at least one copy of that documentation sitting somewhere that isn’t tied to our own uptime.

    Somewhere to just be reachable. A chunk of the accounts below exist mainly so the handle “allconcretecalculator” resolves to something real if someone goes looking, rather than sitting open for someone else to claim.

    None of this replaces the actual product. If you’re here for a calculator, the accounts below aren’t where you want to be — they’re supporting cast, not the main site.

    The video and audio accounts

    Vimeovimeo.com/allconcrete
    This is where the longer calculator walkthroughs live — the ones where watching someone actually enter numbers and read the output is genuinely clearer than a screenshot. Vimeo won hosting duty over YouTube mainly because we wanted a cleaner, ad-free embed for the handful of times we do link out to a video from a guide.

    Dailymotiondailymotion.com/user/AllConcreteCalculator
    A mirror of the same video library, mostly for reach in regions where Dailymotion sees more traffic than Vimeo. Same content, different audience.

    SoundCloudsoundcloud.com/allconcretecalculator
    The smallest and most experimental of the three — short audio walk-throughs for people who’d rather listen than watch while they’re on a job site. Still early, but the format has held up better than we expected.

    The documentation accounts

    Issuuissuu.com/allconcrete
    Longer reference documents — the kind that don’t fit naturally into a calculator page’s layout but that some visitors want as a standalone PDF-style read. Think full methodology breakdowns rather than quick guides.

    DZonedzone.com/users/5547470/allconcrete.html
    More technical write-ups, aimed at the smaller slice of our audience that’s actually curious about how the calculators are built rather than just using the output — formula sourcing, unit conversion edge cases, that kind of thing.

    Internet Archivearchive.org/details/@allconcretecalculator
    An archived copy of key reference material, kept somewhere that will outlast any single hosting decision we make. This one is closer to a backup than a channel.

    The academic and research accounts

    We’re not an academic institution, and we’re not pretending to be — but our methodology leans on published standards, and a few visitors each month are specifically checking sourcing rather than looking for a quick answer. These three accounts exist for them.

    Google Scholarscholar.google.co.in/citations?user=p0NYC-wAAAAJ
    A citations profile tying back to the standards references our calculators are checked against.

    Academia.eduindependent.academia.edu/AqeelAhmed349
    Similar purpose, different audience — some researchers use Academia.edu almost exclusively and never touch Scholar.

    Open Heritage Labslabs.openheritage.eu/profiles/allconcretecalc/activity
    The newest and smallest of the three — an activity profile we’ve kept mostly to stay connected to a couple of research contacts who reference construction-material data.

    The community and review accounts

    This is the least glamorous group and, honestly, the one that gets the least regular attention from us. These exist mostly so we’re reachable in spaces contractors and homeowners already spend time in, rather than because we’re running an active content strategy on each one.

    Disqusdisqus.com/by/allconcretecalculator
    Used when we reply to questions on articles that use Disqus for comments — a byproduct of participating in discussions elsewhere, not a channel we post to directly.

    Goodreadsgoodreads.com/user/show/202684880-concrete-calculator
    Kept mainly for a couple of construction-reference books we occasionally recommend in guides.

    TripAdvisortripadvisor.com/Profile/allconcretecalculato
    The odd one out on this list, kept from an early team member’s contributions and left up rather than deleted. We’re not pretending it’s central to what we do.

    Hatenaprofile.hatena.ne.jp/allconcrete
    A community profile for a small but consistent slice of our traffic coming from Japan.

    Bloglovinbloglovin.com/@concretecalculator3
    Syndicates our guide updates for readers who follow blogs through a feed reader rather than checking sites directly.

    The creative and identity accounts

    Unsplashunsplash.com/@allconcretecalc
    A handful of job-site photos we’ve contributed over time — mostly pours and formwork shots taken while testing calculator scenarios in the field.

    TEDted.com/profiles/51868607
    A community profile, kept mainly for consistency with the rest of the accounts on this list rather than active participation.

    Gravatargravatar.com/allconcretecalculator
    The identity profile tied to the email address our editorial team uses for comments and sign-ups elsewhere, so an avatar shows up consistently rather than a blank default.

    Being straightforward about this

    A few of these seventeen accounts get real, regular use. A few exist mainly to hold the handle and confirm ownership. We’d rather tell you which is which than have every profile pretend to be an active channel — that’s not particularly useful to anyone, and it’s not accurate.

    What this list isn’t

    It’s not press coverage — none of these are third parties writing about us; they’re accounts we run ourselves. It’s not a ranking signal we’re leaning on either — a profile on a platform like this is a weak, supporting signal at best. Mostly, this is just documentation: if you come across one of these accounts on its own and want to know it’s genuinely tied to this site, this post is how you check — every profile above is also listed in this page’s structured data below, which is the standard way sites declare ownership of external accounts to search engines.

    AllConcreteCalculator.com Editorial Team

    We keep this list updated as accounts change or platforms shut down. If something here looks stale or a link is broken, let us know.

  • How to Calculate Concrete for a Slab: The Complete Step-by-Step Guide (2026)

    How to Calculate Concrete for a Slab: The Complete Step-by-Step Guide (2026)


    Whether you’re pouring a backyard patio, a garage floor, or a shed foundation, one question always comes first: how much concrete do I actually need? Ordering too little means a frustrating mid-pour emergency. Ordering too much wastes money. This guide walks you through every step of calculating concrete for a slab — accurately, confidently, and without guesswork.

    💡 Save time: Use our Concrete Slab Calculator to get your number instantly, then use this guide to understand exactly what that number means.


    What You’ll Learn in This Guide

    • The exact formula for calculating concrete volume
    • How to convert measurements to cubic yards
    • How thick your slab actually needs to be
    • How to account for waste (and why it matters)
    • Bags vs. ready-mix: which to choose
    • Common mistakes to avoid
    • How to use our free calculators to speed up the process

    Step 1: Understand the Basic Formula

    Calculating concrete volume comes down to one simple formula:

    Volume = Length × Width × Thickness
    

    The tricky part is unit consistency. Concrete is ordered and sold by the cubic yard in the United States, but most people measure their slab in feet and inches. So you need to convert everything to feet first, then divide by 27 (because 1 cubic yard = 27 cubic feet).

    The full formula:

    Cubic Yards = (Length ft × Width ft × Thickness ft) ÷ 27
    

    Example: 10×12 Patio at 4 Inches Thick

    • Length: 10 ft
    • Width: 12 ft
    • Thickness: 4 inches = 4 ÷ 12 = 0.333 ft
    10 × 12 × 0.333 = 40 cubic feet
    40 ÷ 27 = 1.48 cubic yards
    

    That’s your raw volume. But you’re not done yet — you still need to add for waste (more on that in Step 4).

    🔢 Skip the math: Plug your dimensions directly into our Concrete Patio Calculator and get cubic yards, cubic feet, and bag count in seconds.


    Step 2: Decide on the Right Slab Thickness

    Thickness is the single biggest variable in your concrete calculation — and getting it wrong is expensive. A slab that’s 1 inch too thin might need replacing in 5 years. A slab that’s 2 inches too thick costs you significantly more concrete than needed.

    Here are the standard thickness guidelines:

    Project TypeRecommended Thickness
    Pedestrian walkway / sidewalk3–4 inches
    Residential patio4 inches
    Garage floor (passenger vehicles)4–5 inches
    Driveway (passenger vehicles)4 inches
    Driveway (trucks / heavy vehicles)5–6 inches
    Workshop / shed floor4 inches
    RV pad or heavy equipment6 inches

    📐 Not sure what thickness your project needs? Our Slab Thickness Selector recommends the right depth based on your load type and soil conditions.

    Pro Tip: If you’re in an area with freeze-thaw cycles, increase thickness by at least half an inch and always use air-entrained concrete. Frost heave is one of the leading causes of slab cracking in colder climates.


    Step 3: Measure Your Area Accurately

    Sounds obvious, but measurement errors are the #1 cause of ordering mistakes. Here’s how to do it right:

    Rectangular Slabs

    Measure length and width at multiple points, especially if your space isn’t perfectly square. Use the largest measurement for each dimension to make sure you don’t come up short.

    L-Shaped or Irregular Slabs

    Break the shape into two or more rectangles. Calculate the volume of each section separately, then add them together.

    Example: L-shaped patio

    • Section A: 12 ft × 8 ft × 0.333 ft = 32 cubic feet
    • Section B: 6 ft × 10 ft × 0.333 ft = 20 cubic feet
    • Total: 52 cubic feet ÷ 27 = 1.93 cubic yards

    Round or Circular Slabs

    Use the circular volume formula:

    Volume = π × radius² × thickness
    

    For a 12-foot diameter fire pit pad at 4 inches thick:

    • Radius = 6 ft
    • Volume = 3.14159 × 36 × 0.333 = 37.7 cubic feet ÷ 27 = 1.4 cubic yards

    🔵 Round or irregular slab? Our Concrete Volume Multi-Shape Calculator handles circular and L-shaped areas automatically — just enter your dimensions.


    Step 4: Always Add a Waste Factor

    This is the step most beginners skip — and it’s the reason so many DIY pours run out of concrete before the job is done.

    Why do you need extra concrete?

    • Subgrade is never perfectly level (low spots consume more concrete)
    • Spillage during pouring and finishing
    • Slight variations in your forms
    • Over-excavation beyond your planned dimensions

    Standard waste factors:

    • 5% — Experienced contractors with precision-built forms
    • 10% — Typical residential DIY project (recommended starting point)
    • 15% — Irregular shapes, uneven terrain, or first-time DIYers
    • 20% — Complex projects with curves, slopes, or steps

    Applying the Waste Factor

    Final Order = Calculated Volume × (1 + Waste Factor)
    

    For our 10×12 patio (1.48 cubic yards) with 10% waste:

    1.48 × 1.10 = 1.63 cubic yards → order 1.7 cubic yards
    

    Not sure which percentage fits your project? Run your numbers through the Concrete Waste Factor Calculator to get a specific recommendation instead of guessing.

    Running short mid-pour is a serious problem. When fresh concrete sits while you wait for more, the earlier pour begins to set. The joint where old meets new concrete is called a cold joint — it’s structurally weak and prone to cracking. Always have enough.

    ⚠️ Important: Most ready-mix suppliers have a full-truck minimum of 8–10 cubic yards, and orders below that threshold get hit with a short-load fee — often $50–$250 per yard under the minimum. An emergency mid-pour reorder falls into this bracket every time. Check your exposure with the Short-Load Fee Estimator before you order — it’s far cheaper than finding out mid-pour.


    Step 5: Bags or Ready-Mix Concrete?

    Once you know your volume, you need to decide how to buy your concrete. This is a bigger decision than most people realize — and the two options don’t cover every volume equally well. Below about 1 cubic yard, bags win easily. Above the truck minimum (8–10 yards), ready-mix wins easily. In between, you’re often better off with a volumetric/metered truck or accepting a short-load fee — see the short-load fee guide above for that math.

    Bagged Concrete (DIY Mix)

    Best for: Small projects under 1 cubic yard (27 cubic feet)

    Common bag sizes and yields:

    • 40 lb bag → approximately 0.30 cubic feet
    • 60 lb bag → approximately 0.45 cubic feet
    • 80 lb bag → approximately 0.60 cubic feet

    For a small 4×4 stepping pad at 4 inches thick:

    4 × 4 × 0.333 = 5.33 cubic feet
    5.33 ÷ 0.60 = 8.9 → need 9 bags of 80 lb concrete
    

    Pros: Available at any hardware store, no minimum order, mix as you go Cons: Labor-intensive, time-consuming, inconsistent mixing, expensive per cubic yard

    🛍️ How many bags do you need? Use our Concrete Bags Calculator to convert any cubic footage into bag counts by size.

    Ready-Mix Concrete (Truck Delivery)

    Best for: Projects at or near a full truck load (8–10 cubic yards), or anything larger

    Ready-mix concrete arrives in a mixer truck already batched to your specified PSI. It’s faster, more consistent, and usually cheaper per cubic yard for larger pours.

    Average ready-mix cost (2026): $150–$200 per cubic yard depending on your region and PSI specification.

    Pros: Consistent mix, fast pour, no manual labor for mixing Cons: Full-truck minimums, short-load fees on smaller orders, delivery fees, time pressure (concrete must be placed within 90 minutes)

    💰 Want to compare costs? Our Concrete Cost Calculator breaks down bags vs. ready-mix pricing for your specific project volume.


    Step 6: Choose the Right PSI (Concrete Strength)

    Not all concrete is the same strength. PSI (pounds per square inch) indicates compressive strength — the higher the number, the stronger the concrete.

    PSIBest Use Case
    2500 PSIFootings, non-structural fills
    3000 PSIResidential driveways, patios, slabs (most common)
    3500 PSIDriveways with heavy vehicles
    4000 PSICommercial floors, structural elements
    5000+ PSIHigh-load structural applications

    For the vast majority of residential concrete slabs — patios, garage floors, sidewalks — 3000 PSI is the standard. It balances cost and durability perfectly.

    Higher PSI mixes typically cost $10–$20 more per cubic yard from a ready-mix supplier but can be worth it for long-term durability, especially in high-traffic areas. If your supplier quotes you in MPa instead of PSI, the PSI to MPa Converter translates it instantly.


    Step 7: Don’t Forget Reinforcement

    Concrete is strong in compression but weak in tension — meaning it resists being crushed but can crack when pulled or flexed. Reinforcement adds tensile strength to prevent cracking.

    Wire Mesh (Welded Wire Fabric)

    • Used in residential slabs, patios, and garage floors
    • Placed in the middle of the slab (use chairs to elevate it)
    • Prevents cracks from spreading after they form
    • Cost: ~$0.10–$0.15 per square foot

    Use the Wire Mesh Calculator to figure out how many sheets or rolls your slab needs, including standard overlap.

    Rebar (Steel Reinforcing Bar)

    • Used in driveways, footings, structural slabs
    • #3 rebar (3/8 inch) on 18-inch grid is standard for residential driveways
    • Provides structural strength, not just crack control
    • Cost: ~$0.50–$1.00 per linear foot

    📏 Calculate your rebar needs: Use our Rebar Calculator to determine total linear feet, or the Rebar Spacing Calculator to dial in the right grid for your slab.

    Fiber Reinforcement

    • Mixed directly into the concrete
    • Controls surface shrinkage cracking
    • Does NOT replace rebar for structural strength
    • Best used in combination with mesh or rebar

    The Fiber Reinforcement Calculator tells you the right dosage per cubic yard for your mix.


    Step 8: Prepare Your Site Properly

    Even a perfectly calculated concrete order will fail if your site preparation is poor. This is the step that separates lasting slabs from ones that crack within a year.

    The proper base sequence:

    1. Excavate to the correct depth (slab thickness + 4 inches for gravel base)
    2. Add 4 inches of compacted gravel (crushed stone #57 is ideal)
    3. Compact with a plate compactor until the surface is firm — you should leave no footprints when walking on it
    4. Install forms (2×4 or 2×6 lumber depending on slab thickness)
    5. Lightly dampen the base just before pouring — this prevents the dry subgrade from sucking water out of the concrete too fast
    6. Place vapor barrier (inside slabs only) to prevent moisture migration

    A 4-inch compacted gravel base does three things: provides drainage, prevents ground movement from cracking the slab, and gives you a stable, level surface to pour against. Use the Gravel & Crushed Stone Calculator to figure out how much base material to order alongside your concrete.


    Putting It All Together: Complete Example

    Let’s calculate everything for a 12×20 ft garage floor at 4 inches thick:

    Step 1 — Raw Volume:

    12 × 20 × 0.333 = 79.92 cubic feet ÷ 27 = 2.96 cubic yards
    

    Step 2 — Add 10% waste:

    2.96 × 1.10 = 3.26 cubic yards → order 3.5 cubic yards
    

    Step 3 — PSI: 3000 PSI (standard residential garage)

    Step 4 — Reinforcement: Wire mesh or #3 rebar on 18-inch grid

    Step 5 — Ready-mix vs. bags: At 3.5 cubic yards, you’re well below most 8–10 yard truck minimums, so expect a short-load fee — check the Short-Load Fee Estimator before you call. Bagging this project would take ~158 bags of 80 lb concrete — exhausting and time-consuming, and not realistic at this volume.

    Step 6 — Base: 4 inches of compacted gravel = 12 × 20 × 0.333 ft = 2.96 cubic yards of gravel

    🏗️ Get the full breakdown in one click: Our Concrete Garage Floor Calculator outputs cubic yards, bag count, waste-adjusted totals, and cost estimates all at once.


    Common Mistakes to Avoid

    1. Measuring in inches but forgetting to convert Always convert thickness to feet before calculating. 4 inches = 0.333 ft, not 4.

    2. Skipping the waste factor Even a 5% overage is better than nothing. Running short mid-pour costs far more than the extra concrete.

    3. Pouring on unprepared ground No gravel base = slab will settle unevenly and crack within 1–2 years.

    4. Under-ordering for round or irregular shapes These shapes are harder to estimate mentally. Always use a calculator and add extra waste.

    5. Ordering PSI that’s too low 2500 PSI is technically sufficient for footings, but don’t use it for driveways or garage floors where you need durability.

    6. Not checking weather Concrete should not be poured when temperatures are below 40°F or above 90°F without special precautions. Cold slows curing; heat accelerates it, causing surface cracking.


    Quick Reference: Concrete Calculators for Every Project

    Your slab is just one of many concrete projects you might tackle. Here are the tools available to you on All Concrete Calculator:


    Final Thoughts

    Calculating concrete correctly before you pour is one of the most important steps in any concrete project — and it’s not complicated once you know the formula. Measure your slab, apply the right thickness for your use case, add a waste factor, and decide between bags and ready-mix based on your volume.

    The math is simple. The preparation matters more than most people realize. And having the right tools makes both effortless.

    Ready to calculate your project? Head to our Concrete Slab Calculator — it takes under 60 seconds and gives you everything you need to order with confidence.


    Found this guide helpful? Browse more articles in our Concrete Learning Hub for tips on mixing, curing, finishing, and more.